Wow, Iceland. I’ve been back for about 24 hours now, and it feels more like I visited a different planet rather than simply a different country. Looking back through the photos, it’s no surprise as to why: the landscapes and colors of Iceland are like nothing you can find elsewhere in the world.
As a photographer-in-progess, Iceland was so exciting for me to capture on camera and experience its incredible light and colors. I also faced weather conditions I’d never faced before, including a “no travel storm” and the most snow I’ve seen in my entire life.
Through so many different conditions, I learned a lot about the conditions and preparation that make for awesome photos. In this post, you’ll find tips and ideas for:
- Camera gear you need for Iceland
- How to make sure your camera gear can survive Iceland’s weather
- General tips for capturing Iceland in photos
- How to take panoramas using any camera
- The settings you need to take silky smooth waterfall photos
- How to photograph the Northern Lights
Here are my top tips for getting the most out of your photos in Iceland!
If you’re looking for an itinerary of places to see in Iceland, look no further than my Iceland itinerary.

Make sure you have necessary camera gear
Here’s the camera gear I used most in Iceland. Not all of it is necessary, it really depends on the kinds of pictures you want to take! Regardless, here’s the masterlist:
- Camera – Bet you didn’t expect that one. I won’t tell you there is a specific camera that’s best for Iceland, but make sure yours can shoot RAW format!
- Travel tripod – You’re probably going to do some hiking in Iceland. Bring a tripod you won’t regret hauling uphill for 2km. I used the Rollei Compact Traveler (Carbon Fiber) Tripod in Iceland and it worked great. If you aren’t sure, here’s an article I wrote on how to pick a travel tripod based on your budget and needs!
- Wide-aperture wide-angle lens – This is the lens you’re going to use to shoot massive waterfalls, and (if traveling in winter) the northern lights!
- Snapshot lens – The lens you’re going to keep on your camera 90% of the time. If it’s a prime, it’ll probably be a 23mm or 35mm (35mm or 50mm on a full-frame, respectively).
- Telephoto lens – On some shots, you’ll just need a bit of zoom, especially if you want to capture seals, puffins, horses, or other wildlife. For this I just used my 56mm prime, and it got the job done.
- An ND filter – If you want to take long exposures of waterfalls or moving clouds, don’t forget to pack an ND filter for your lenses! Otherwise, you can leave them at home. I use ND filters by B&W and they do a good job at not having a weird tint some ND filters have.
- Extra batteries – Batteries discharge faster in cold weather. Bring a spare and pack it in your inner jacket pocket to keep it warm!
- Spare memory card – Don’t forget to format your memory card before you go, and don’t let yourself run out of space. There are literally NOT electronics stores in Iceland outside of the two main cities. I use SanDisk memory cards and have never had any issues with them.
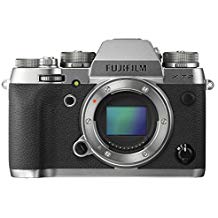 Fujifilm X-T2
My go-to travel camera I bring on every trip. Both robust and lightweight with gorgeous image quality.
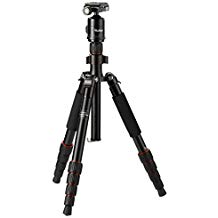 Rollei Compact Traveler No. 1 Tripod (Carbon)
My travel tripod of choice. I've used this in all kinds of scenarios, shooting northern lights or timed selfies. Easy to use and ultra light.
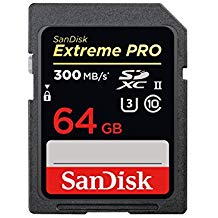 SanDisk 64GB UHS-II 300MB/s
My favorite high performance memory card, lets you take many photos in rapid succession and film 4K video. I own about four of these!

In fact, this didn’t differ much from the photography kit I usually travel with , but I swapped out my main lens for one that was weather-resistant. And here’s why…
Make sure your camera gear can withstand Iceland’s weather
Iceland is hands-down the place where my camera experienced the most abuse. I fell in a river with it, drenched it in mist from numerous waterfalls, and exposed it to temperatures as cold as -9ºC. To be honest, it’s hard to baby your camera when snow is falling and you’re stomping around in streams and mud all day.
Here’s how to make sure your camera gear is prepared for Iceland’s weather.

Mývatn Nature Baths, North Iceland
Make sure your camera is weather resistant. You don’t need a GoPro (although that will be handy), but I would not travel to Iceland without at least one camera/lens combo that is weather resistant. Your camera will get wetter than you’ve ever expected, and nothing could be worse than a broken camera in the middle of nowhere in Iceland!
My main setup was the Fujifilm X-T1 (though these days I’m rocking the Fujifilm X-T2 ) and the Fujiflm 23mm f2 WR lens , as well as the 16mm f1.4 WR lens , which are all weather-resistant. I am shocked / grateful that they completely withstood Iceland’s abuse!
Bring a waterproof camera for the baths. This isn’t strictly necessary (I just re-used my weather-resistant camera for above-water photos), but chances are you’re going to take a dip in the Blue Lagoon or the Mývatn Nature Baths while you’re in Iceland. Having a waterproof option is going to open up some really cool photo opportunities. If you don’t want to splurge on a GoPro, you can get a decent waterproof camera for less than half the price.
Be prepared to clean water off your lenses. There are two tools that can help a lot with this: pre-moistened lens cleaning wipes and a lens pen . You can get a massive neverending supply of lens wipes here , which is also a great addition to your camera bag. Basically, if your camera has dried water on the lens, using a lens wipe is going to be the best way to get it off. For smudges and other debris, the lens pen is the way to go. It’s important to be constantly cleaning water off your lenses, because you will end up with spots in your photos if you leave the water on!
Protect your lens from getting foggy. In general, protecting your camera from extreme temperature changes is a very good idea, and prevents condensation from forming inside your camera. When you go inside or get back in the car, be sure to isolate your camera from the heat by closing it in a plastic bag, or at least wrapping it in a scarf or putting it in your bag.


Include people in your photos for scale
It seems like Iceland was crafted for giants and elves, but litle in between. Its massive waterfalls can make you feel vulnerable – like a strong gust of wind could sweep you right in. On the other hand, the population is so small (as are these turf houses) that sometimes you feel like you have the world world to yourself.

Including people in your photos helps to capture these two complementary feels in a photo. See what I mean…

Visit the same place on different days
Perhaps the most common trope about Iceland is, “If you don’t like the weather, wait 5 minutes.” I saw one place go from sunshine to snow and back again in fifteen minutes, washing out 90% of the tourists in the process. The fickle and violent nature of Iceland’s weather is not to be underestimated.
That said, visiting the same location more than once during your trip can give you a completely different view of the places. Here’s just one example of Skógafoss less than 24 hours apart.
Don’t miss the opportunity to check out the same place twice, you never know what nature has in store for you!
Learn how to create a panorama using any camera
Here’s a super quick tip which will come in handy in Iceland if you don’t have a wide-enough lens that can fit in a huge scene. Instead, you can take several pictures in a row, with at least 1/3 overlapping, and stitch them together later in Lightroom using the “Merge” option.
As an example, here’s a photo I made out of three portrait-orientation pictures. You’d never know that I could never fit this in my picture without a little post-processing magic 😉

All you have to do is: 1) Import your photos 2) Select the photos you want to merge together 3) Press Ctrl + M or right click and choose “Photo merge → Panorama”. You’ll get several options for how to merge, and you can just play around and see what looks best!
How to get smooth water with long exposure photography
Taking these professional-looking photos of waterfalls is secretly super easy, once you have the right equipment: you’re going to need a tripod, a camera where you can set the shutter speed, and an ND filter. Here’s how to do it:
- Set up your camera on a tripod.
- Attach the ND filter to your camera (I use ND filters by B&W )
- Set the camera to shutter priority mode, and change the shutter speed to 1 second.
- Turn on the camera’s timer to 2s, so you don’t accidentally introduce camera shake when you push the button.
It’s really that easy. If you know how to use manual mode, you can change things around. Ideally, the camera is going to be smart enough to do 99% of the work for you!
Here’s a photo of Goðafoss in North Iceland, taken for 28 seconds. Super smooth!

How to photograph the Northern Lights
Just like waterfalls, the Northern lights are also not that hard to photograph so long as you can find them! Here’s a step-by-step to set up your camera to take northern lights photos:
- Set up your camera on a tripod.
- Set your camera to manual mode (my settings are below each photo for you to use!)
- Set the focus to infinity (ideally your camera has a hard stop at infinity when you adjust the manual focus ring)
- Push the button and wait!

Settings: ISO 640, 16mm f1.8, 30 seconds
Tips for photographing the Northern Lights
If you want to include people in your northern lights photo. It’s important to focus on the person instead of the background, or else the person will be blurry because you’re shooting with a wide aperture. Have your subject light themselves using e.g. a phone, and then manually focus on them. Once you’ve got a good focus, turn off the light and start shooting!
If it’s windy, forget about it. Iceland has such extreme wind, you may not be able to take a photo of the northern lights that isn’t blurry. Try taking the photo from inside your hotel / guesthouse / car if you need real protection from the wind.
How to edit Northern Lights photos. Make sure you’ve taken your photos in raw. When you open them in Lightroom, be sure to adjust the temperature of the photo to be colder, so you get a blue sky instead of a grey-green one. If the snow is a funny color (like green or yellow), use the adjustment brush to slightly desaturate the snow. Don’t desaturate it 100%, but just enough to remove the tinge. You can also shift the color from green to magenta to remove unwanted green tints.

Settings: ISO 640, 16mm f1.8, 30 seconds
If you went to Iceland, what’s the number one thing you’d want to take photos of?
For me it was the Northern Lights, but when I go back I want to take more pictures of wildlife and charming countryside cottages 😉
Share your dream Iceland photography subject in the comments!!