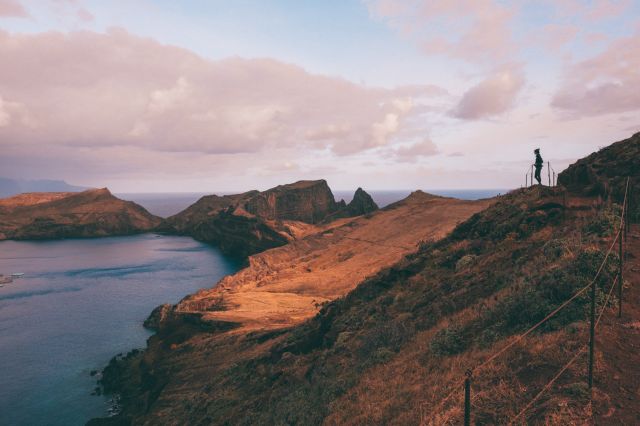
Known as Dolomiti in Italian (or Dolomiten in German), the Dolomites is the name for the Italian alps. Originally part of Austria before World War I, this area is a wonderland for hikers, history lovers, and anyone with a soft spot for the melody of cowbells.
With their increasing popularity, the Dolomites are also subject to overtourism. In 2022, when we first visited the Dolomites, the region had 34 million overnight stays. Prices between then and now, for everything from food to parking and boat rentals have doubled across the board. New registration systems, such as those for parking your car at Lago di Braies, hope to cut down on hit-and-run travelers triggering traffic jams.
Unsurprisingly, the world has caught on that the Dolomites are something special. And while you won’t be there alone – especially if traveling during the peak Summer season – you can still beat the crowds by waking up early. This itinerary is up-to-date for what you can do in 2025, including the current prices, opening/closures, and the best places to visit. Especially, considering the upcoming 2026 Winter Olympic games in Cortina.
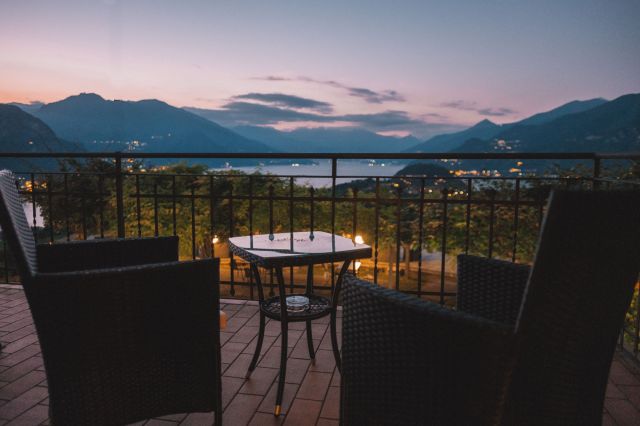
Where to stay in the Dolomites
For the best experience, and the least driving, I highly recommend staying in two different locations for different parts of your Dolomites trip.
In the West, I recommend staying in Val Gardena . You’ll be close enough to walk to the Seceda funicular, and have incredible views up to Alpe di Siusi. In the East, I recommend staying in Cortina d'Ampezzo . It’s an excellent location for food, and close to one of the biggest highlights of the trip: Tre Cime Di Lavaredo.
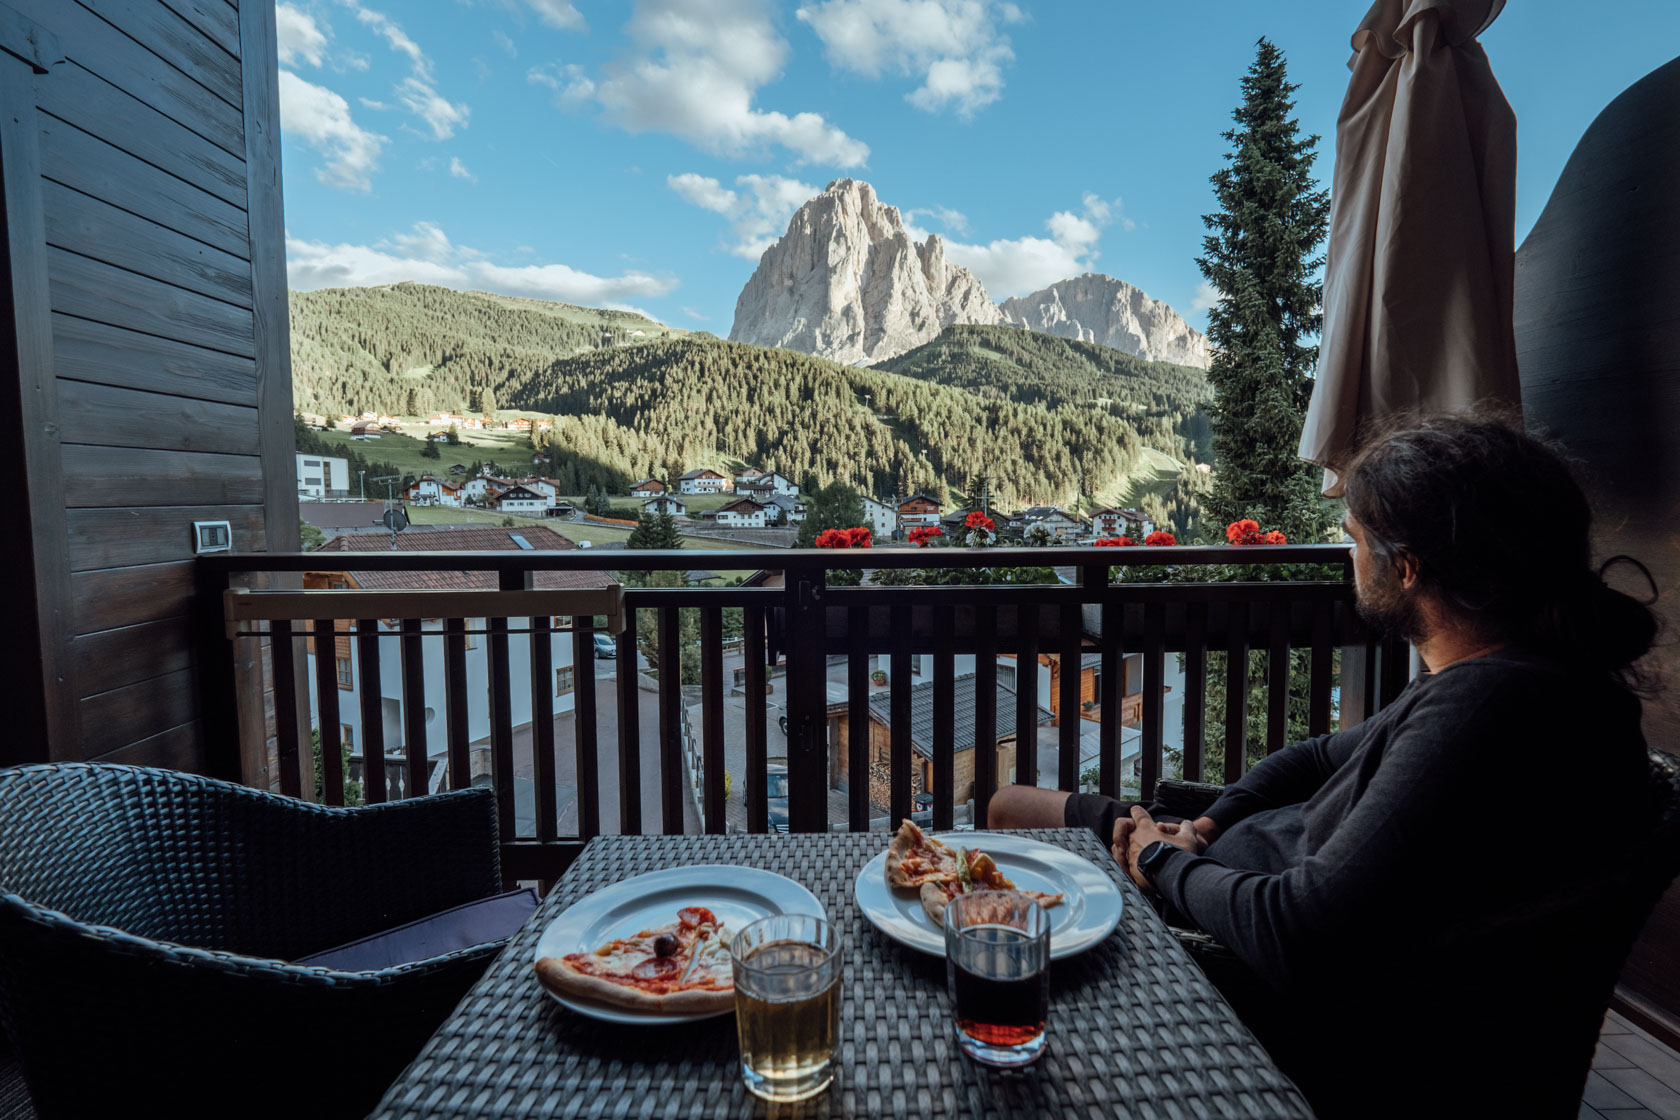
Here are two lovely guest houses we personally stayed in and would re-book in a heartbeat:
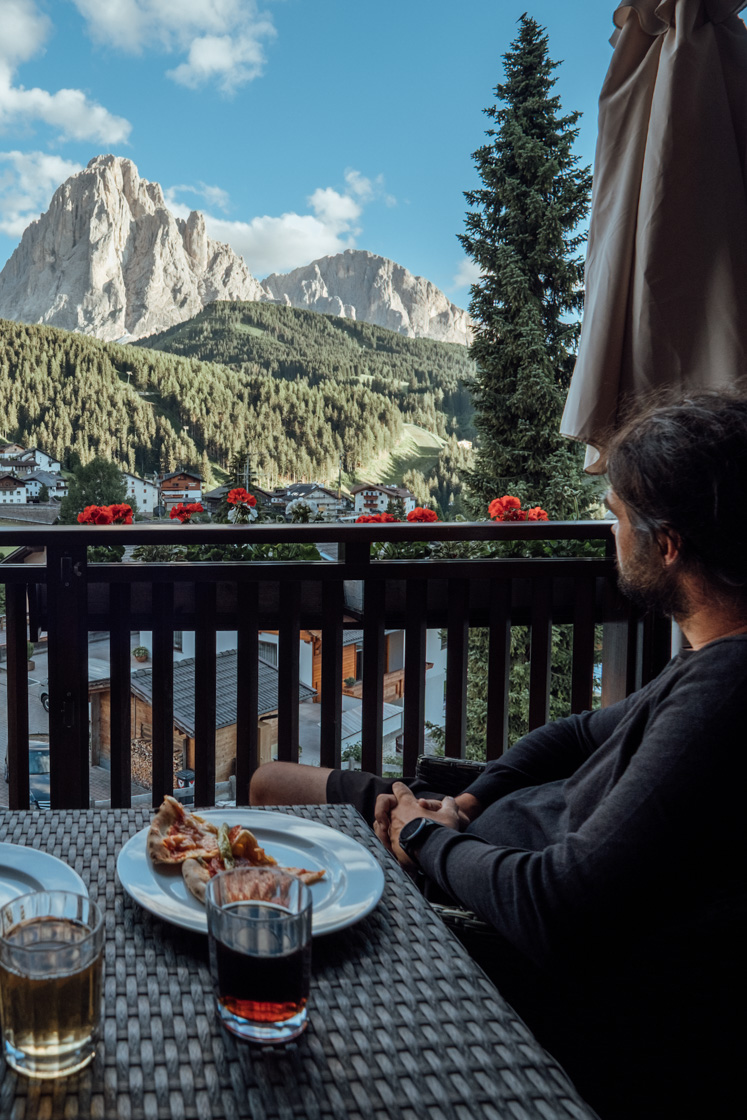
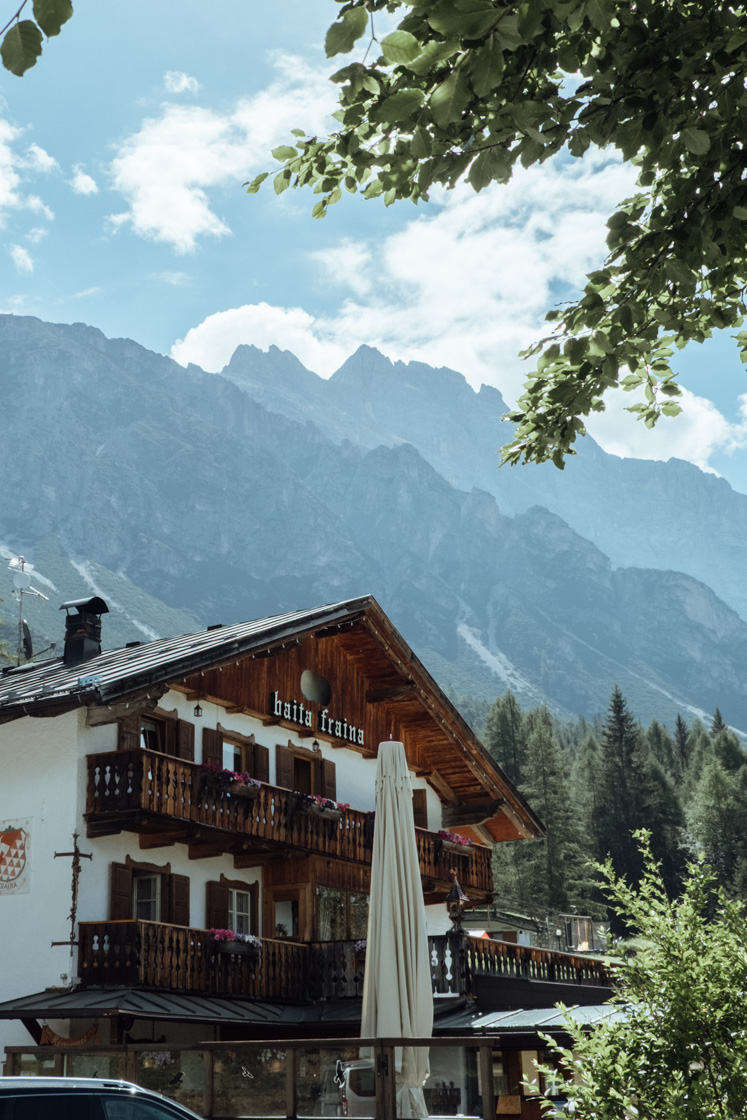
Our favorite place we stayed on the trip, thanks to the stunning mountain views you can see from bed. Wake up early to enjoy crimson-colored sunlight lining the tops of the mountains.
Perfect location for exploring Seceda and Alpe di Siusi with the Col Raiser cable car that takes you to Seceda just a 12-minute walk away. Super friendly owner as well.
(9.6 - Exceptional)
This authentic, family-run wooden alpine guest house was remodeled in the last couple years. The interiors of the rooms are floor to ceiling wood, and smell exactly like what you'd expect inside a log cabin.
As a bonus, it's also home to a fabulous Michelin-reviewed restaurant. One of our best meals on the entire trip, and worth a visit in its own right.
(9.5 - Exceptional)
In preparation for the 2026 Winter Olympics, Cortina is going to be under extensive construction. This will have broad implications for traffic and parking in the the town, as well as hotel availability. Consider staying in Val Gardena, as recommended above, to avoid being impacted by construction. The rest of the region should be relatively undisturbed, but check in advance on Reddit/Forums for the absolute latest.
What do know before you visit the Dolomites
Here are the most important things to plan for if you’ll be doing a Dolomites road trip:
- You may need to register your car to park at popular spots. For example, places like Lago di Braies, you now must reserve parking in advance during peak season (usually July–September).
- Cable cars and rifugi aren’t open year-round. Most lifts and huts only operate from late May or mid-June through early October.
- Book rifugio stays in advance. If you plan to overnight at a mountain hut, especially well-known ones like Rifugio Locatelli or Rifugio Palmieri, book weeks or months ahead.
- Carry cash for huts and tolls. Some mountain huts and toll roads don’t take cards, or have unreliable signal – it’s the mountains afterall.
- Download offline maps. Cell signal can be spotty in the mountains. Download trail maps (e.g. from Komoot, AllTrails, or Maps.me) before you go.
- Driving isn’t hard, but plan for mountain roads. Roads are generally well-paved and in good condition, but expect tight switchbacks, steep grades, and the occasional single-lane pass.
- Stay in two base locations to avoid long drives. The Dolomites cover a huge area. We stayed in both Cortina d’Ampezzo and Val Gardena (in Santa Cristina) to reduce diving.
- Start hikes early. Parking lots fill up fast (especially at Tre Cime and Lago di Braies), and the light is better in the morning anyway. You’ll also beat afternoon storms and mid-day crowds.
- Avoid certain hikes in wet weather. Many iconic trails (like Lago di Sorapis and Tre Cime) involve exposed paths, slippery rocks, or cables. These can become dangerous when wet. Always check the weather and don’t hesitate to skip or shorten a hike if storms roll in.
Dolomites Itinerary
In this Dolomites itinerary, we start East based in Cortina d'Ampezzo , and then switch to to Santa Cristina in Val Gardena on the evening of Day 3. You could do it in reverse, we organized it this way due to flying in from Venice.
Here’s how to spend 7 wonderful days in the Dolomites:
- Day 1: Passo Giau and Croda Da Lago
- Day 2: Lago di Braies and Tre Cime Di Lavaredo
- Day 3: Lago di Sorapis and Val di Funes
- Day 4: Seceda Ridgeline
- Day 5: Alpe di Siusi and Ortisei
- Day 6: Sassolungo, Carezza Al Lago, Bolzano, St. Valentin Church
- Day 7: Adolf Munkel Trail
Day 1: Passo Giau and Croda Da Lago
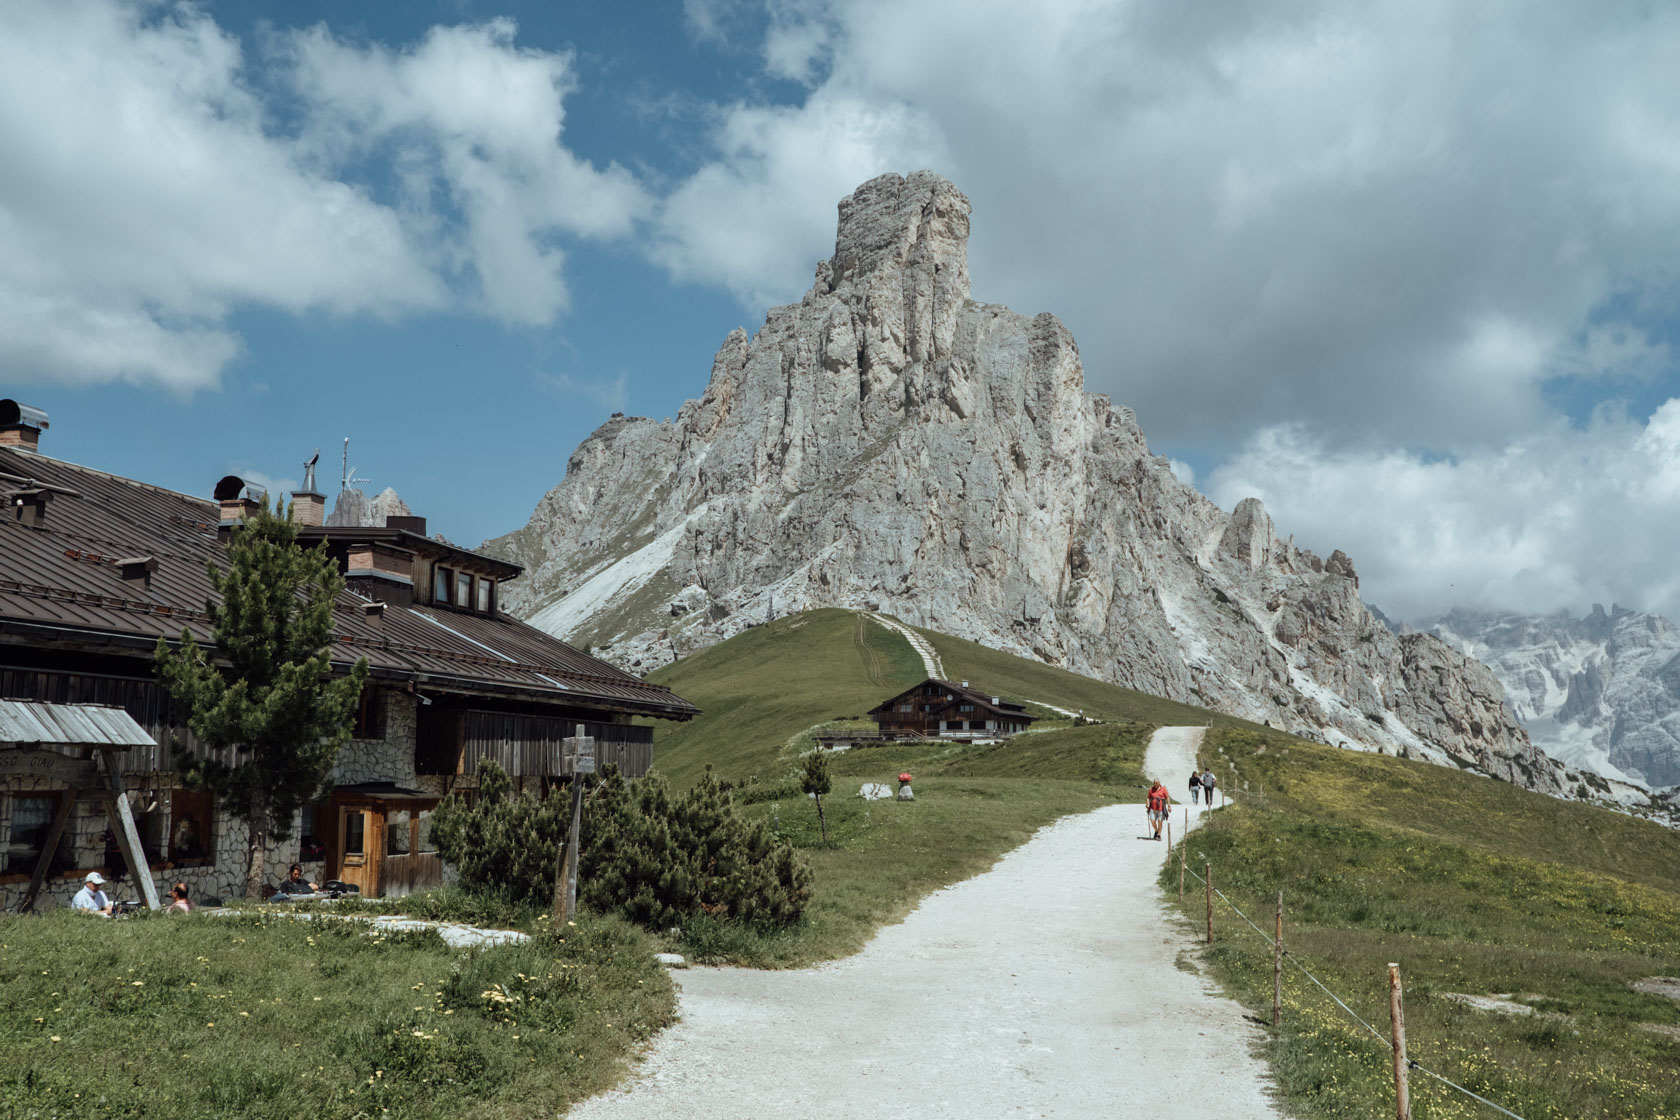
Passo Giau is a high mountain pass in Italy, and a perfect stop on the way to our first hike in the Dolomites! You’ll drive up some windy roads to this pass, and be rewarded with a sweeping panorama across the valley.
It’s located close to Cortina d’Ampezzo, making it an easy pitstop if you’re staying in the area. You have the option to hike up the pass, or just go halfway and turn back.

Up next, is Croda Da Lago . This hike has two variants: out and back to the lake which takes 1 hour 45 minutes, or a full circuit that involves some scrambling, runs for 11.3 kilometers, and takes 6 hours total. We opted for the former.
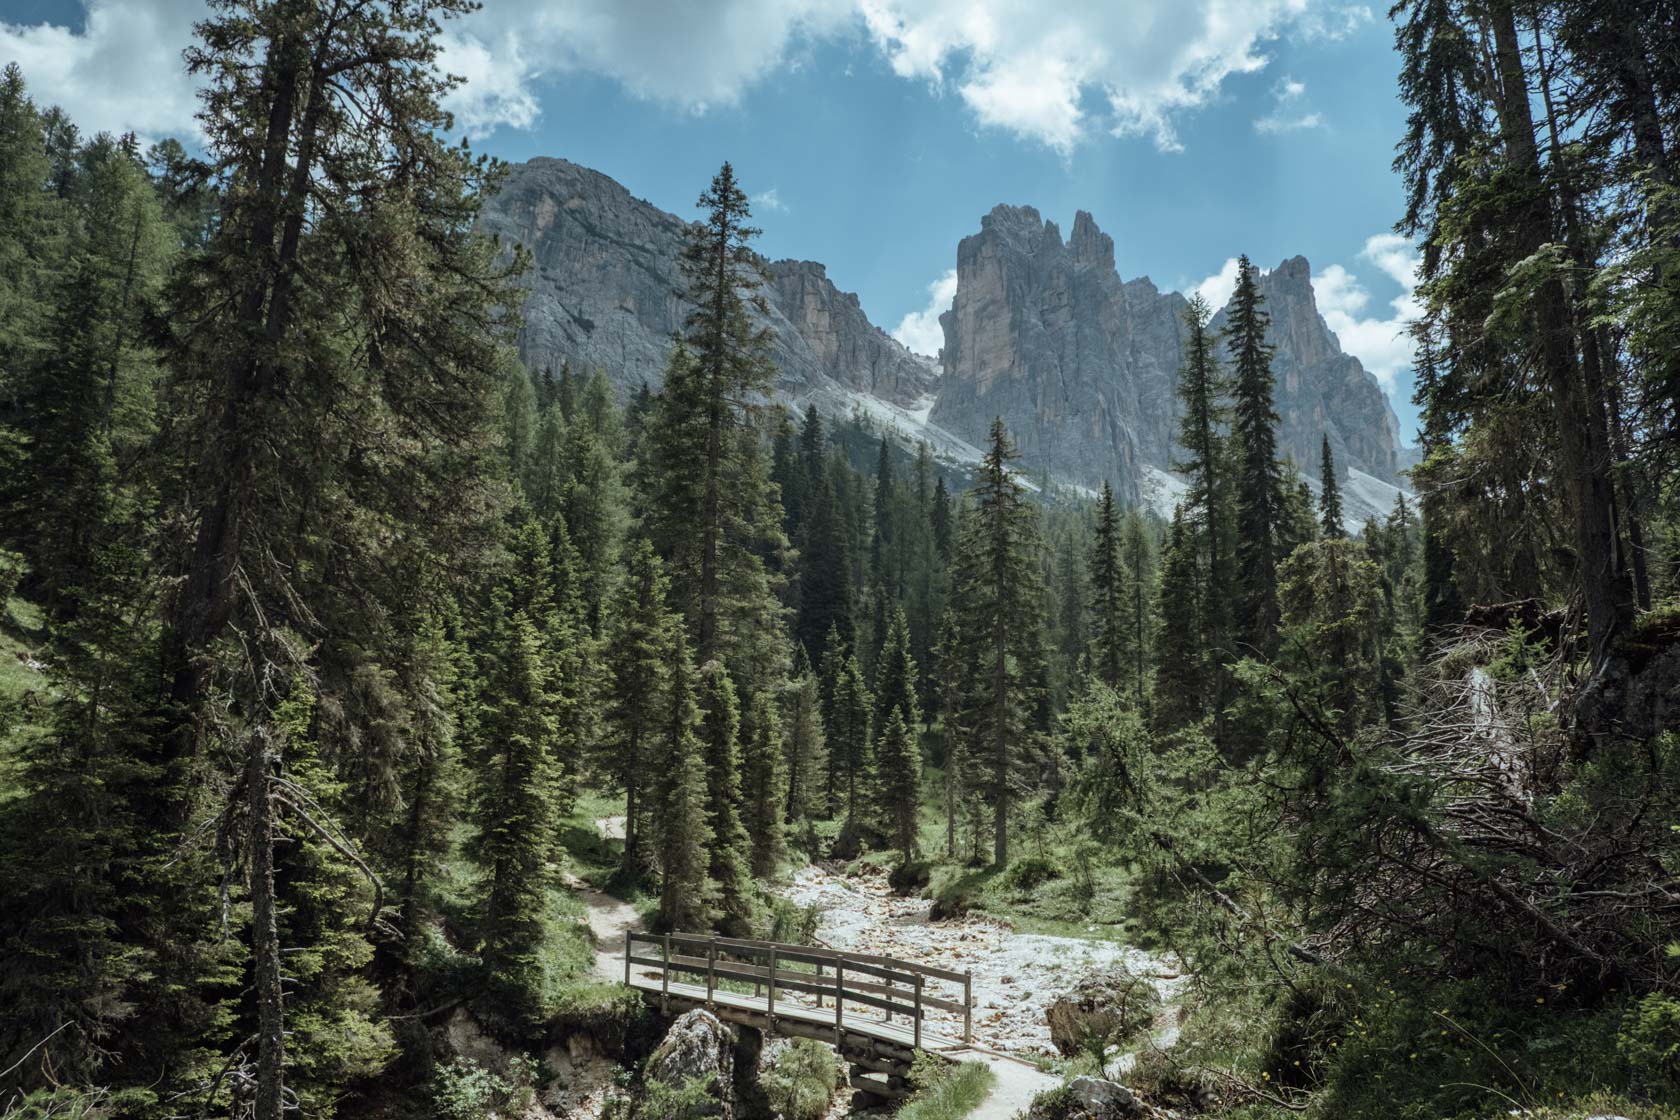
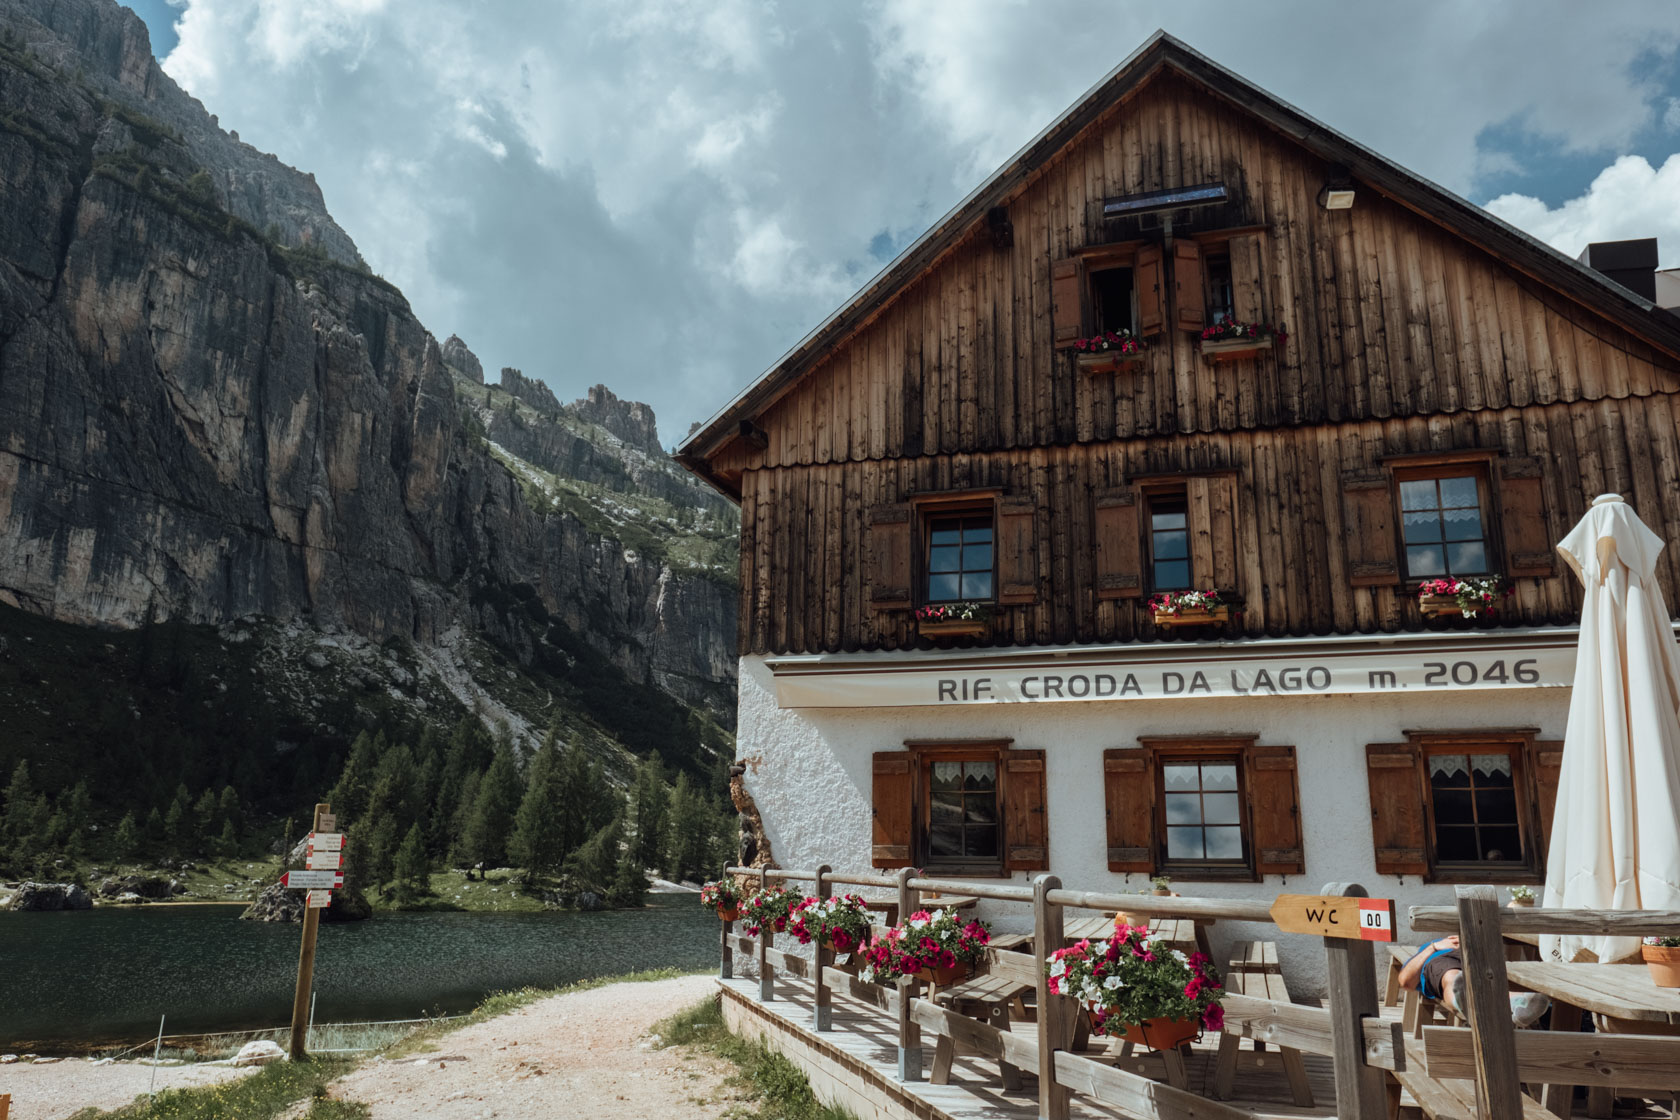
The hike was great in the afternoon, and has moderate elevation gain to reach the lake. There’s a path around the lake, which you’ll take to reach the rifugio (alpine hut), called Rifugio Croda da Lago .
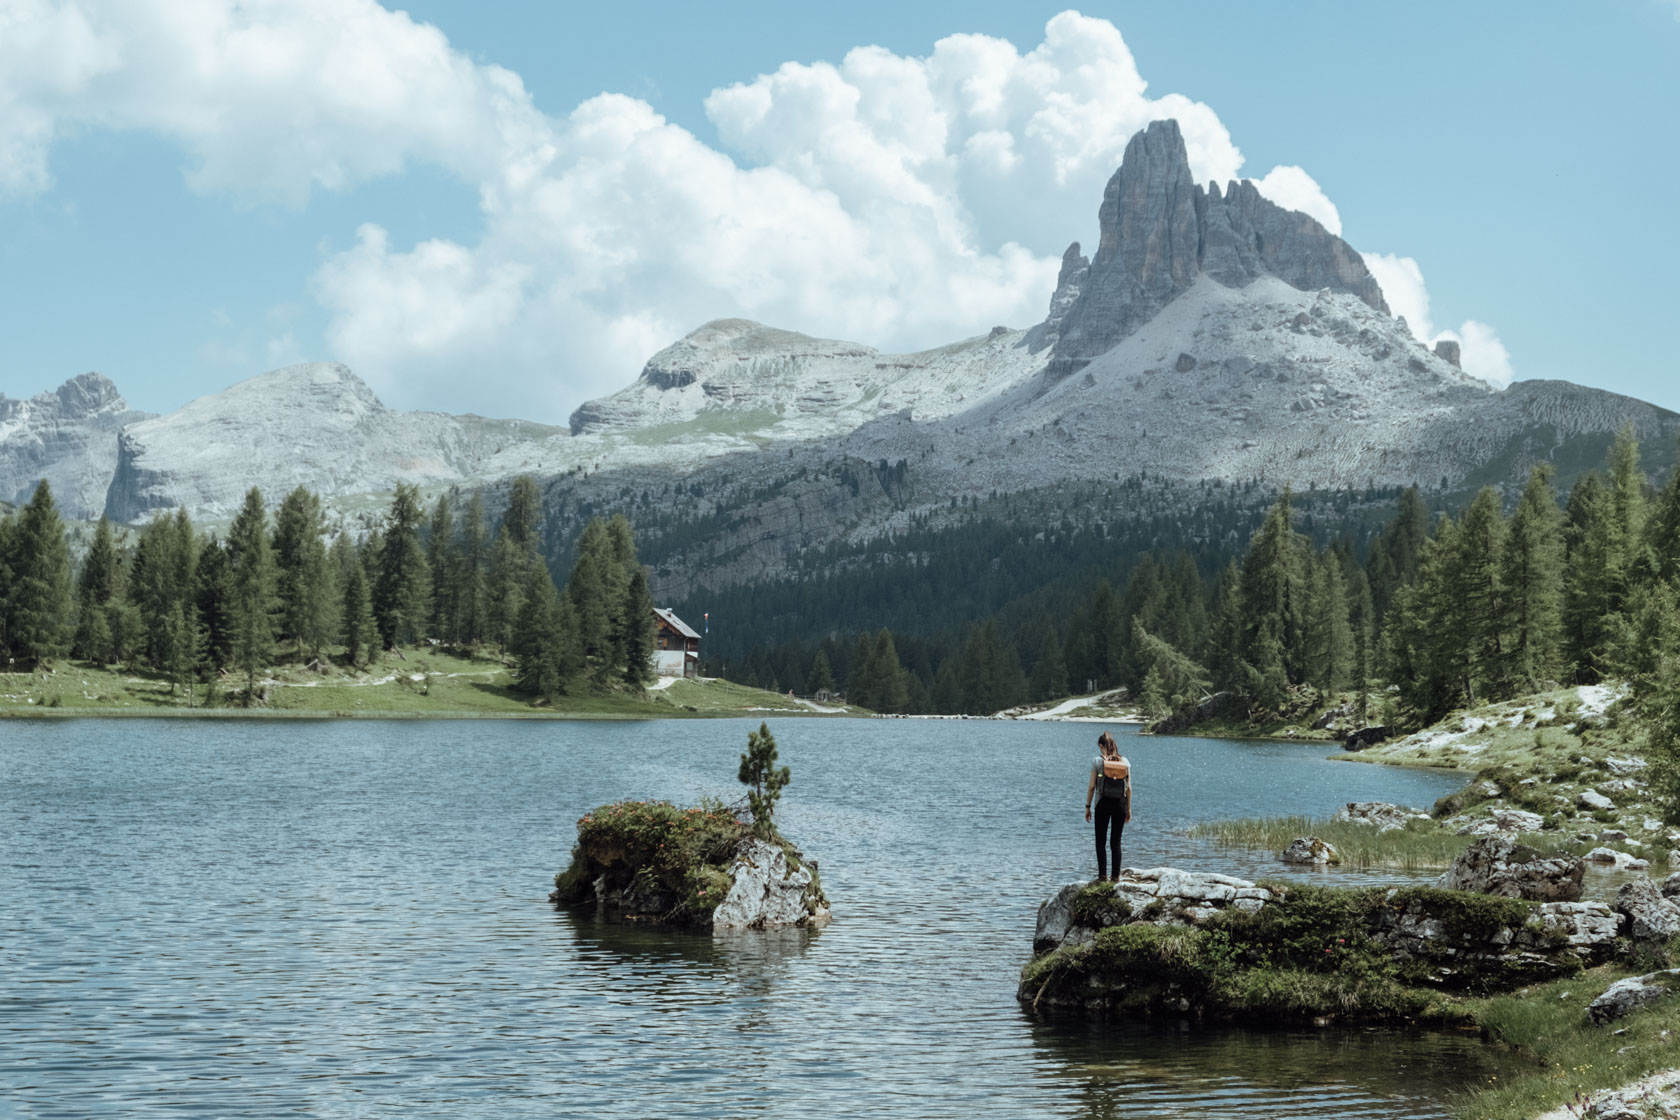
Once you’re there, the rifugio serves food and drinks. Like most rifugios, they stop serving food pretty early in the afternoon. So make sure you time your hike so you’ll be there around lunch, or bring plenty of food with you for the hike. Most rifugios have “No picnic” signs, meaning they’re not friendly to you BYOF’ing at their tables ;)
Day 2: Lago di Braies and Tre Cime Di Lavaredo
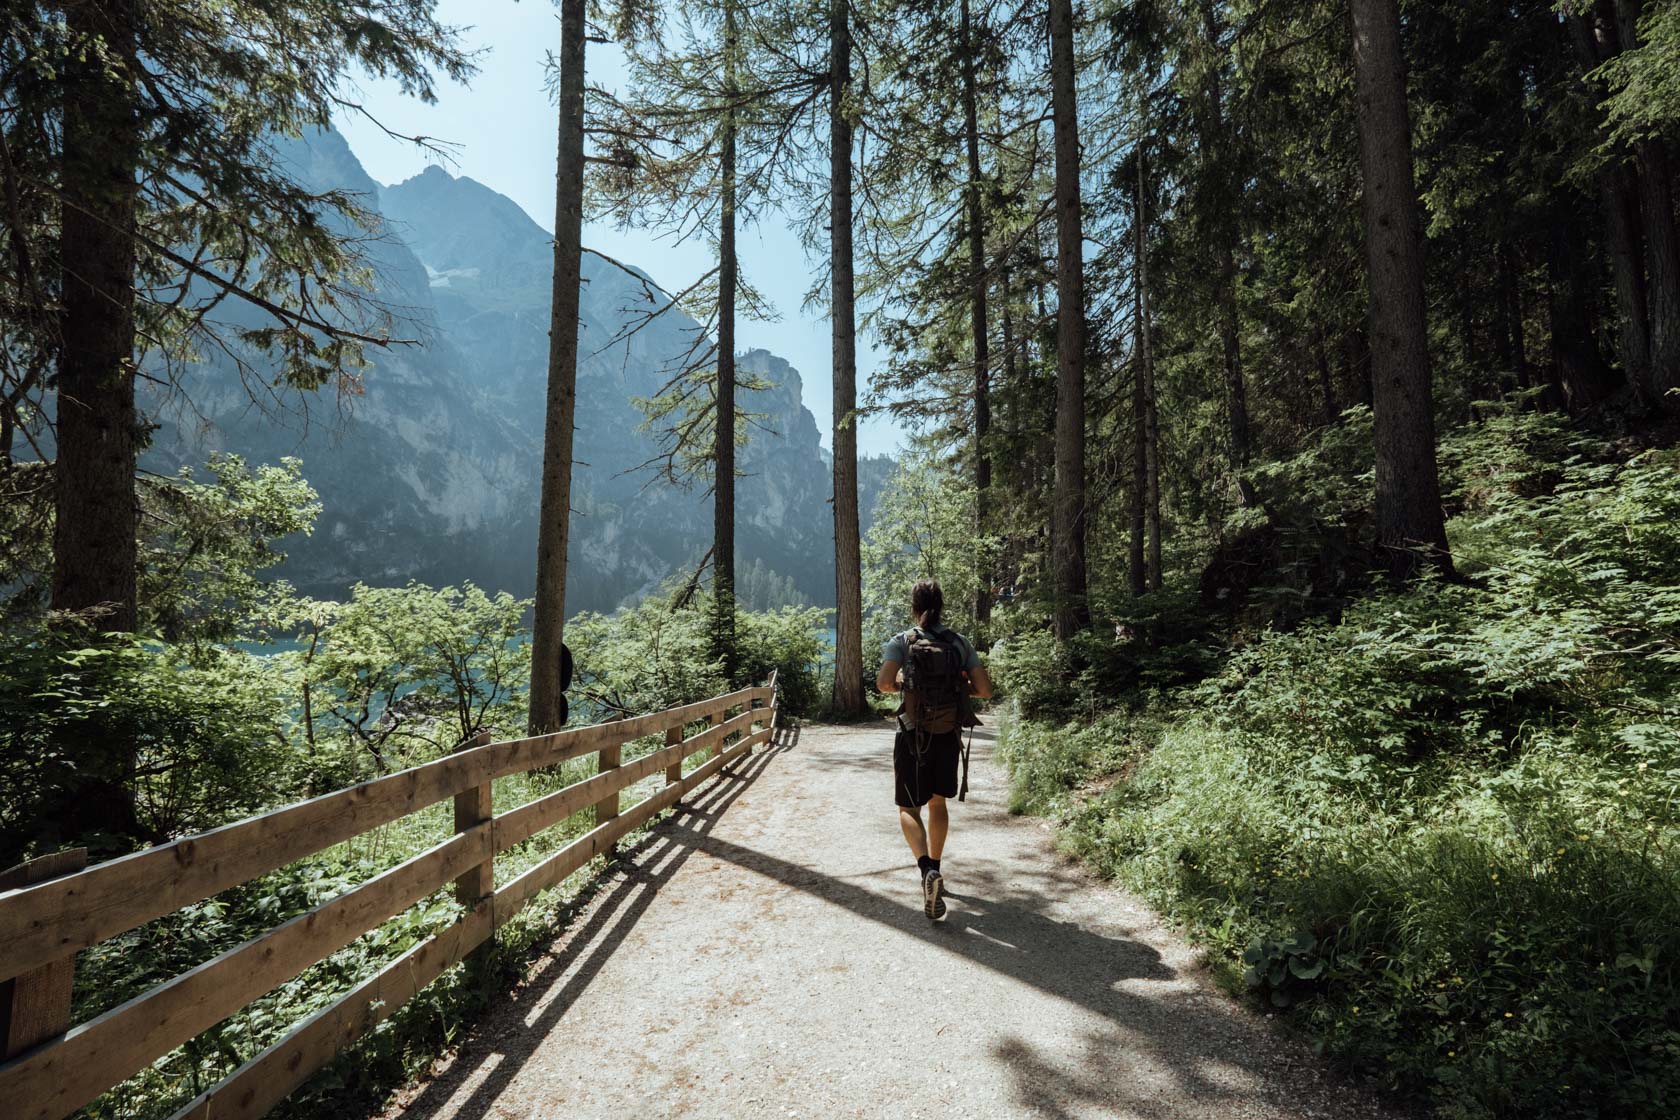
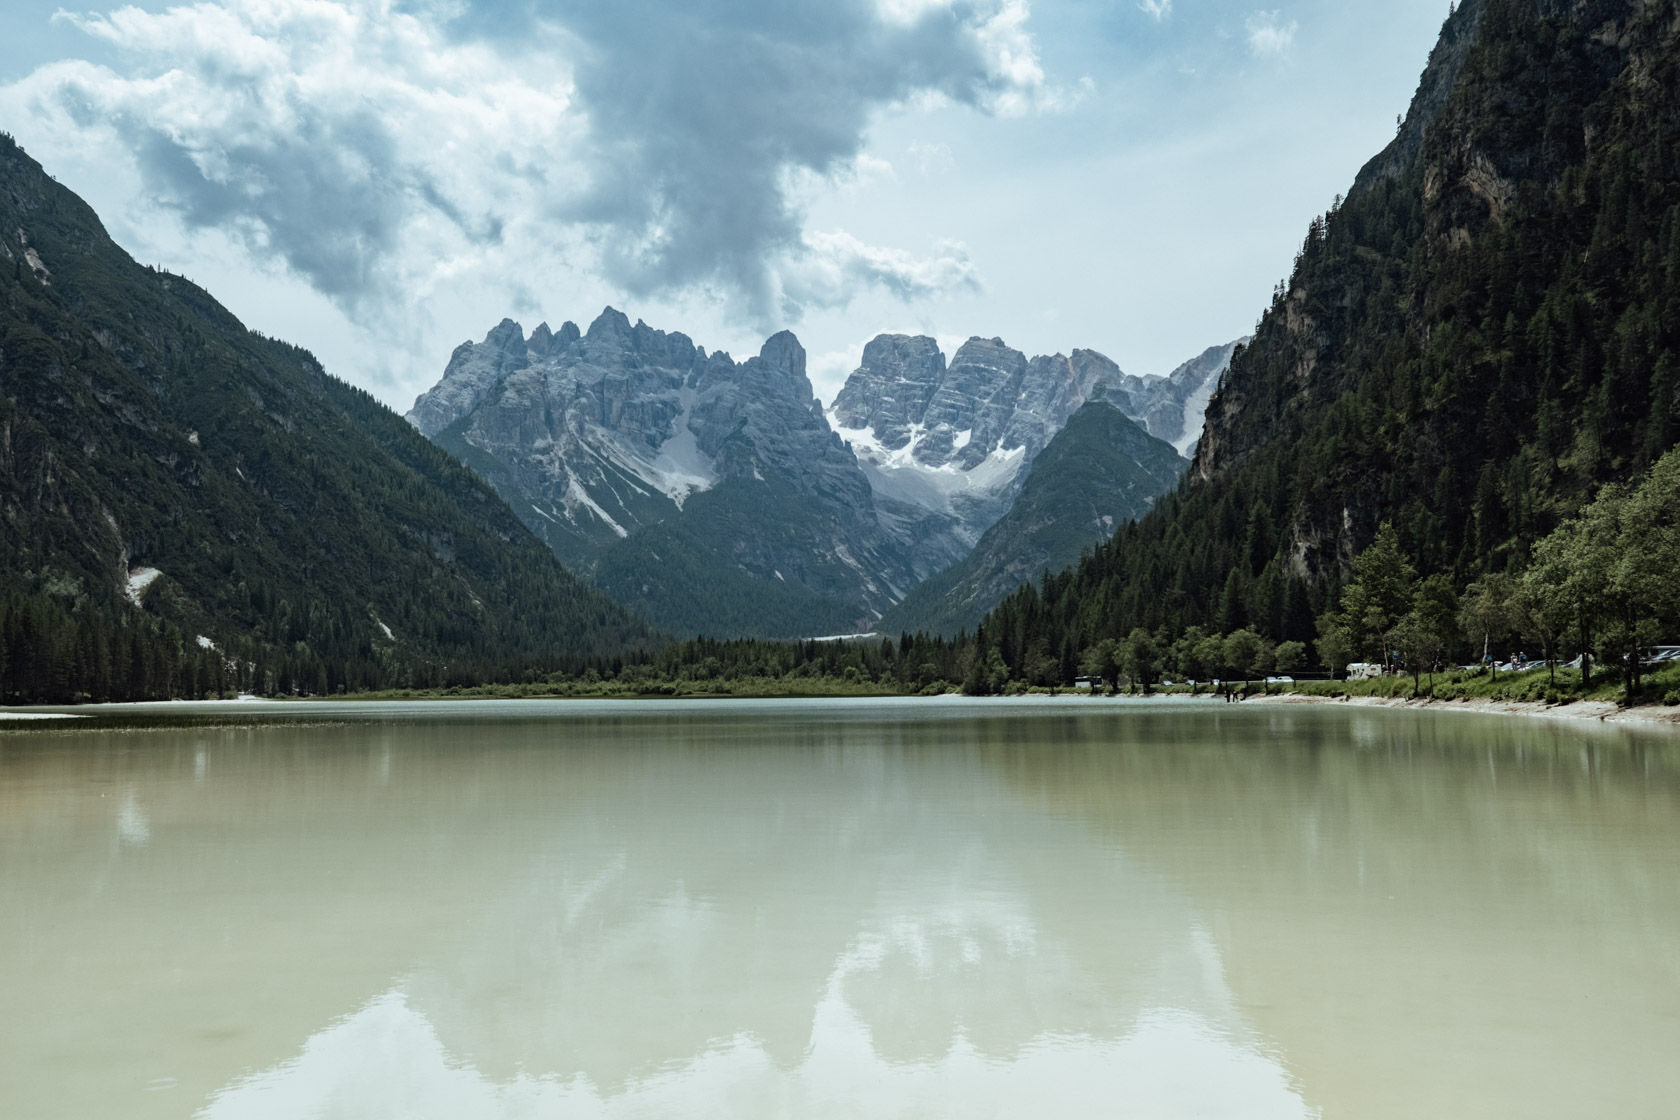
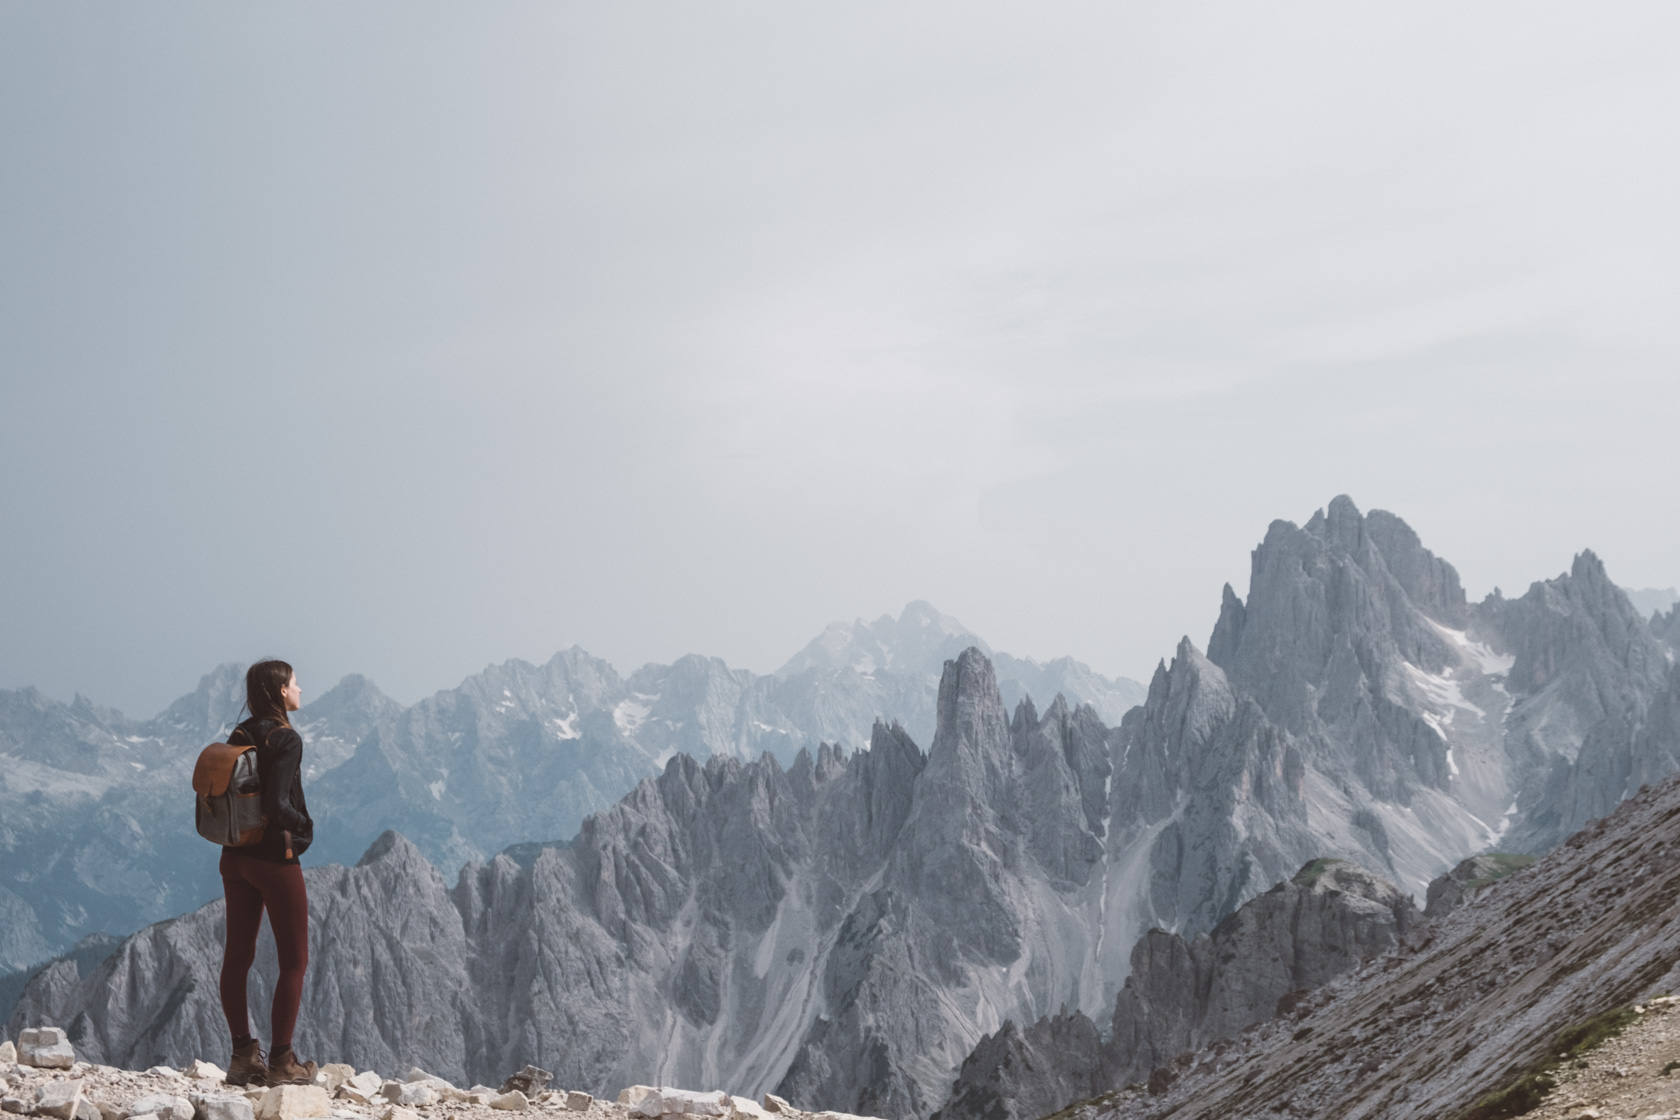
Today, you’ll start the morning at one of the most famous (and crowded) lakes in Italy. Known as the “Pearl of the Alps”, Lago di Braies is a gorgeous, alpine lake has become one of the most famous photography locations in Italy, and when you get here you’ll understand why.
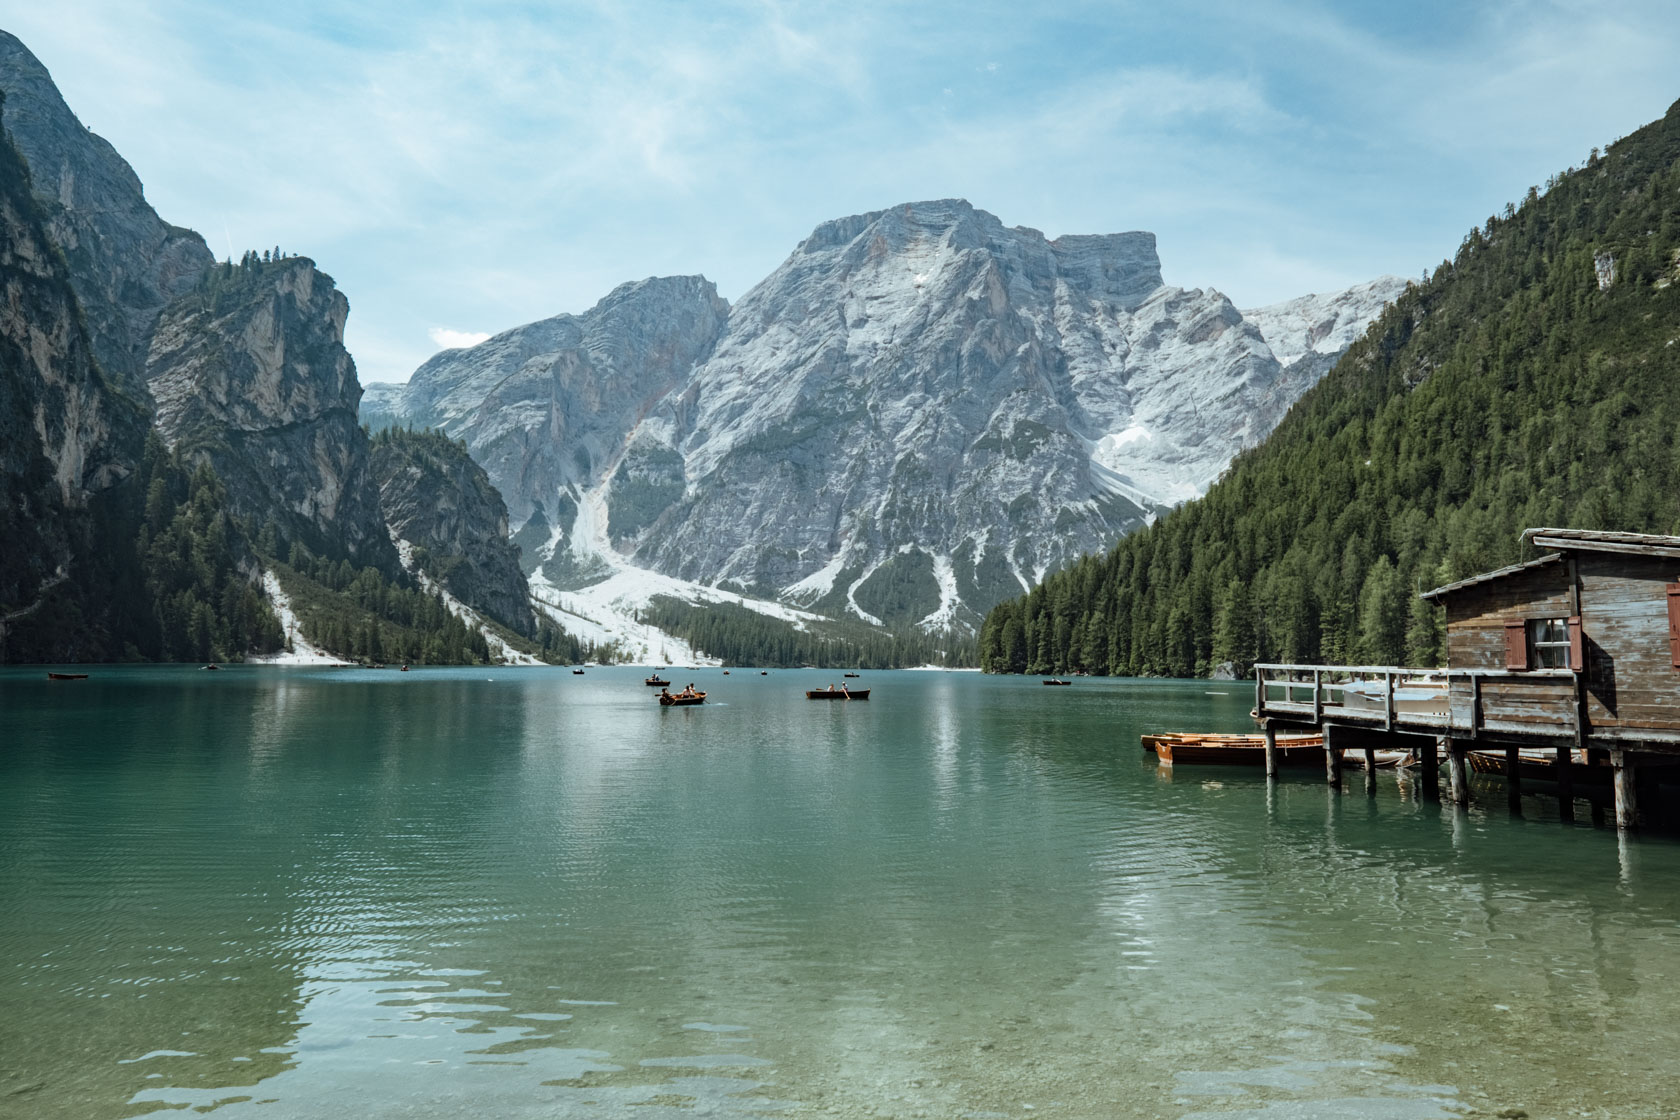
Arrive early in the morning to beat the crowds and secure yourself a parking spot, as they have been restricting vehicle access since 2023 due to overtourism. Lago di Braies is encircled by a 3-kilometer walking route (1.86 miles) you can casually complete in 45 minutes to an hour.
Hiking boots are helpful, but not required. If you go counter clockwise, the stairs with incline are at the end, and it’s mostly flat with some stairs at the end. For reference, a lot of people bring dogs on this hike. It’s also doable with children.
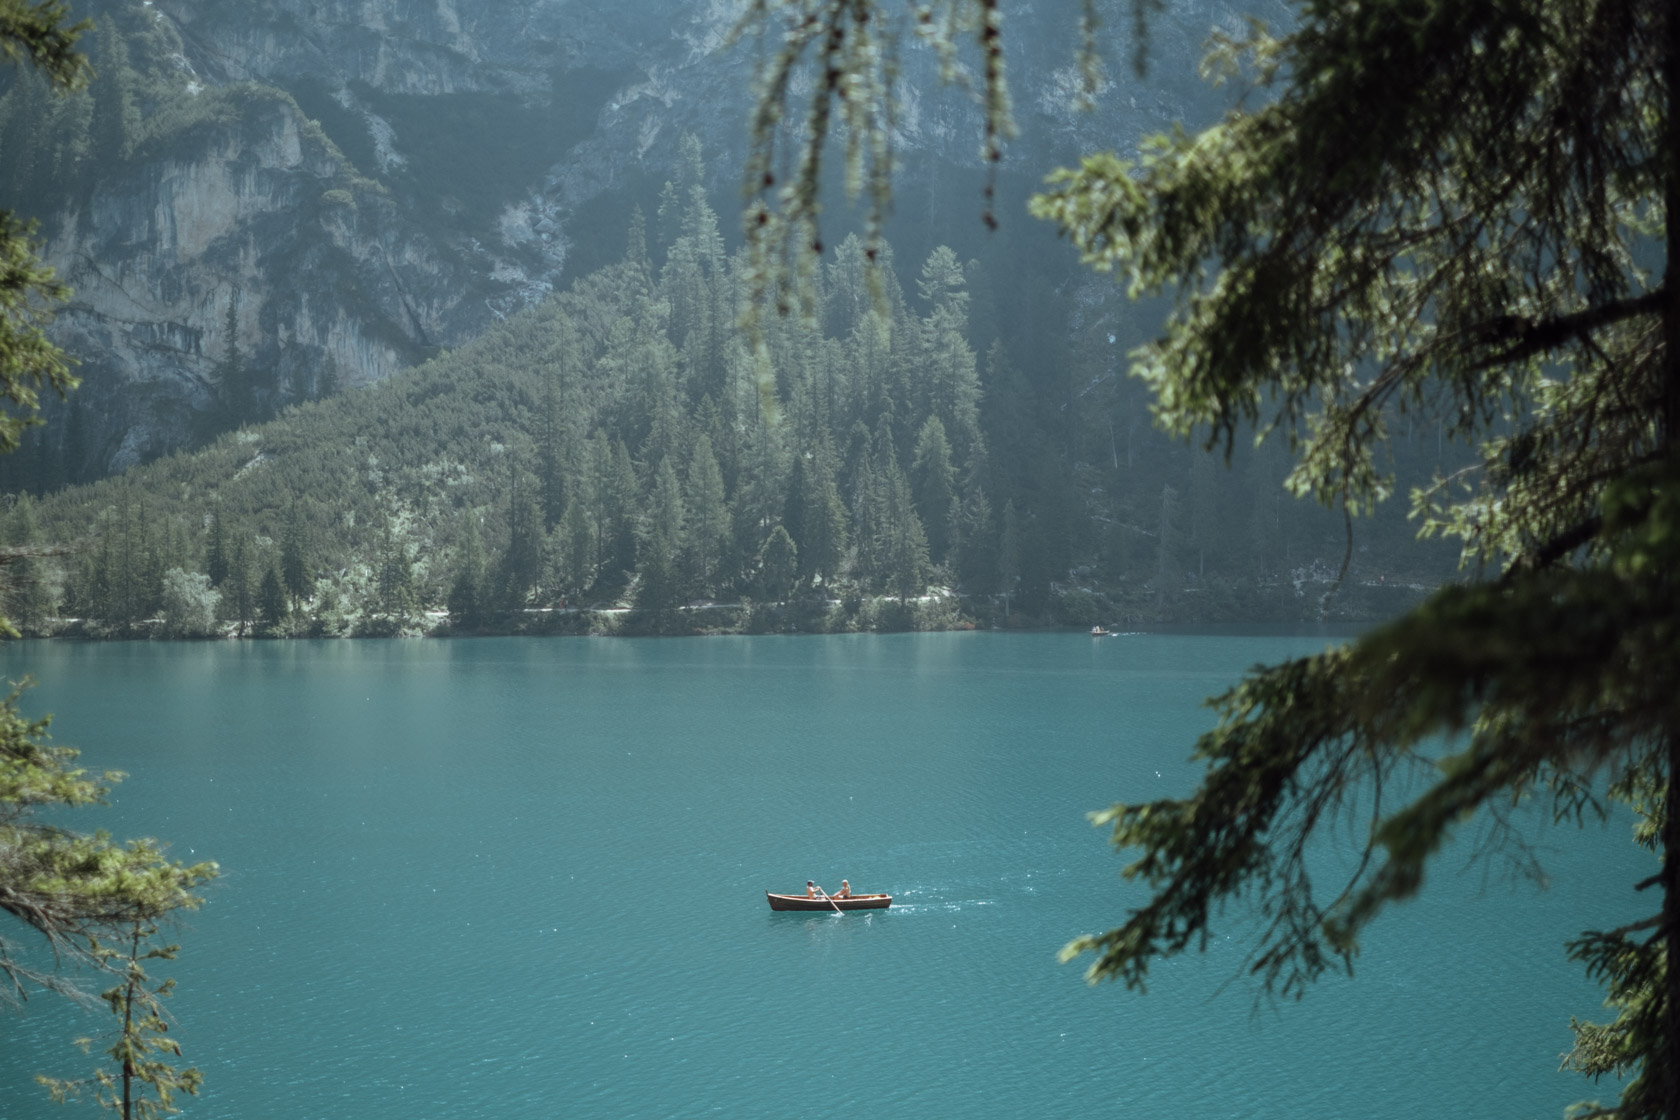
Renting a boat is also an option, and will run you 50€ for 45 minutes. Boat rentals are first come, first serve which means you’ll need to be very early if you want to secure a boat. In terms of other costs, parking in 2025 now costs 18€ (doubling from its cost of 9€ in 2022). While you might feel like the most iconic views are to be had from a dock you can only reach by paying, the view to the left of the boathouse is also fantastic (and free).
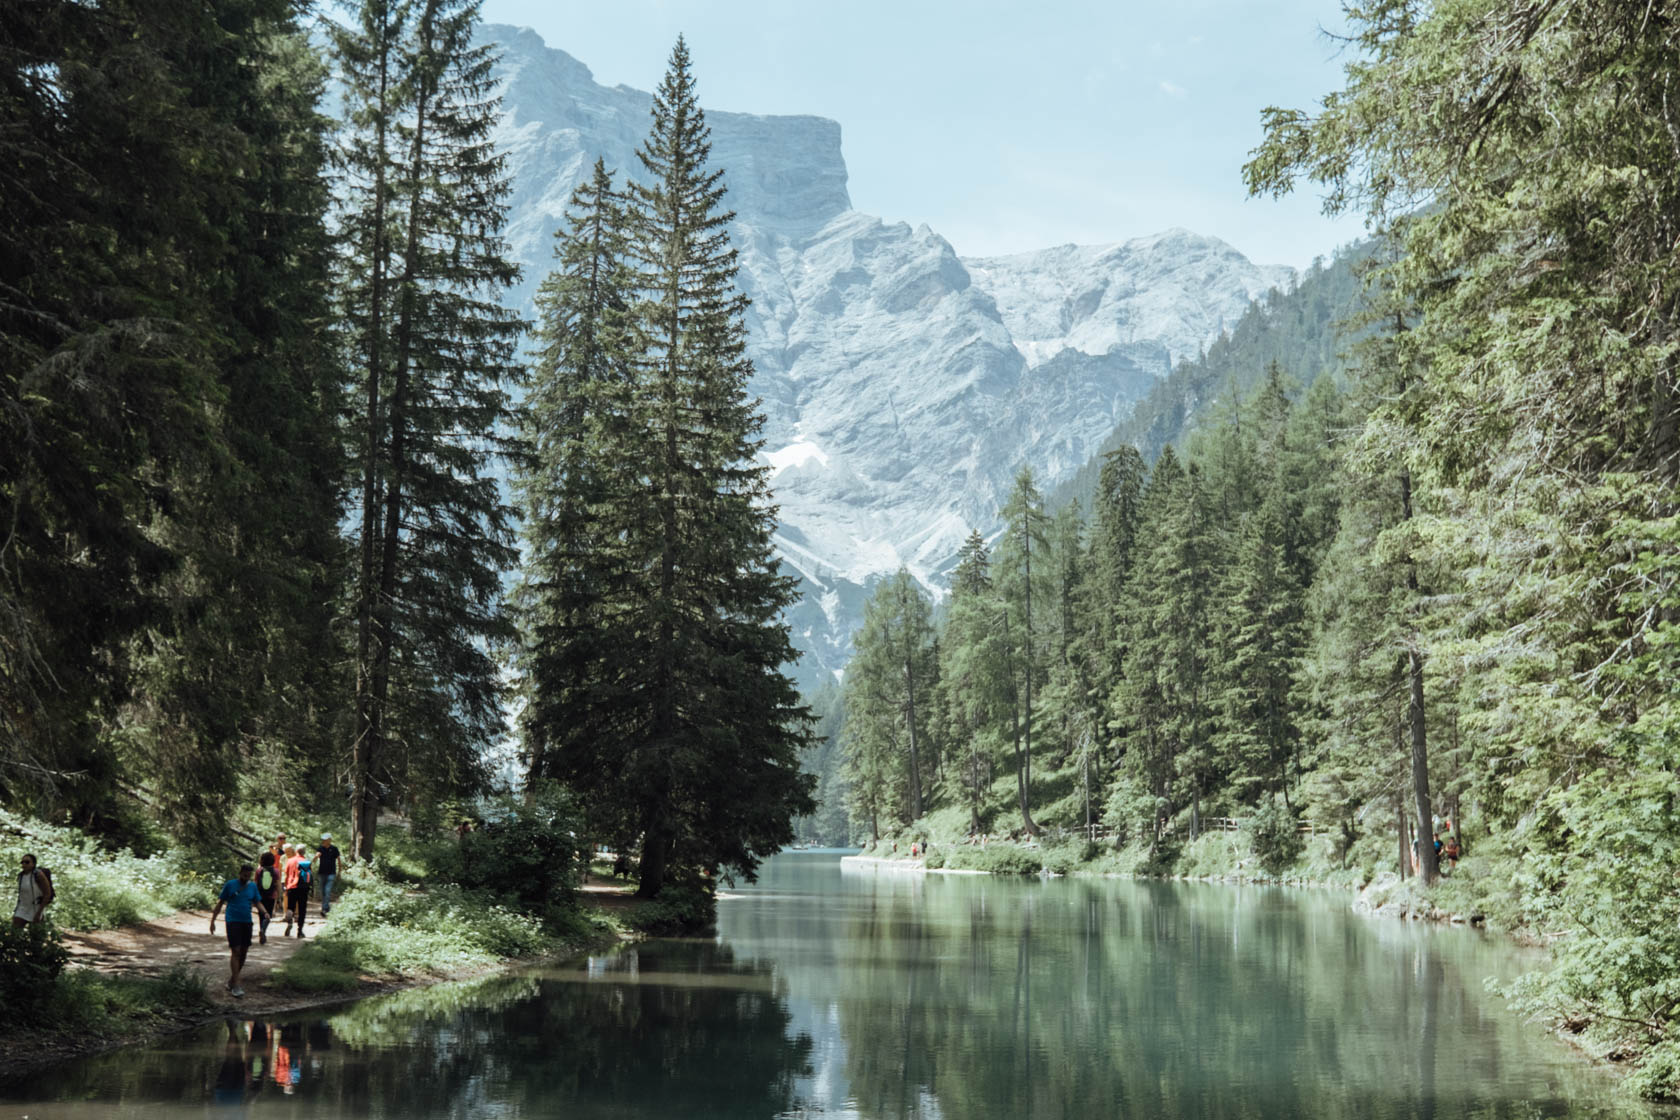
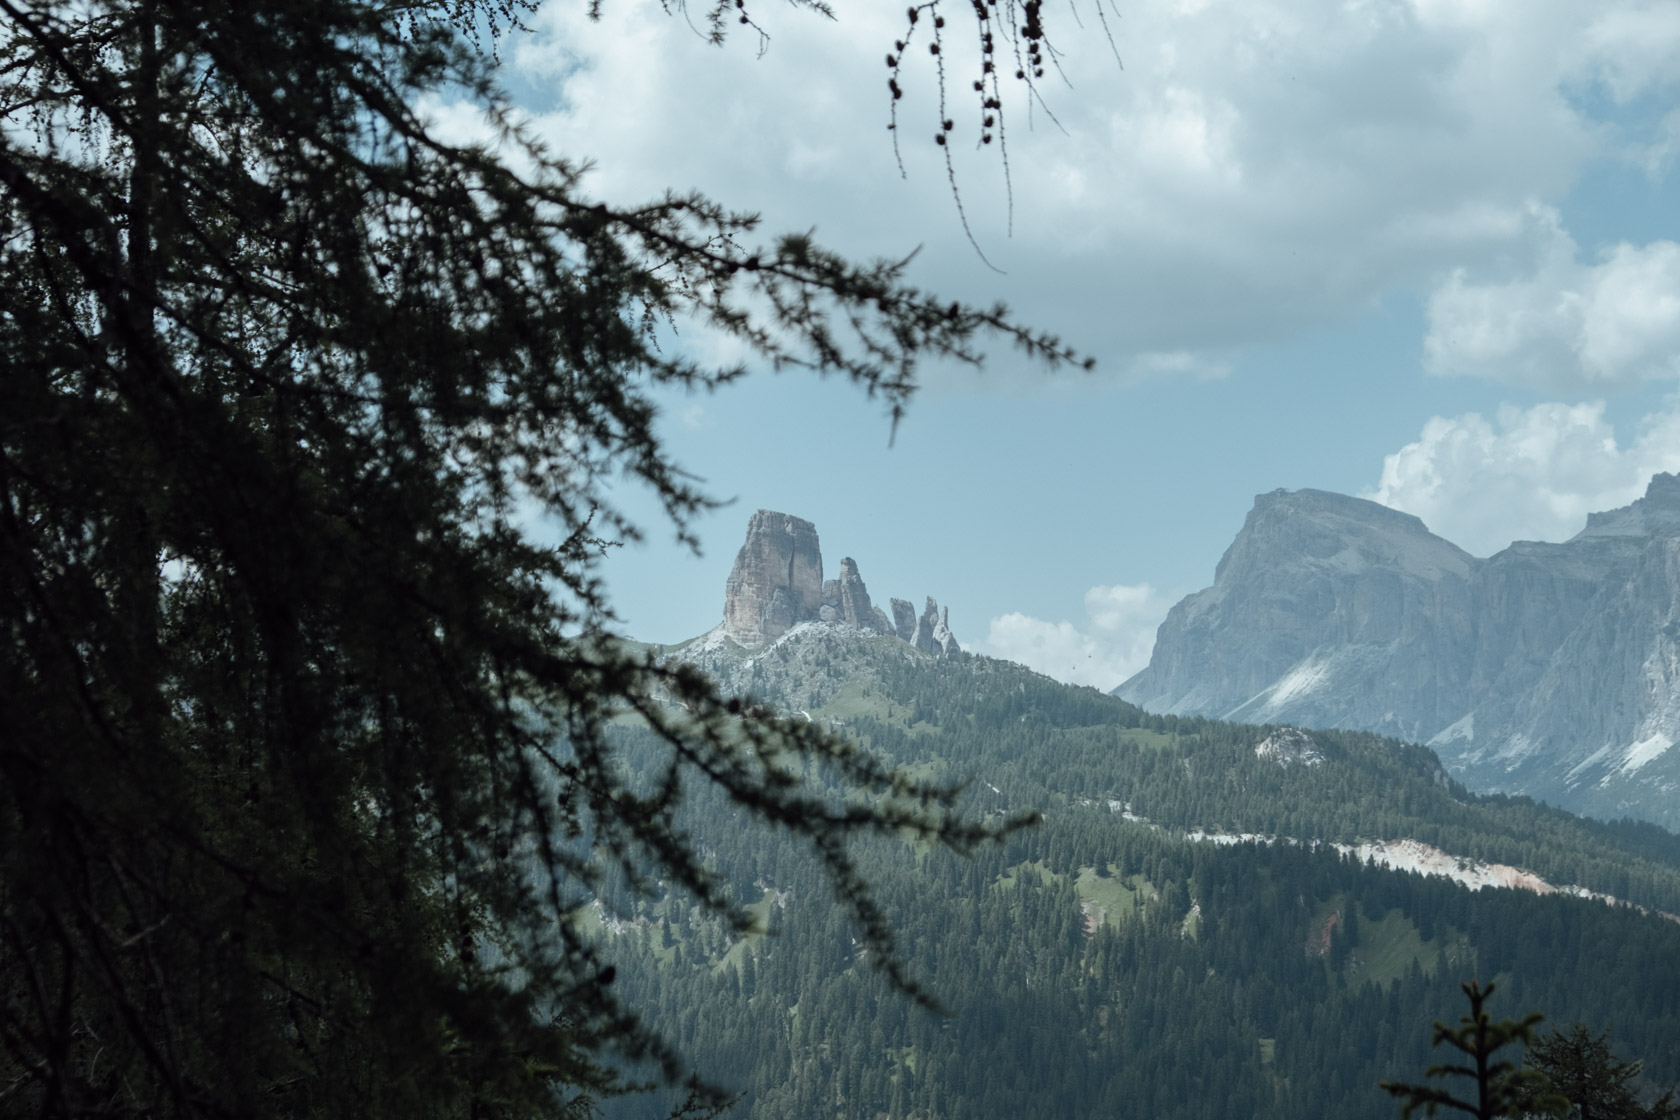
There are some small, self-serve restaurants with outdoor picnic tables you can have lunch at after your hike. Leave by noon to move on to the next leg of our trip! One fantastic stop on the way is Vista Panoramica Tre Cime Lavaredo . It’s an easy pull-over from the road, and gives you a glimpse through to where we’re going later: Tre Cime Lavaredo. Bring your telephoto lens if you really want a close shot!
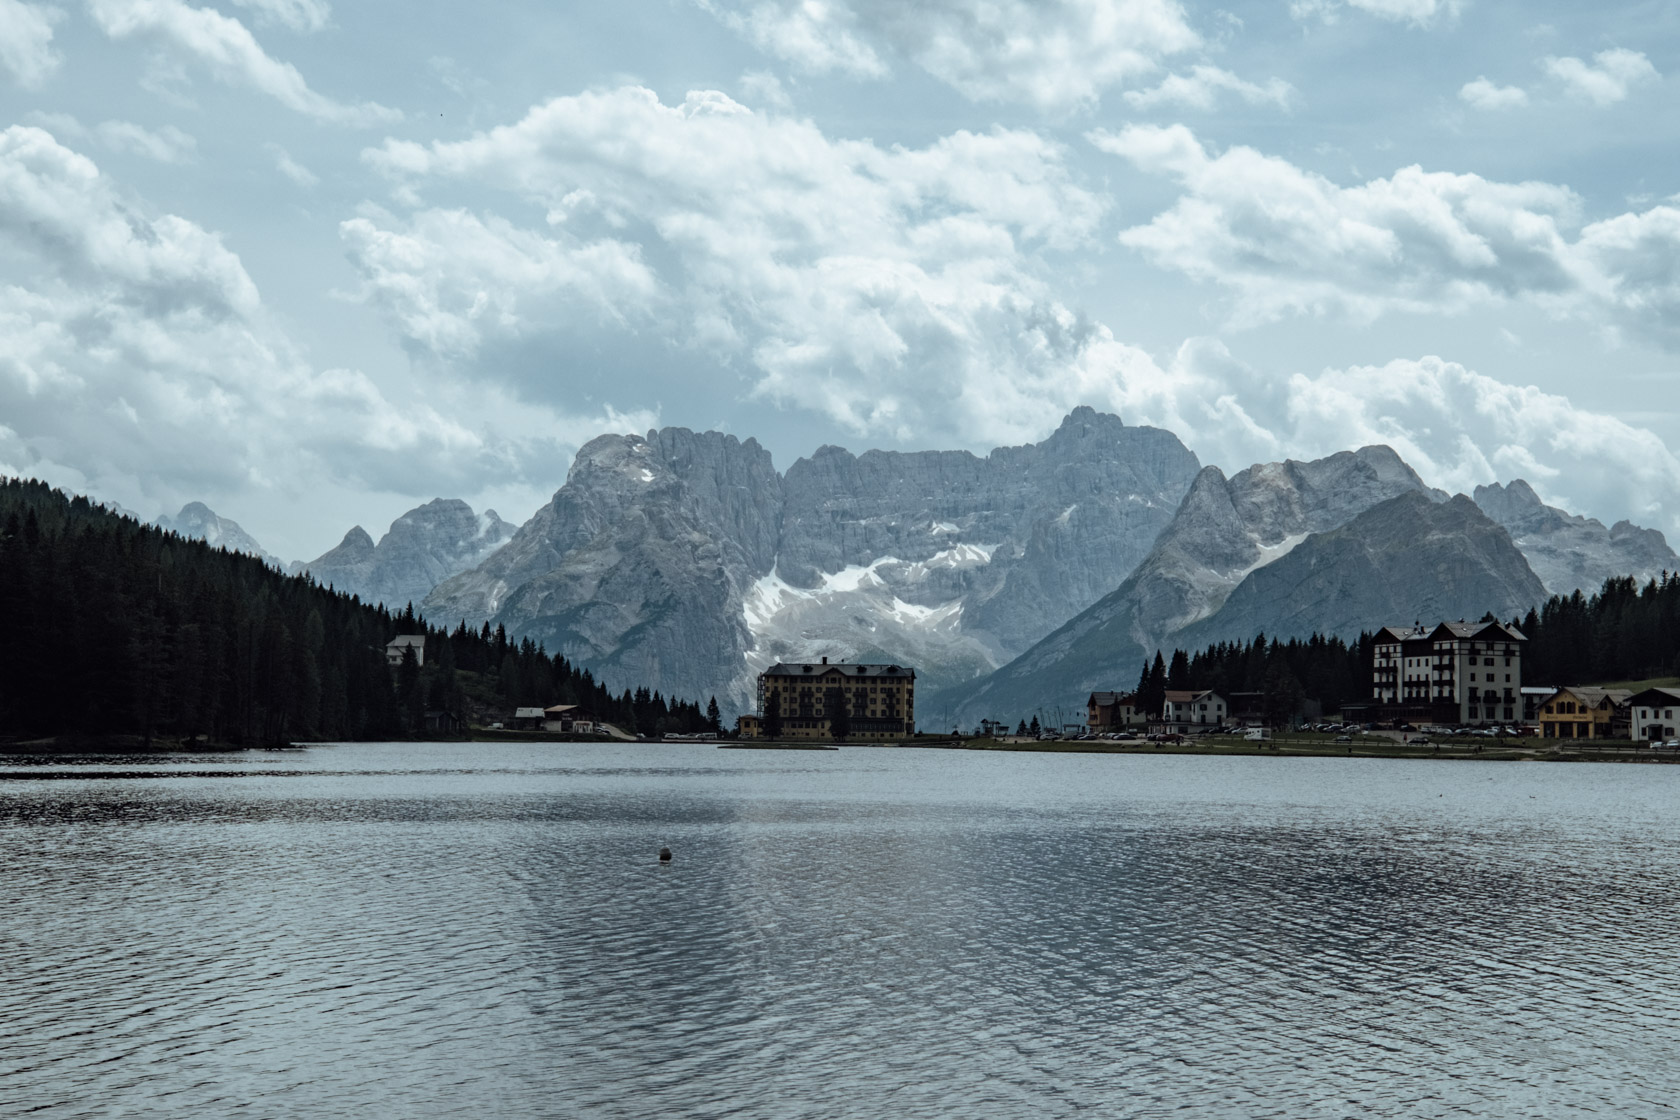
From here, there are two lakes you can easily stop at: Lago di Landro and Lago di Misurina . The latter has a small town nearby, where you can stop for a coffee and enjoy the view over the lake.
One of our biggest misses in the Dolomites was not visiting Cadini Di Misurina. This iconic mountain scene is 45 minutes out and back from Rifugio Auronzo, the starting point of the Tre Cime circuit. This’ll be one of our priority stops next time!
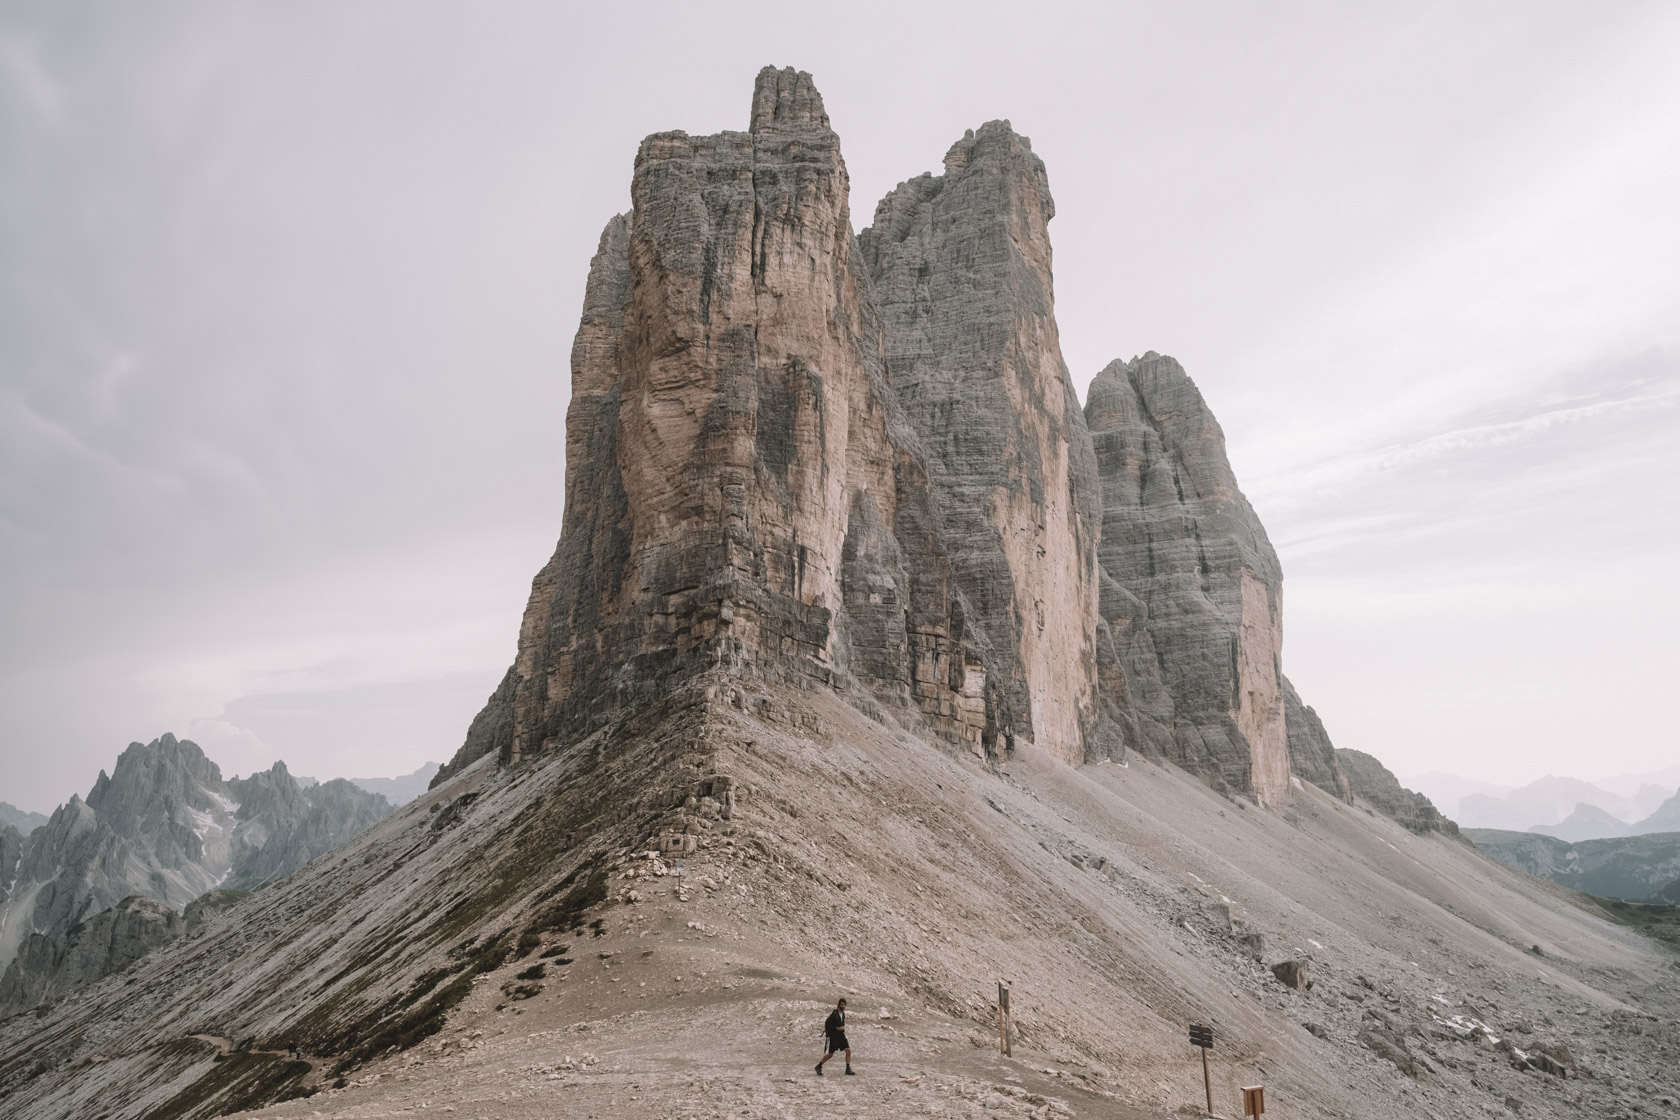
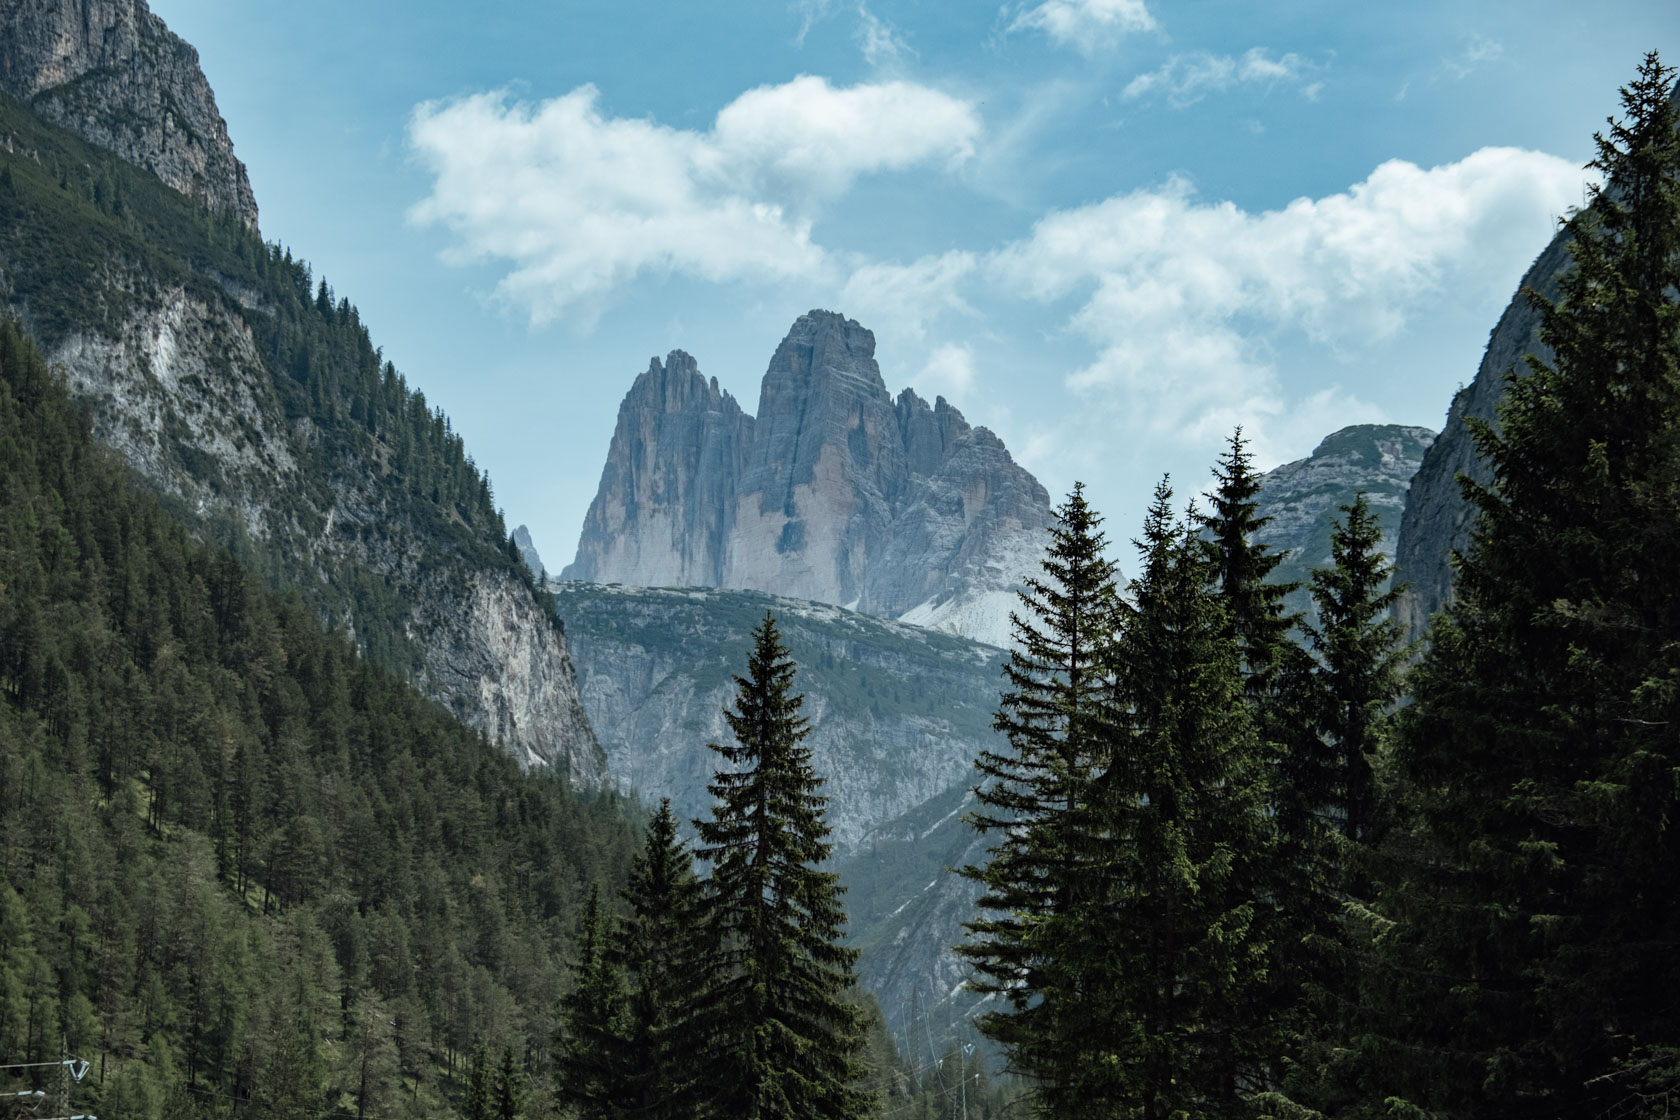
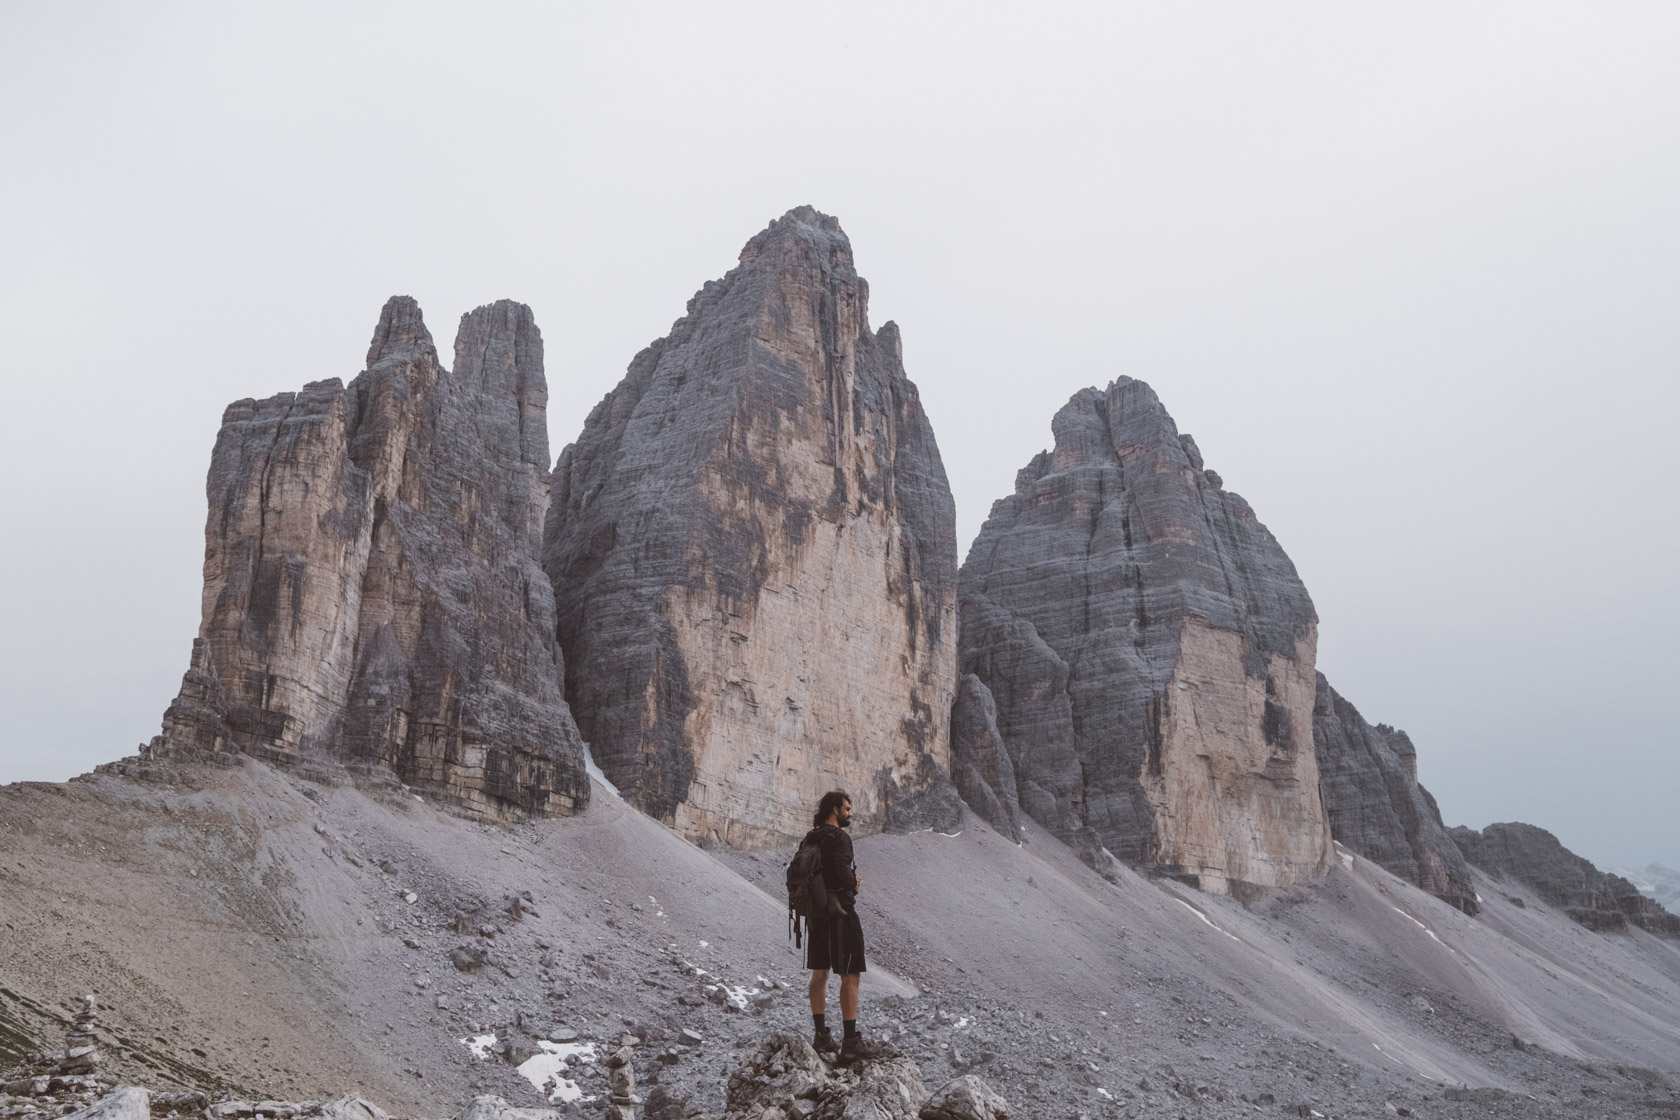
Finally, it’s time to hike around Tre Cime Di Lavaredo . Probably the most popular hike in the region, there are a few different options for getting around.
- Full Loop (12k total, 4 hours) – Starts and ends at Rifugio Auronzo , and passes by several locations and offers views of multiple rifugios. It reaches out to Dreizinnenhütte , before looping back.
- Shortened Loop (10km) – While this shaves off about 2km, it’s actually sharp rock underfoot the entire way and by the end my feet hurt just from that. It’s very exposed, meaning no shade in the Summer, and less scenic than the longer loop.
We went for the shortened loop, and the rocky hiking probably made it more involved than it would’ve been just hiking out to the hut and taking the longer loop. If you have time, opt for the longer loop. The ground is softer and it’s more scenic on the return.

Right from the car park, you’ll see Rifugio Auronzo , and then continue along a broad gravel road to Rifugio Lavaredo . This section is very easy and flat, and can be done by anyone in 20-30 minutes. While you can’t drive your own car there, it’s used by service vehicles to reach Lavaredo, which should give you an idea of just how wide and flat the path is. It’s about 1.5km one-time with an elevation gain of about 100 meters.
As you might guess from these photos, we got caught in a short-lived thunderstorm on our way to Rifugio Lavaredo, which was lucky because we could take shelter and wait it out for about half an hour. It was also possible to order food, though as with most rifugios, you’ll need cash to pay. After that cleared up, it was possible to continue the hike with a gracious amount of cloud cover.
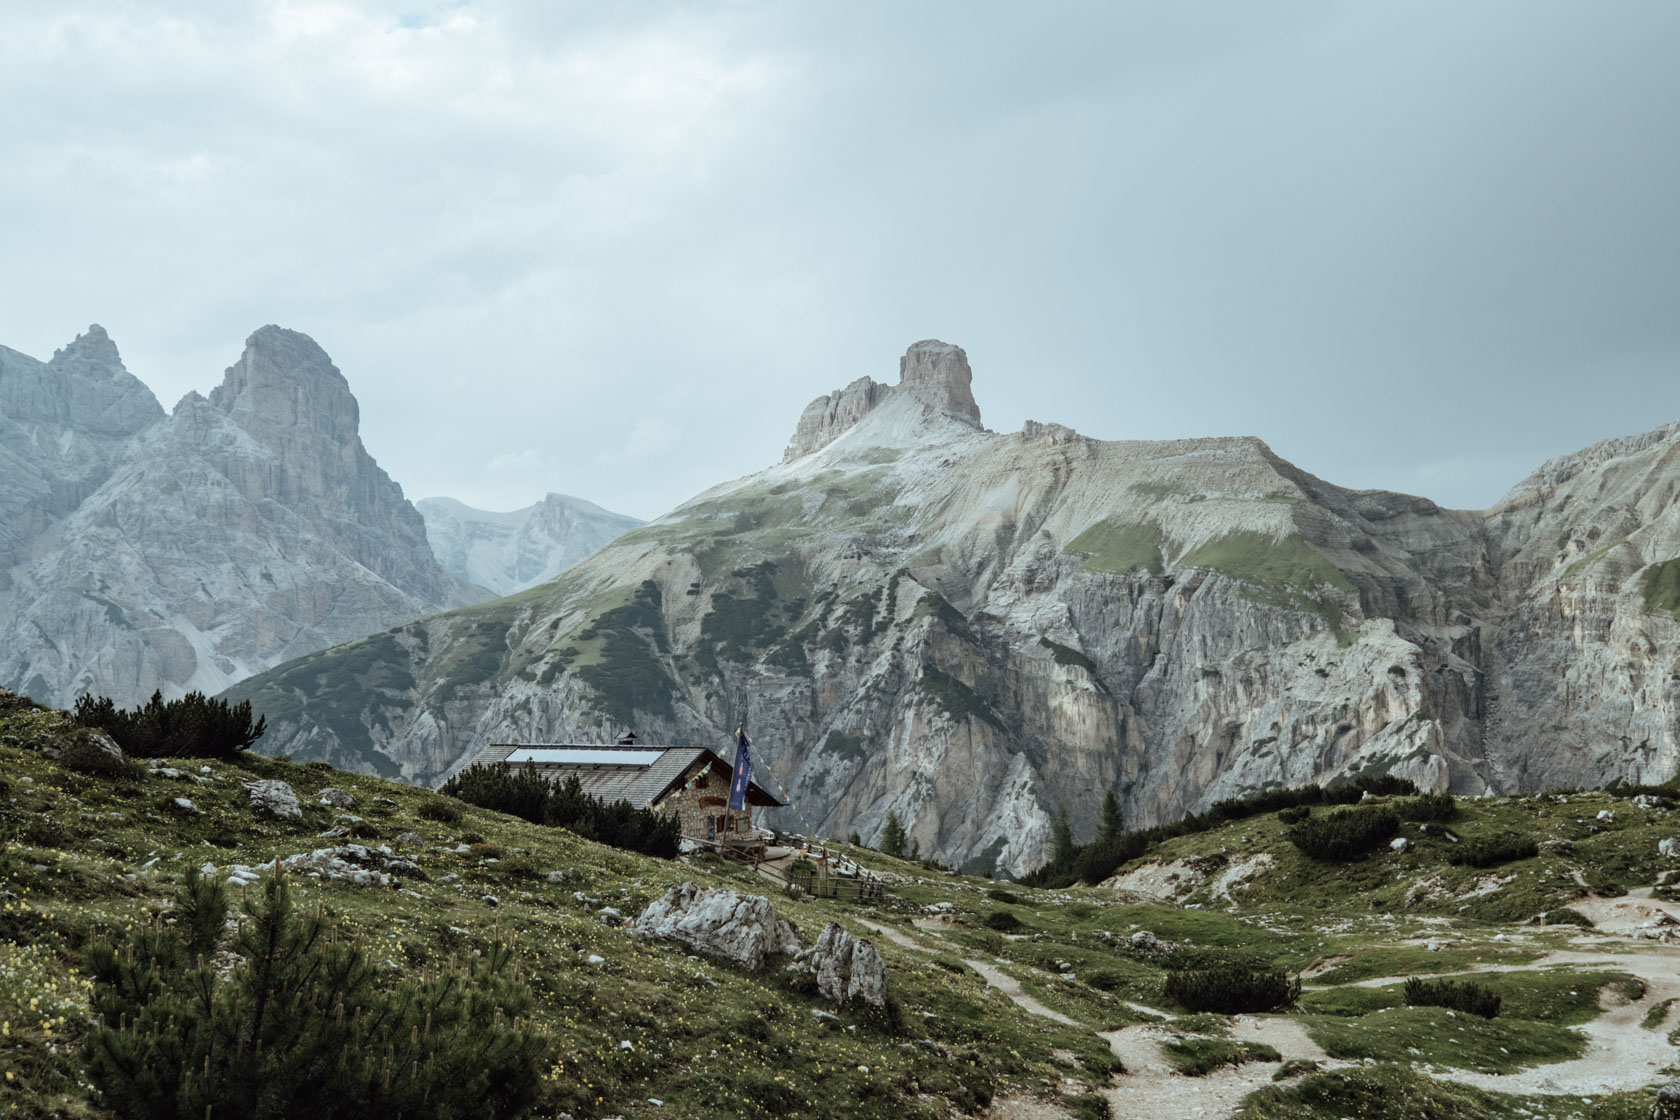
From the path, you’ll see the Dreizinnenhütte (Rifugio Locatelli) which is where you’ll walk on the longer, classic loop. It was built in 1882 by the Austrian-German Alpine Club, directly across from the north faces of the Tre Cime peaks. The hut has basic food and drinks including Tyrolean dishes like Kaiserschmarrn. Arrive early to avoid the crowds, or stay overnight (advanced reservations are a must!).
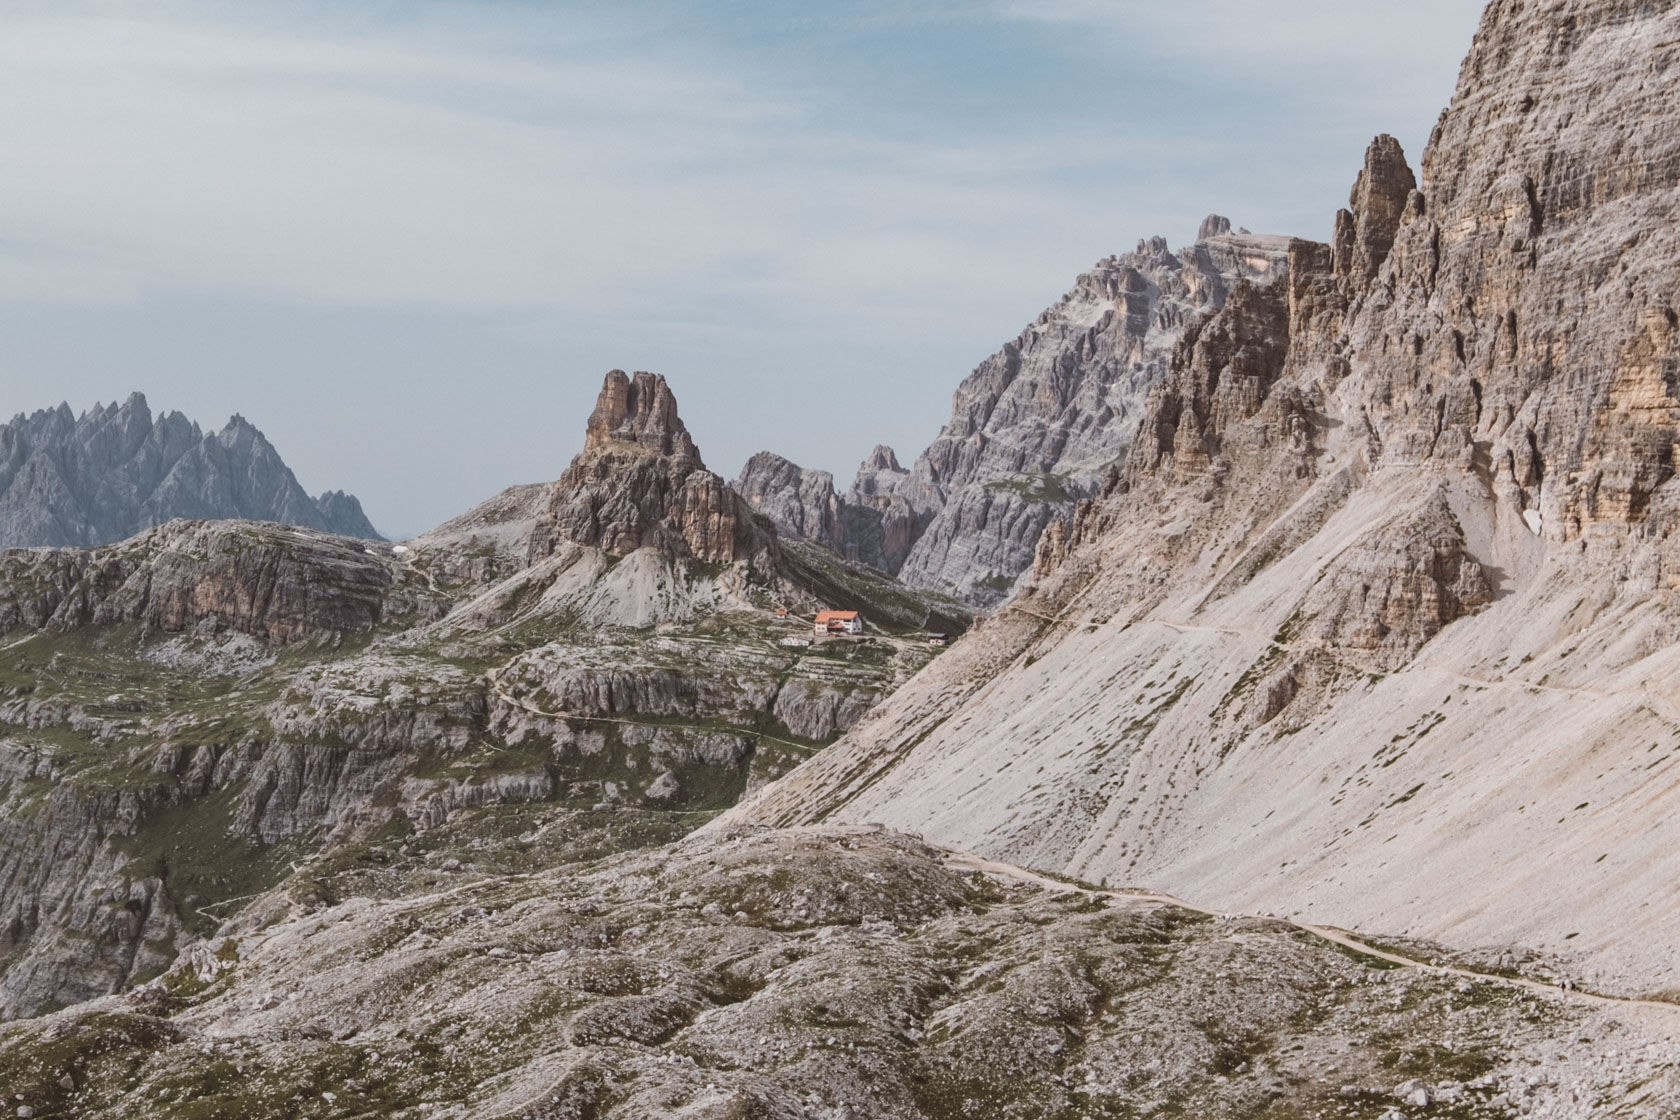
Another rifugio you’ll see on both routes is Malga Langalm . This alpine hut also functions as a dairy farm and is privately run. They serve homemade dairy products, such as fresh cheese, yogurt, and buttermilk.
As you start the arc that bends towards the car park, you’ll see some small lakes and ponds which are either seasonal alpine tarns (mountain lakes found in high elevations) or meltwater ponds.
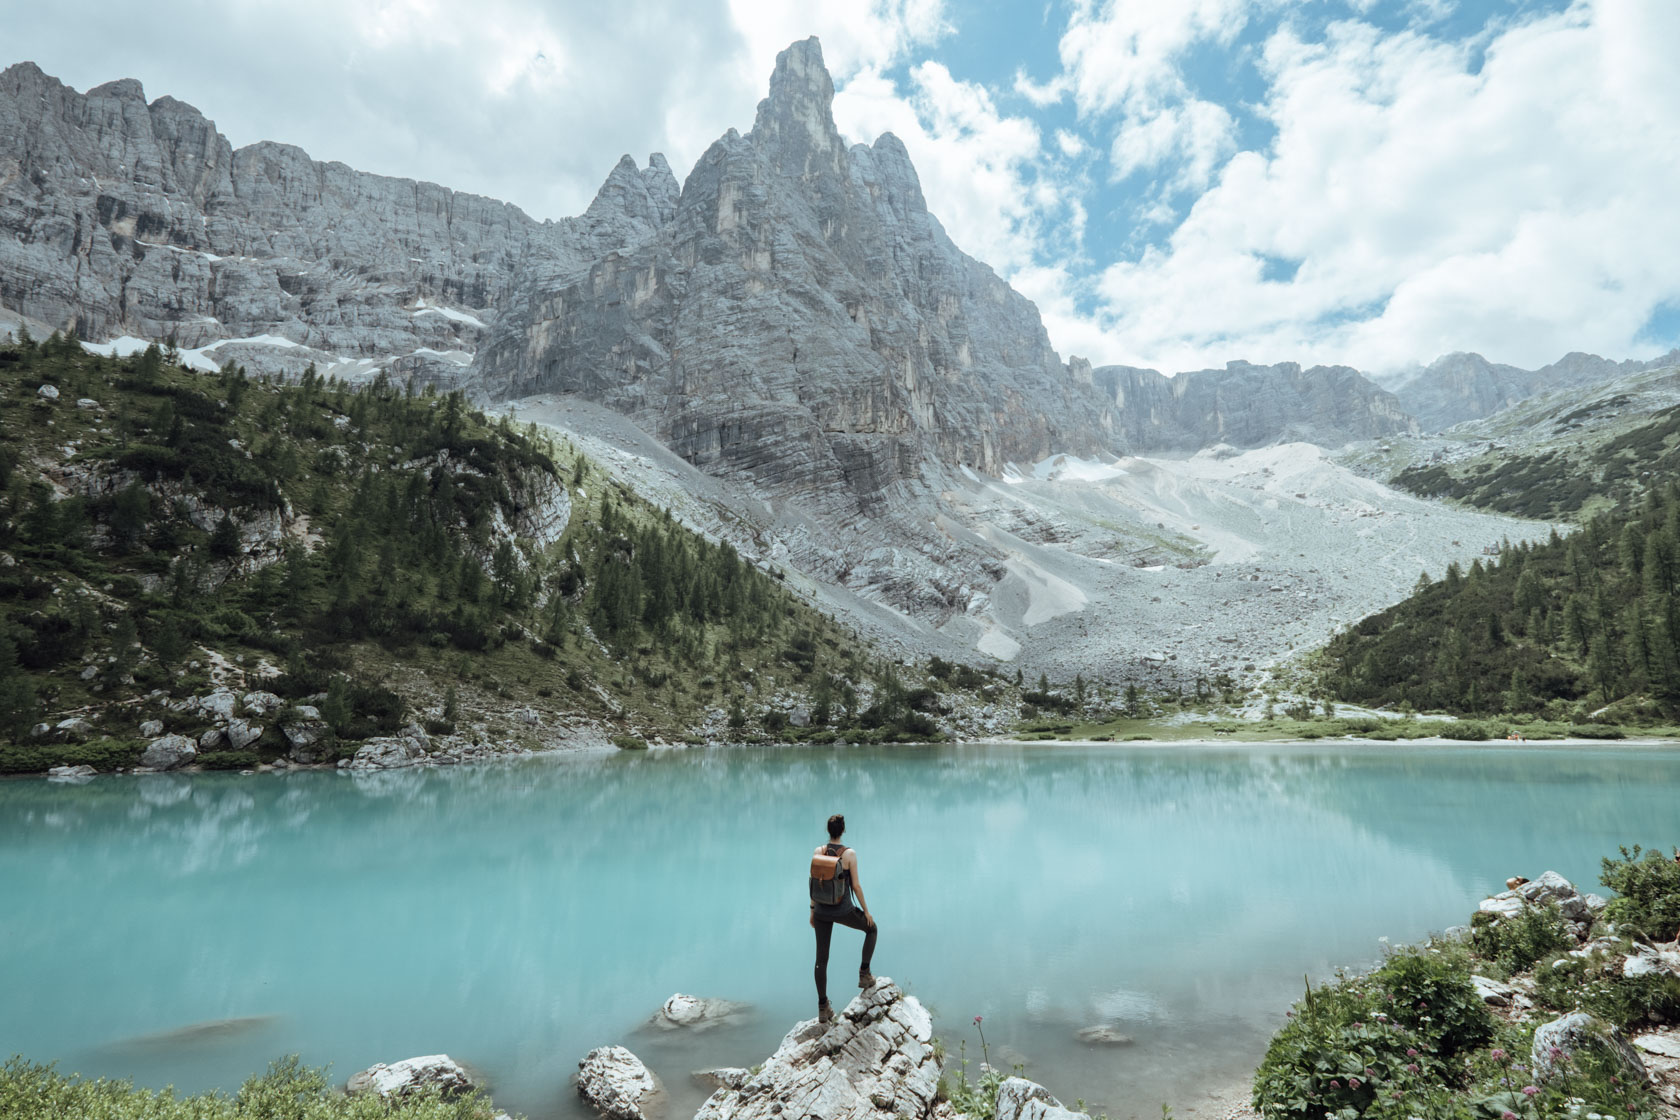
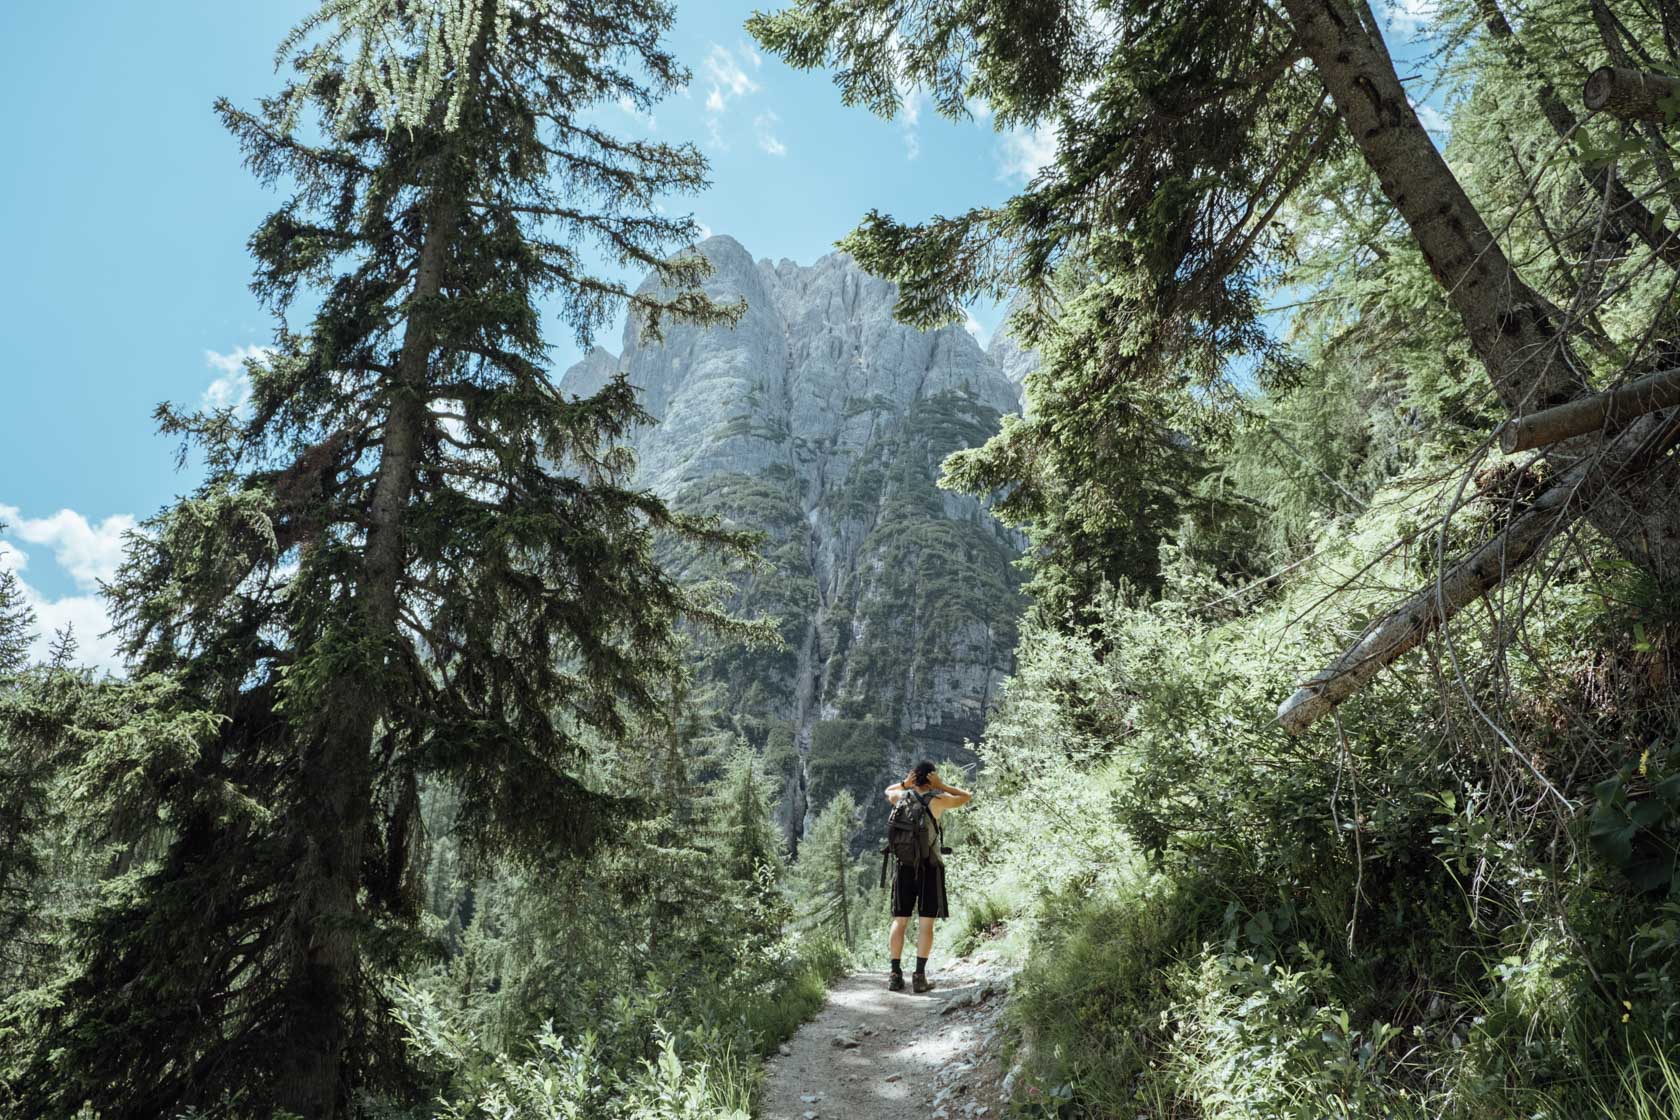
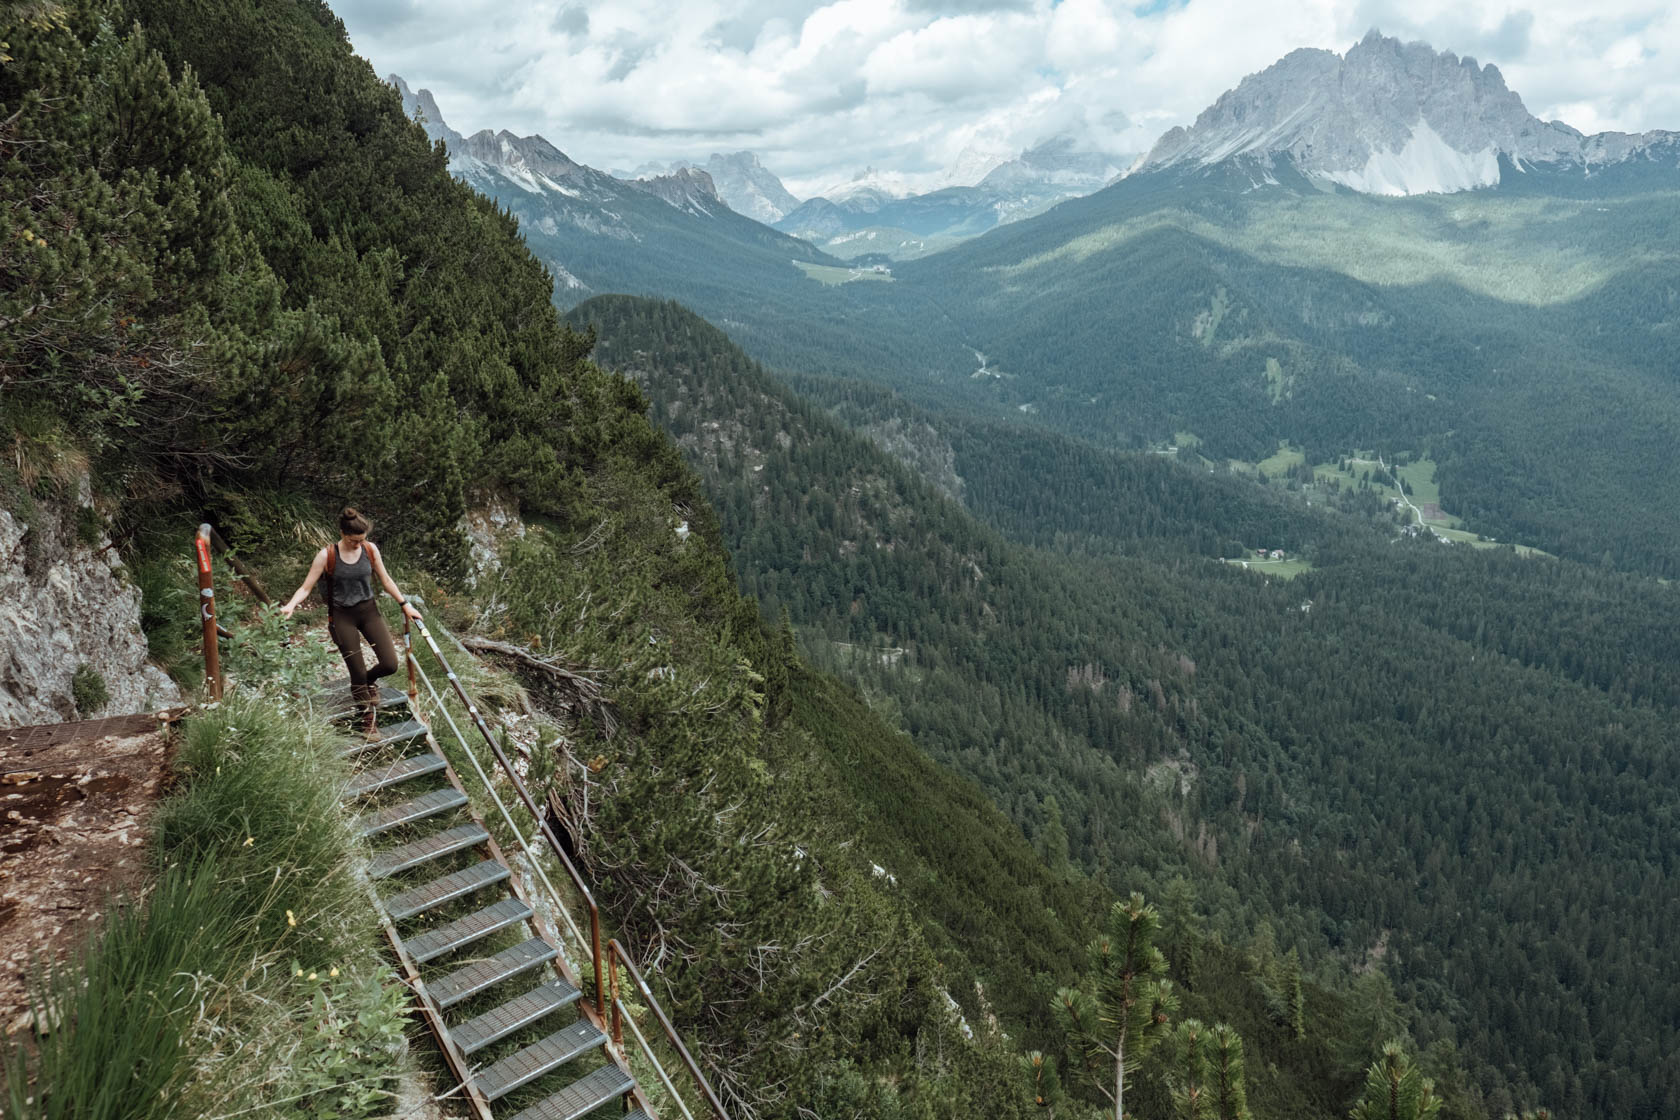
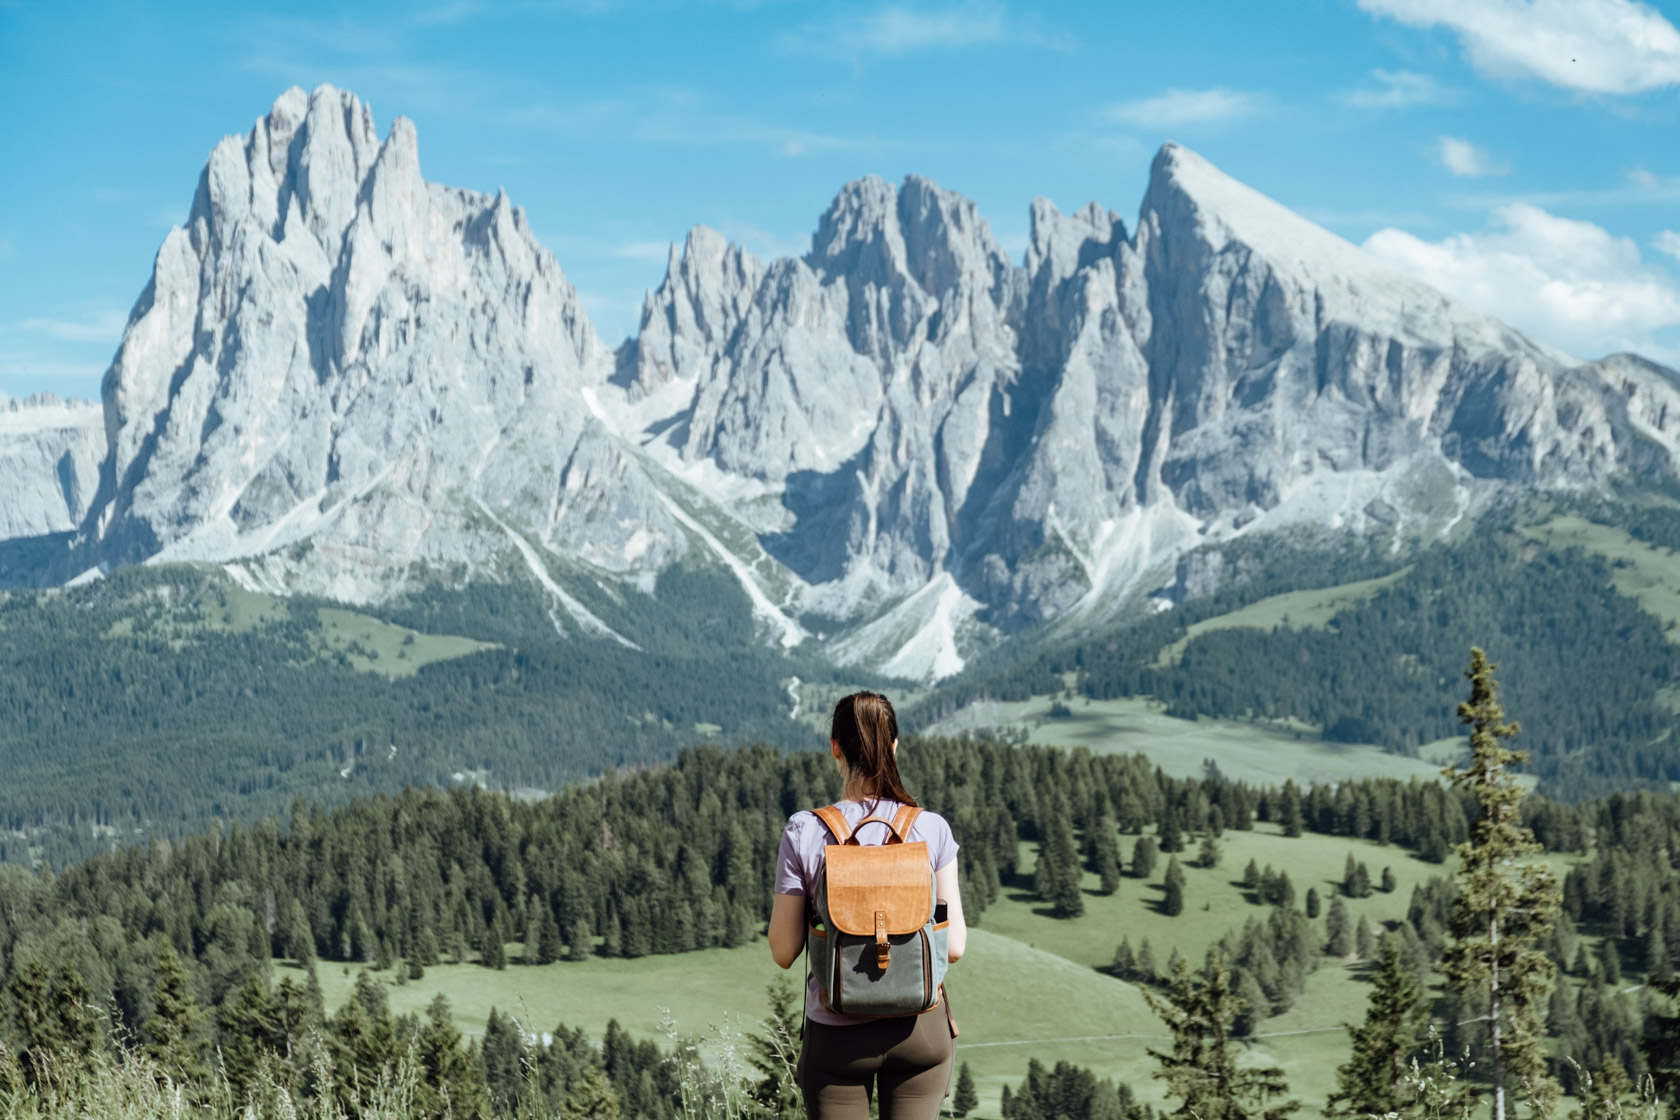
Day 3: Lago di Sorapis hike and Val di Funes
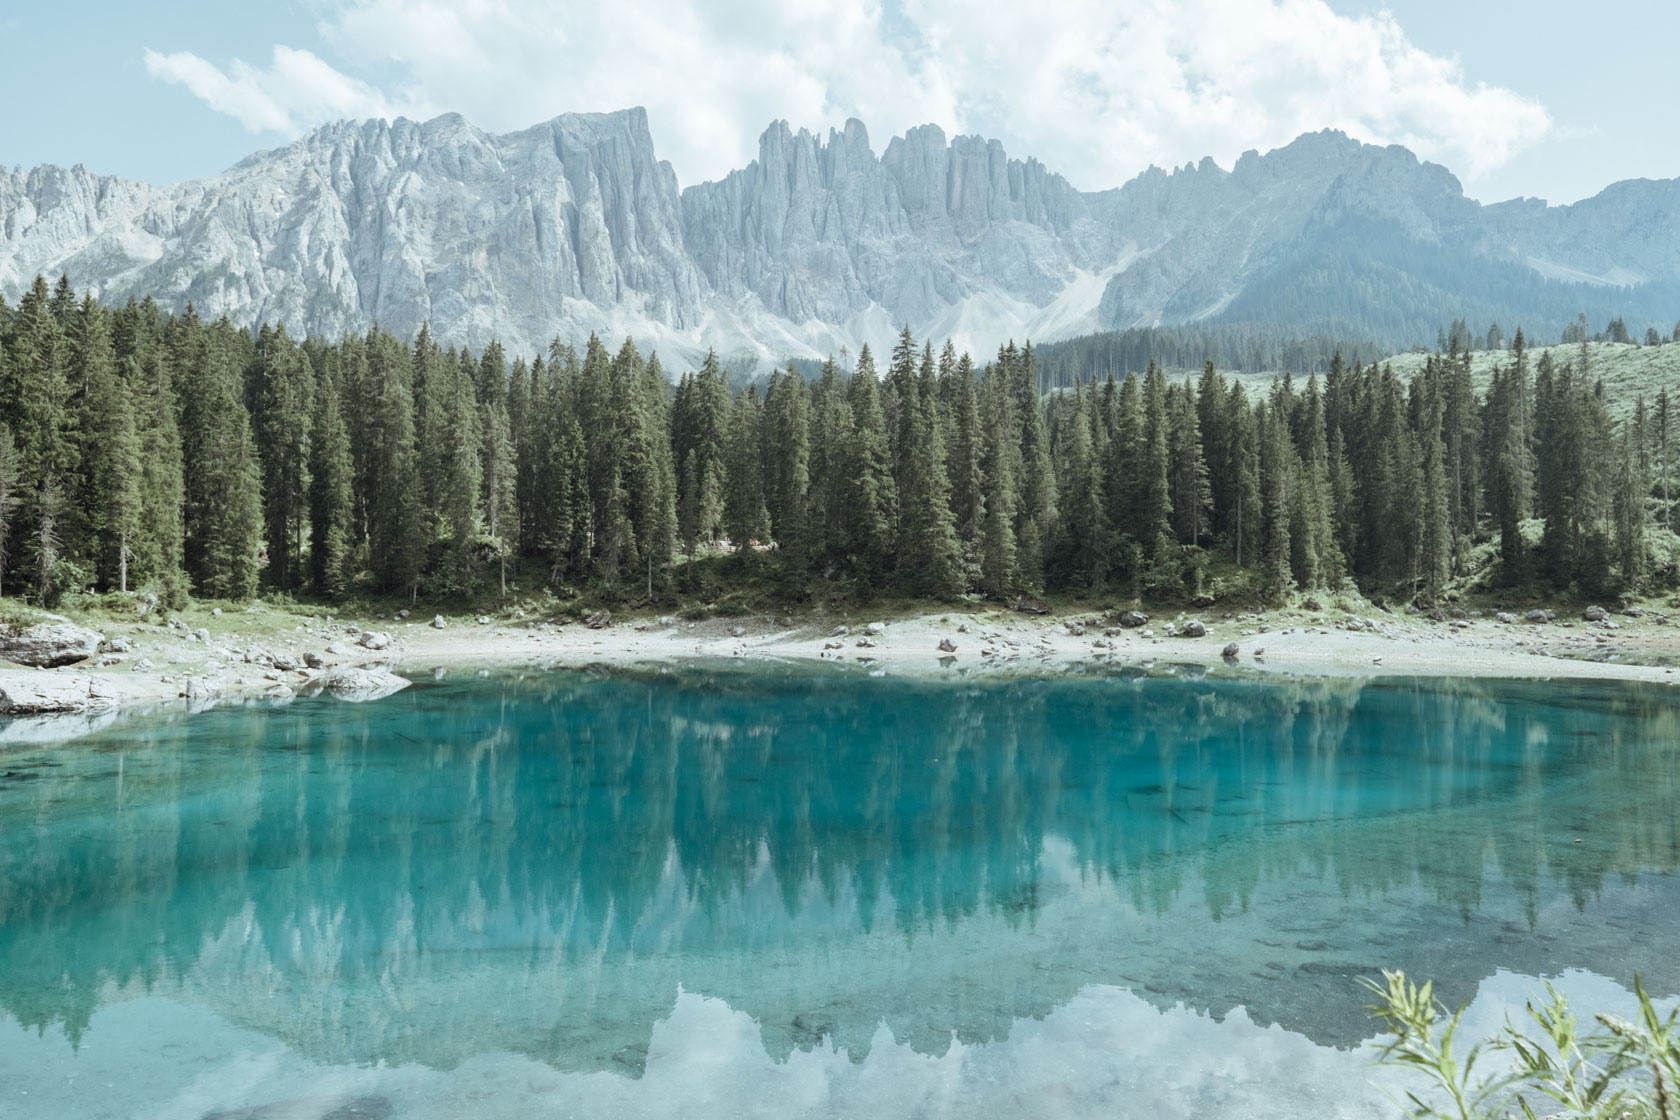
Lago di Sorapis is a stunning turquoise alpine lake, fed by glaciers and encircled by the Dolomites’ characteristically jagged limestone rocks. Especially when the sun is out, you’ll appreciate the milky-blue color of the water which comes from glacial sediment (known as “rock flour”).
Here’s an overview of what to expect on this hike:
- Trailhead: Passo Tre Croci (between Cortina d’Ampezzo and Misurina)
- Route: Out and back via Trail 215. Be careful to use the recommended route, or you can end up going up sheer cliffs on a much more challenging hike.
- Distance: ~11 km round trip, though my Strava activity says 12.9km.
- Elevation gain: ~460 meters, though my Strava activity says 392m.
- Time: 4 to 5 hours total. We spent 3:20 moving.
- Difficulty: Moderate to challenging
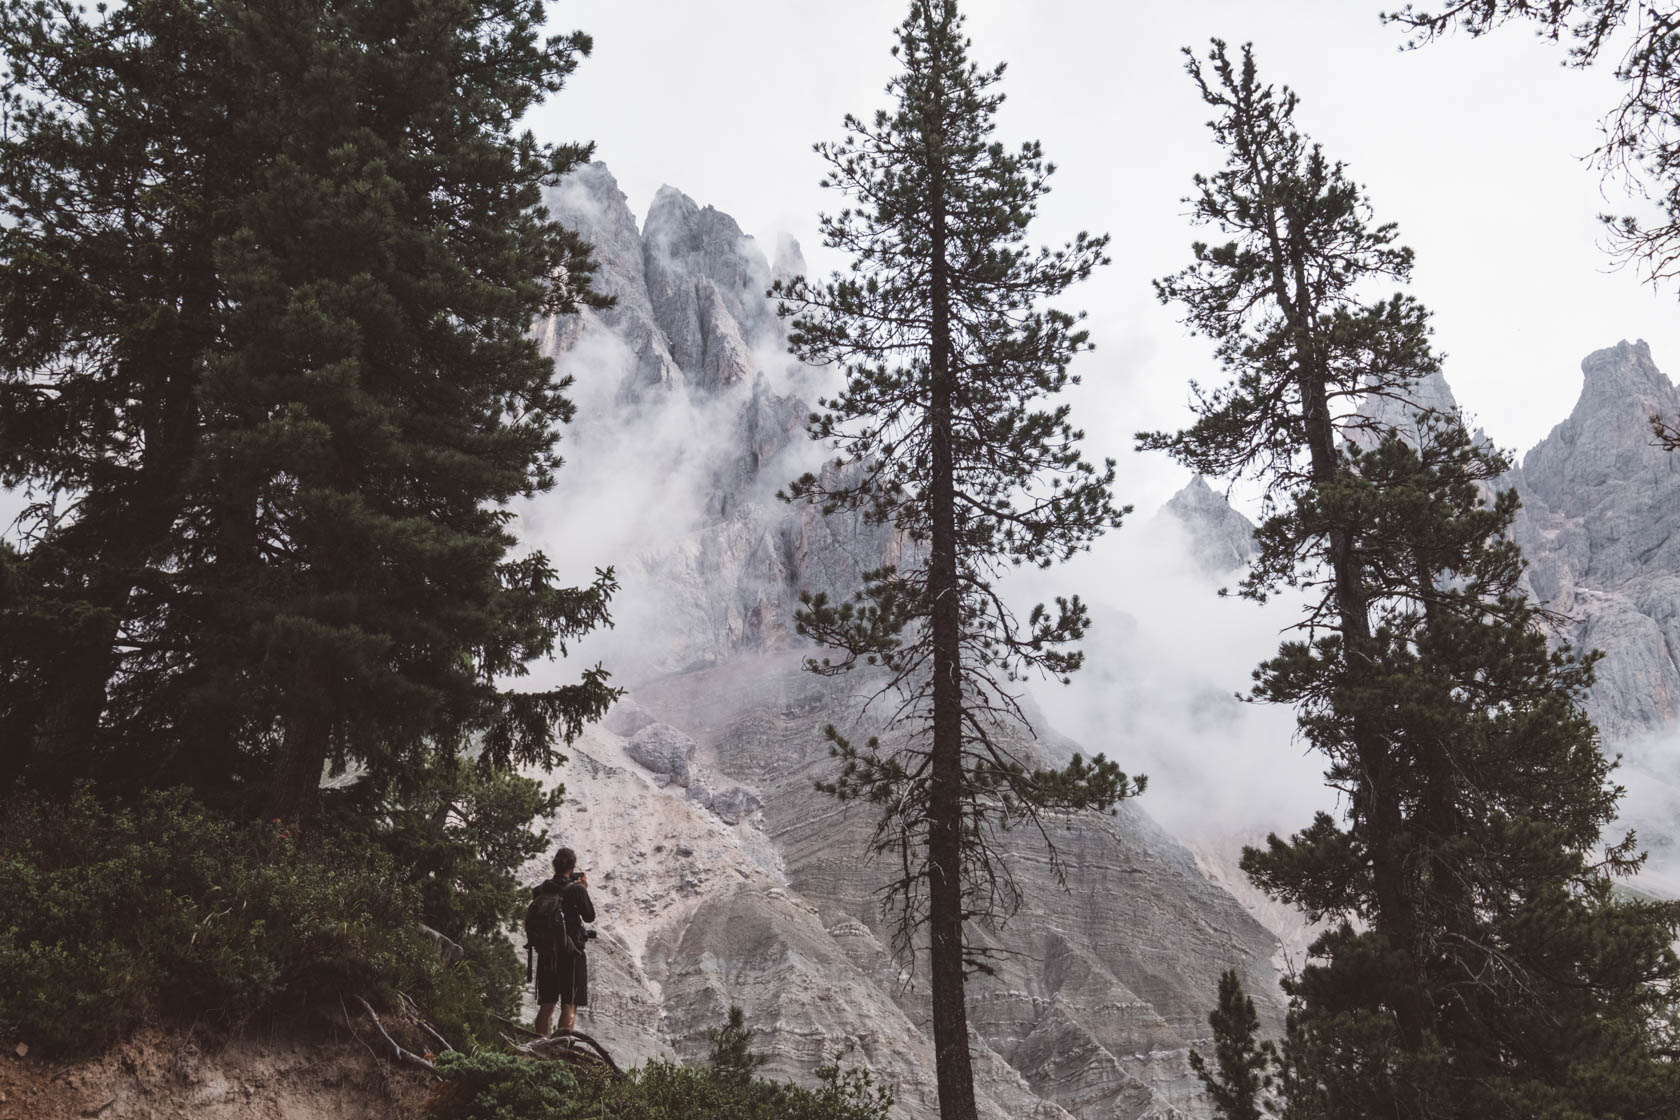
While the trail isn’t technically difficult, it does have narrow sections with steep drop-offs and metal cables for support in certain areas like this:

While sections like this have earned this hike the reputation as one of the “world’s most dangerous hikes”, the reports have been greatly exaggerated. Clearly this path would not suitable for small children, but overall the hike isn’t particularly dangerous if you are careful and don’t do anything stupid like taking selfies at the edge of the path. I could see it being more challenging if the rocks are slippery though, so I’d definitely avoid this path during or after rain.
Once you reach the lake, you can follow a loop path around it, giving you multiple photo angles: from jagged mountain backdrops to quiet, reflective corners. The lake’s signature milky turquoise color will be most vibrant in early to mid-summer, when water levels are still high. While you might want to visit in Autumn for some stunning Fall foliage, be aware the lake will be mostly dry at that point.
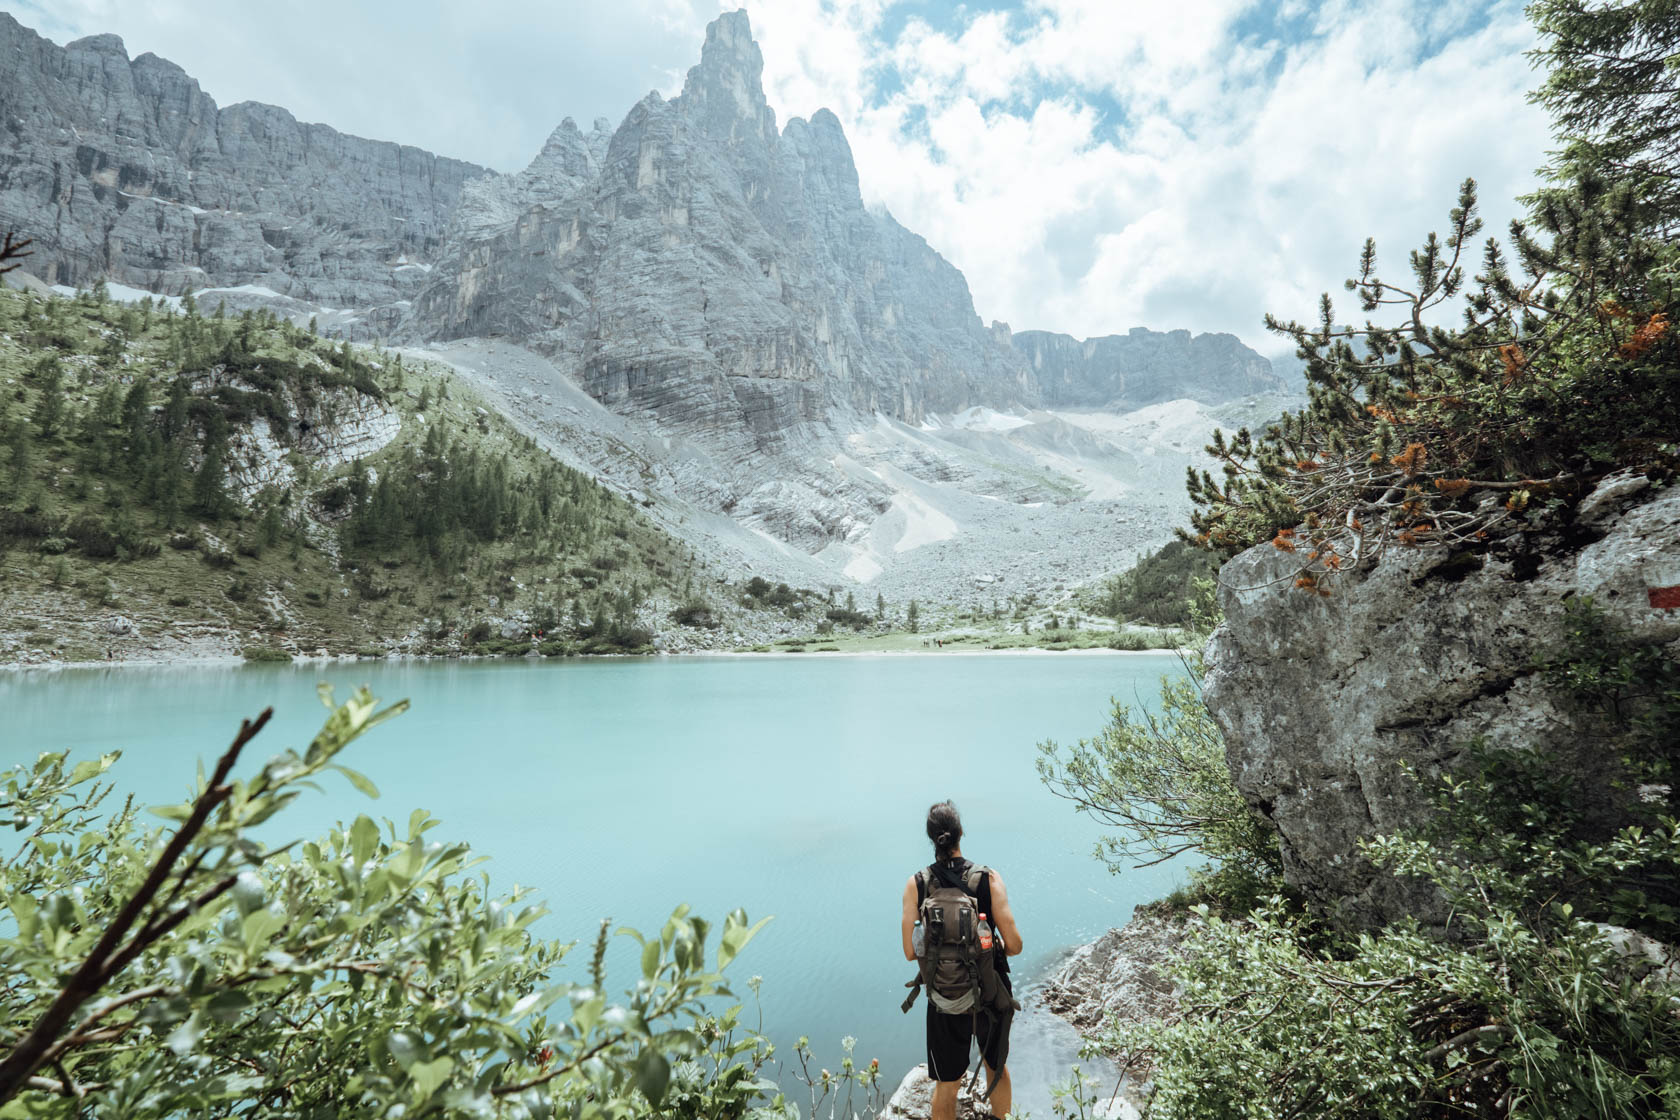
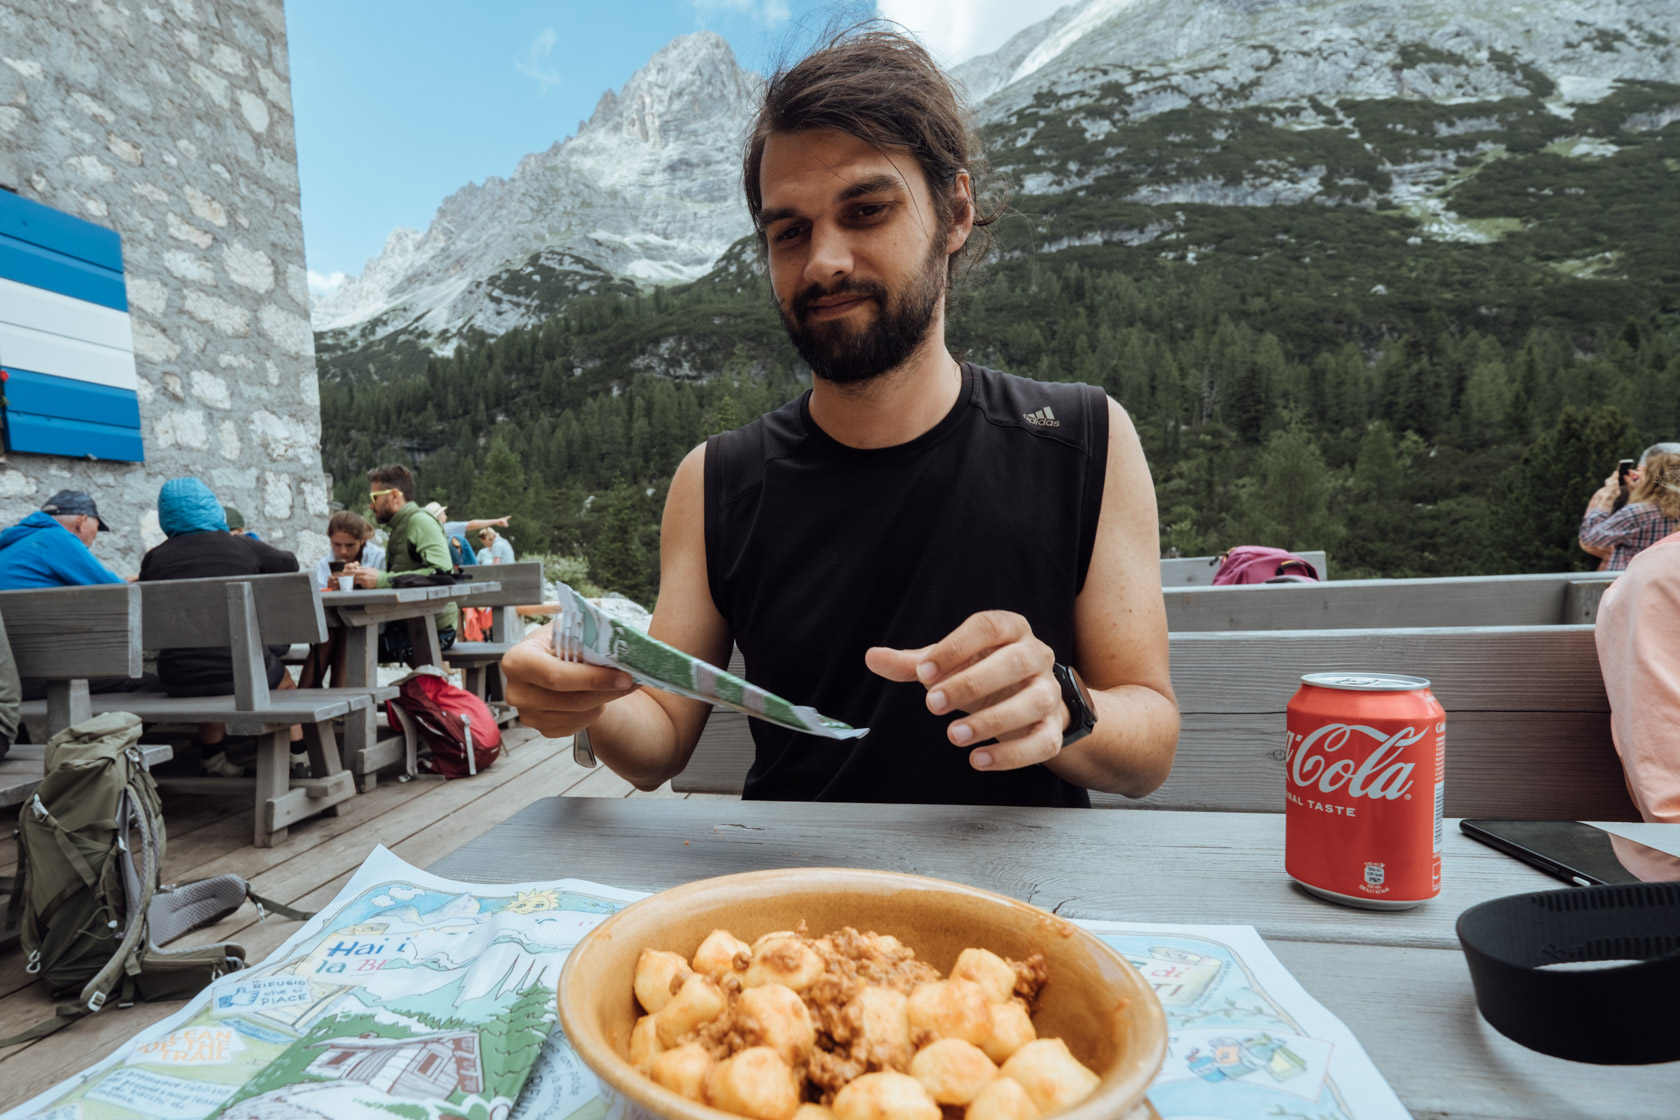
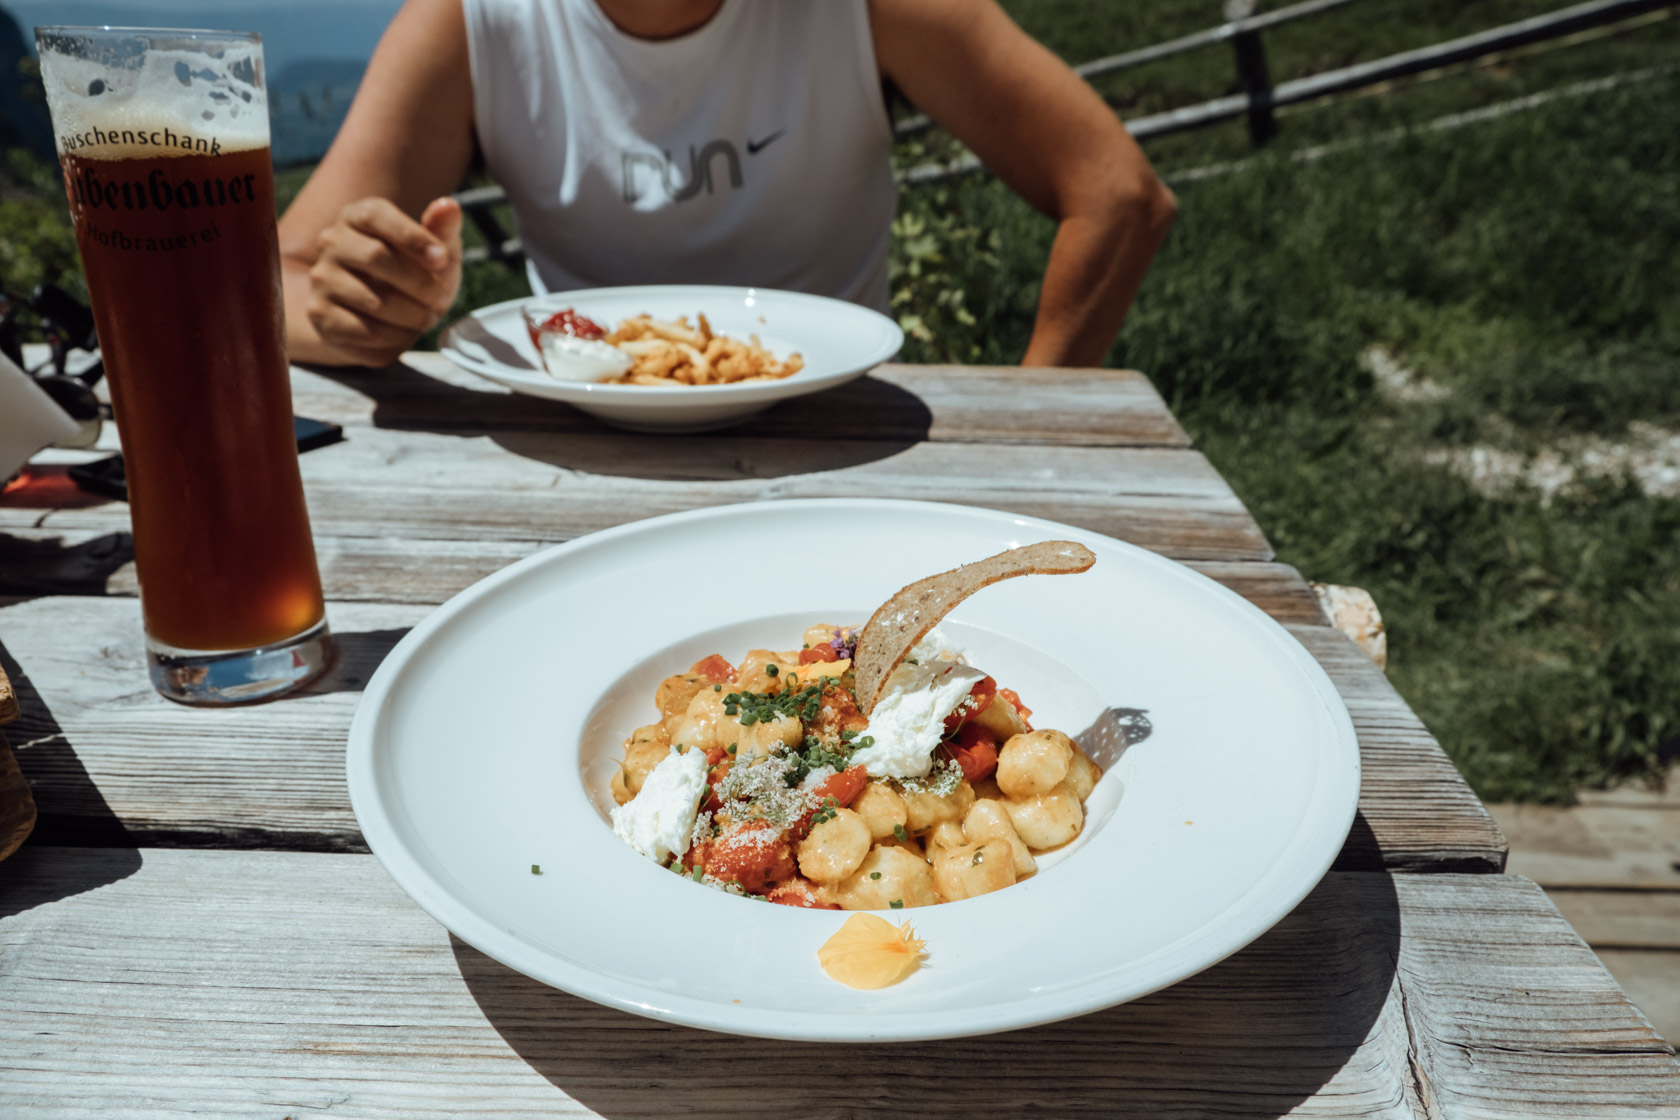
You can also get some basic fare from Rifugio Vandelli . I probably had the best-tasting gnocchi of my life there – not culinarily, but because I was beyond ready to sit. Even at what feels like the top of the world, it was still possible to order an Aperol Spritz (albeit in a plastic cup).
After refuelling, you’ll return the way you came. As usual, the hike back feels a lot shorter and easier. Start as early as possible to avoid the crowds, and leave the rest of the day open for more adventures.
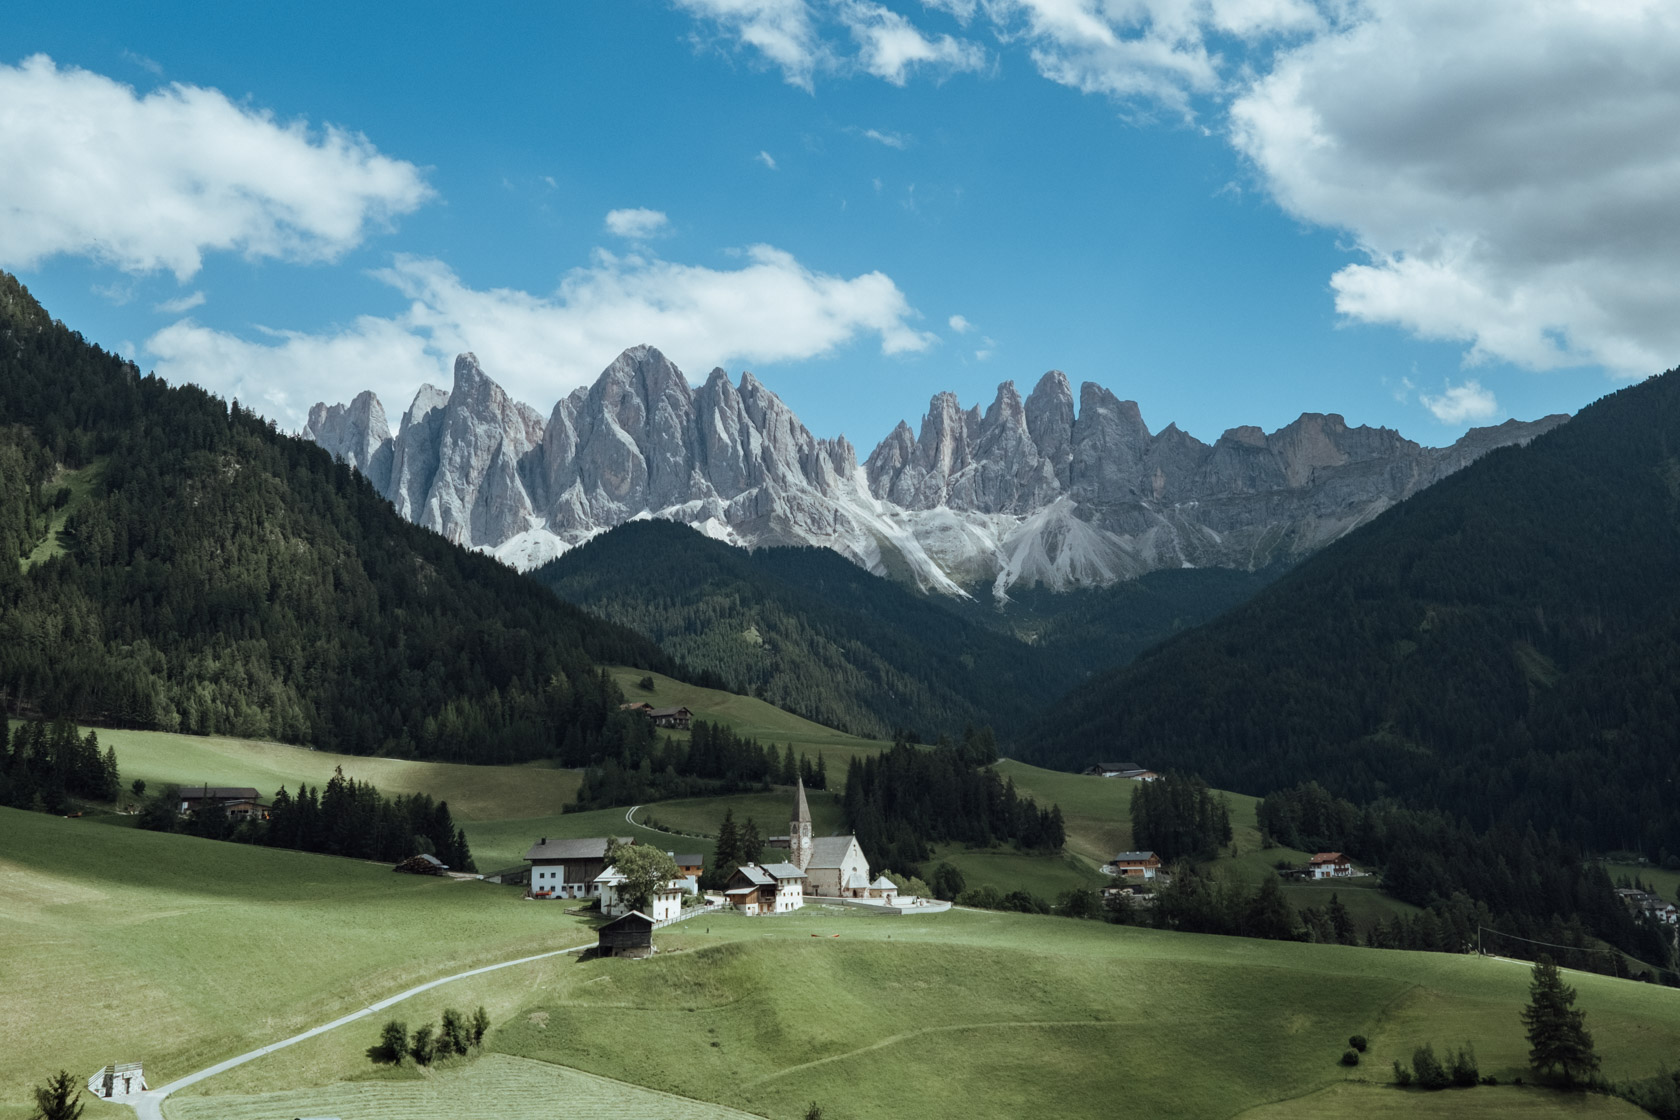
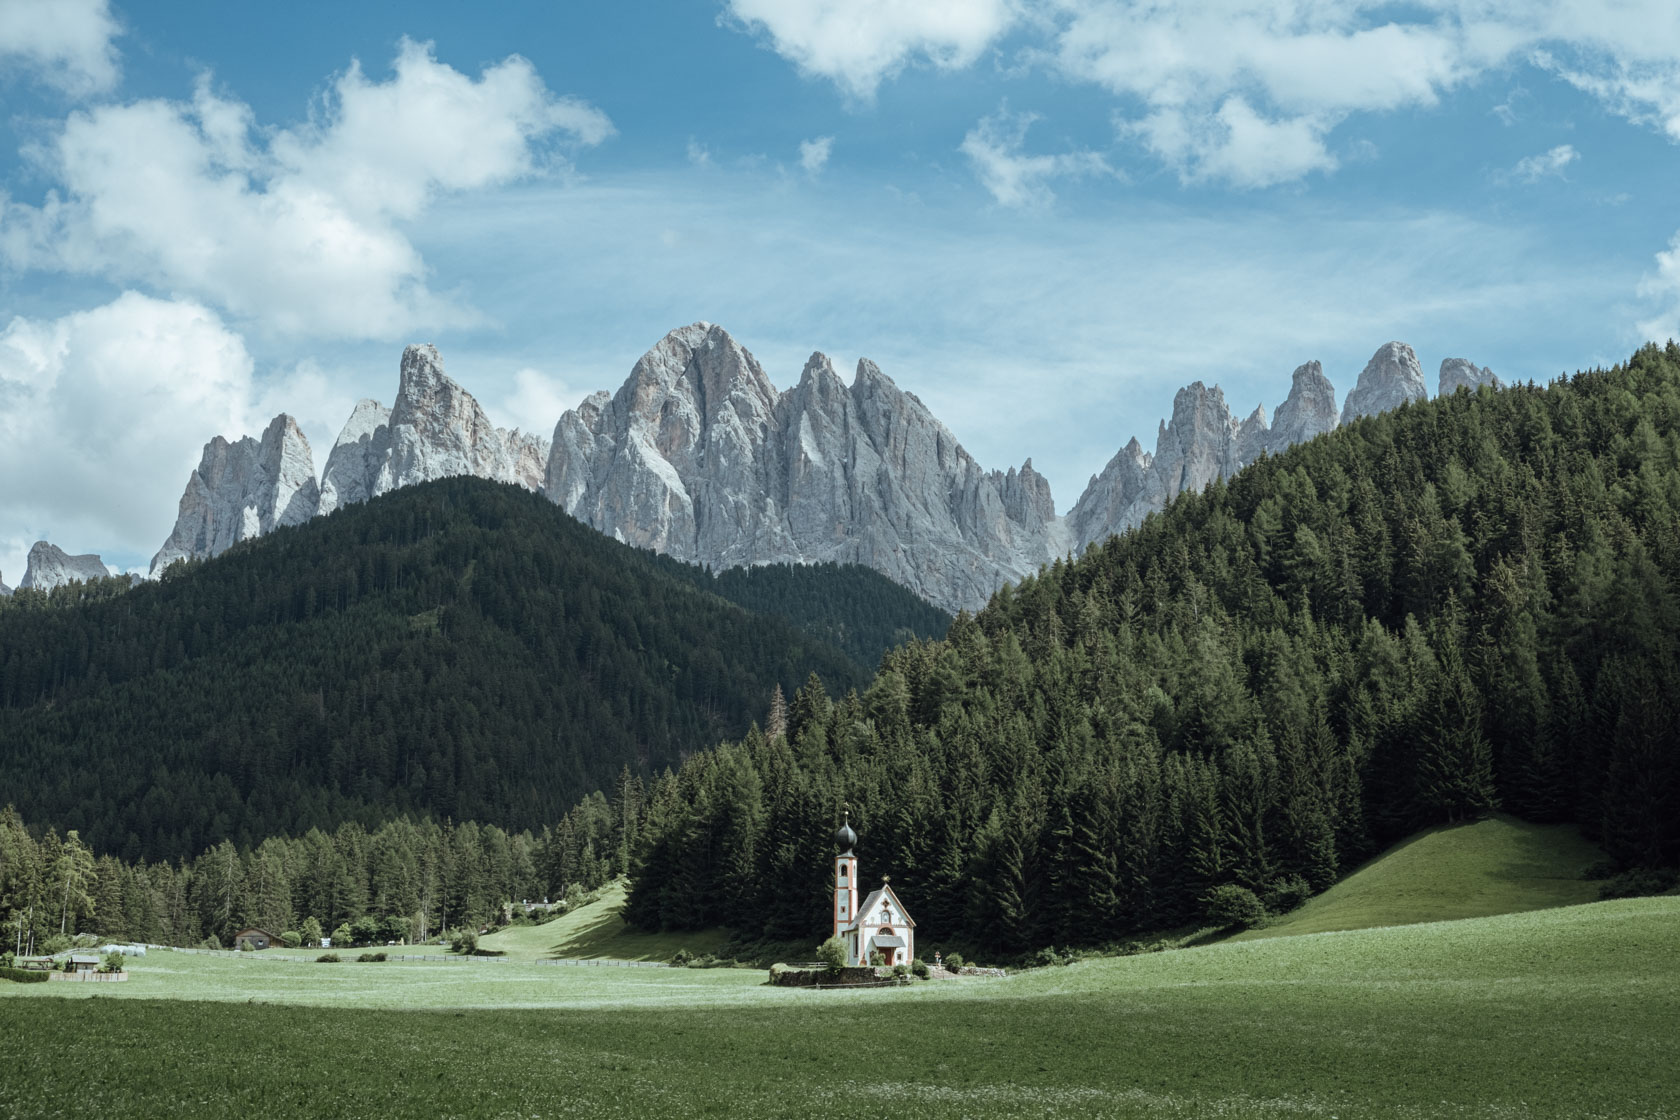
With our main trek for the day behind us, we can take in some other key photos spots in the Dolomites that are much easier to reach: Val di Funes and Church of St. John .
Here’s a summary of this (much less strenuous) hike:
- Starting Point: The village of Santa Maddalena (St. Magdalena)
- Trail Name: Often referred to locally as the Panoramaweg (Panorama Trail)
- Distance: ~1-2 km round trip
- Elevation gain: Minimal (~100 m)
- Difficulty: Easy, family-friendly
The path gently climbs through open grassy fields, offering sweeping views of the Odle peaks, local farms, and the church spires in the valley below. You’ll pass a few benches and photo platforms along the way. The best time to do this hike is between late afternoon and sunset because you’ll get the sun on the mountains that way.
For another view of the same mountains, head to the Church of St. John . While you have to pay to walk out to the church, there’s an elevated viewing platform on the way that will let you snap this iconic Dolomites shot:
Finally, spend the rest of the day exploring Cortina d’Ampezzo. Eat something delicious, wander through the streets, and (if you happen to be there in 2025) take a peak at what they happen to be doing to prepare for the Olympics.

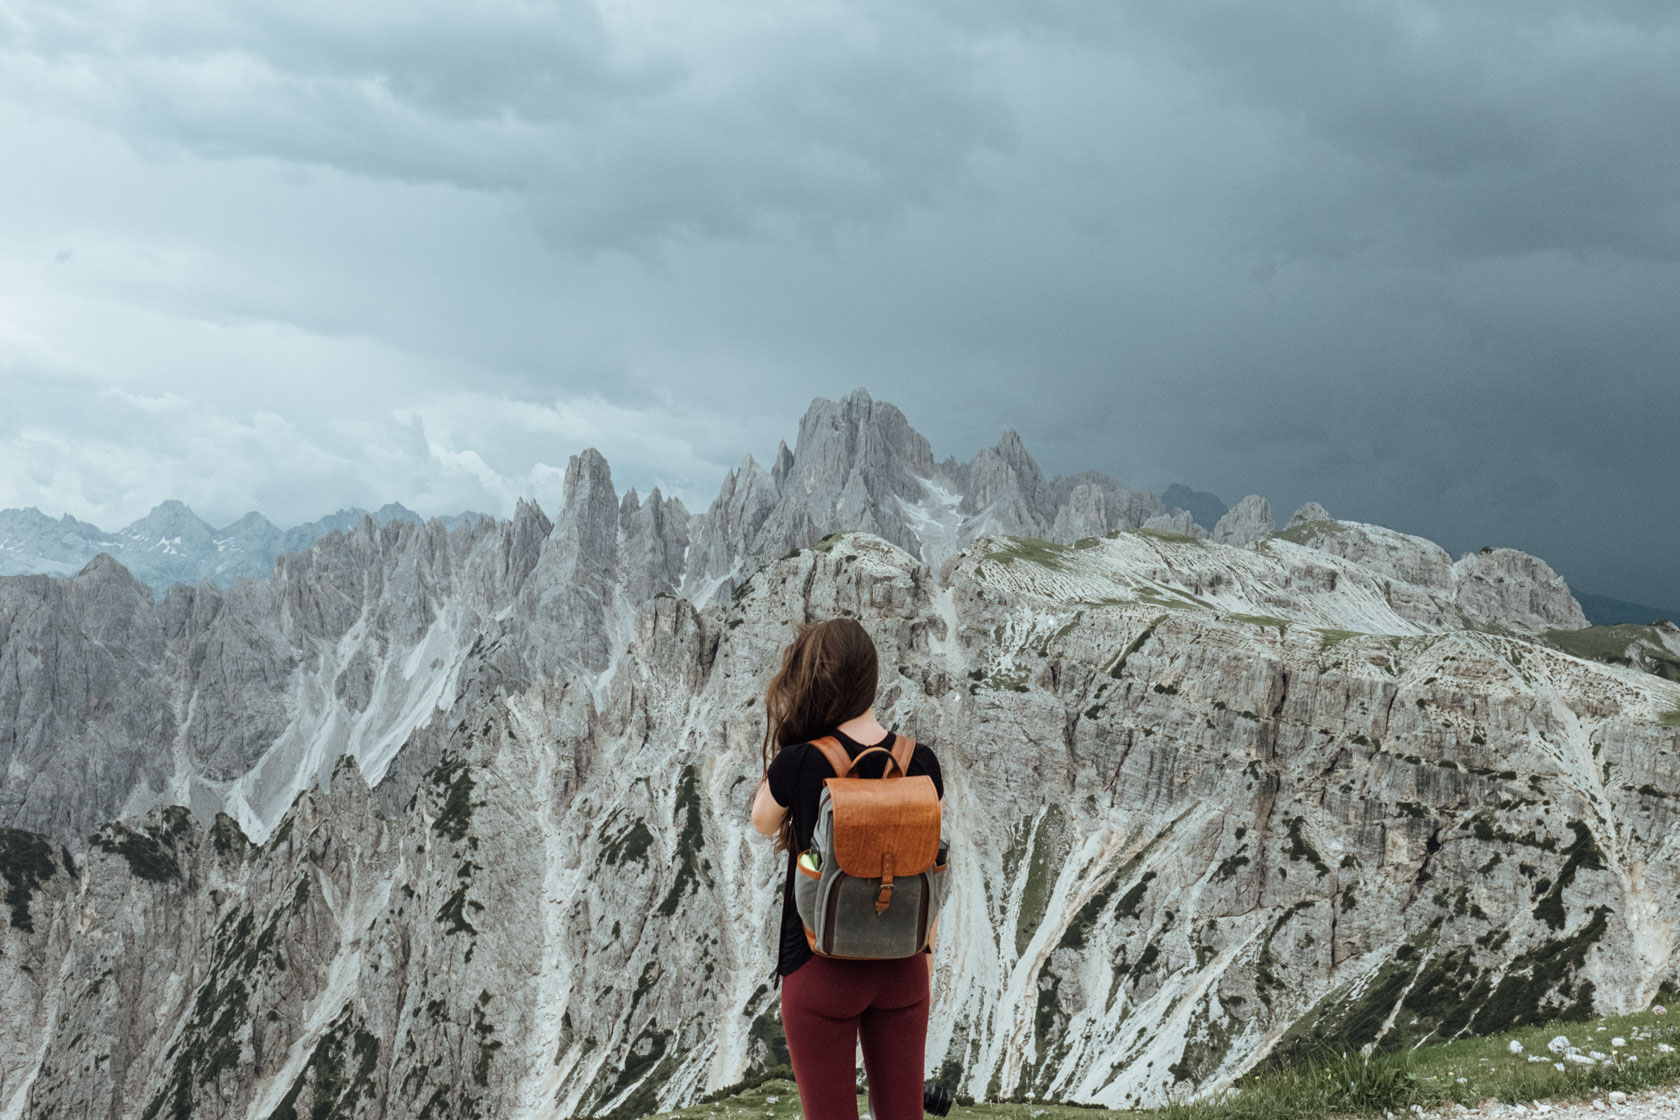
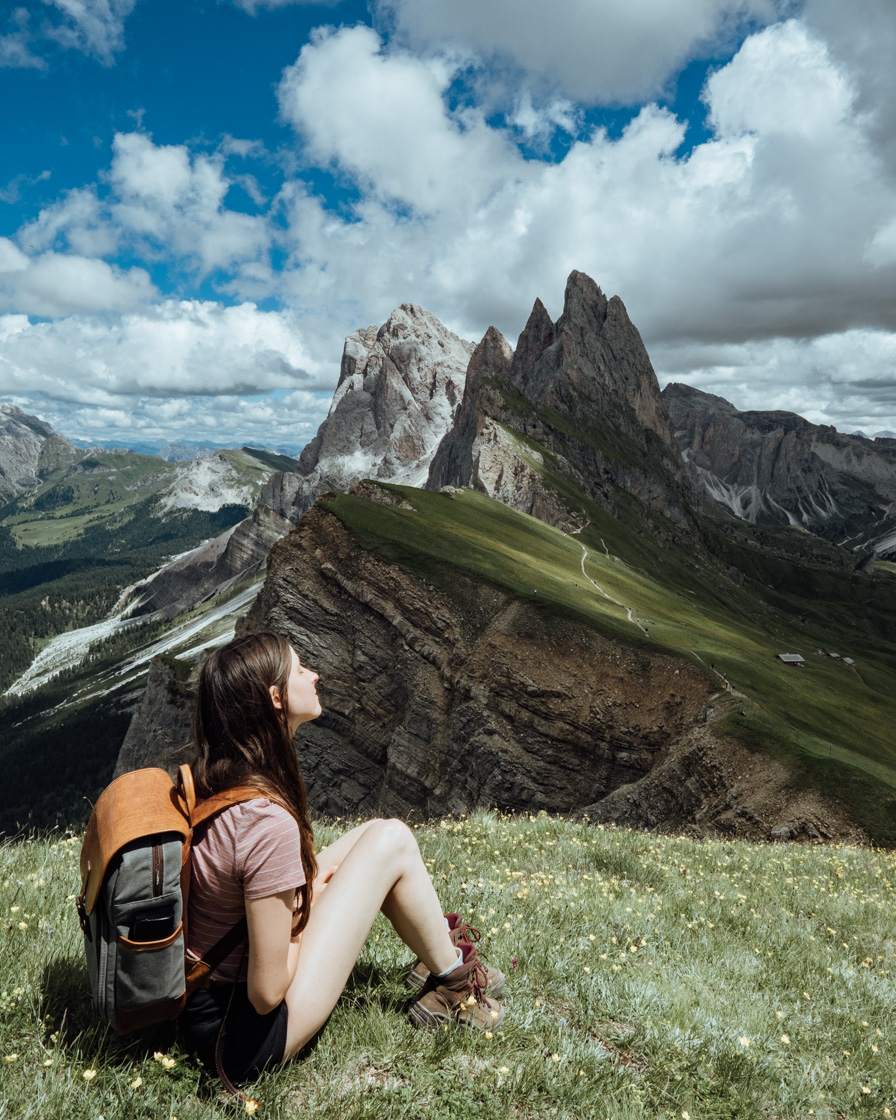
Day 4: Seceda
You’ve seent his before: Seceda, one of the most recognizable viewpoints in the Dolomites thanks to the sharp, spikey ridge and the steep drop offs on the other side. From time to time, tourists trying to take portraits or selfies from the edge fall off cliff and crash onto the rocks below. Be very, very careful and don’t leave the marked path to stay safe.
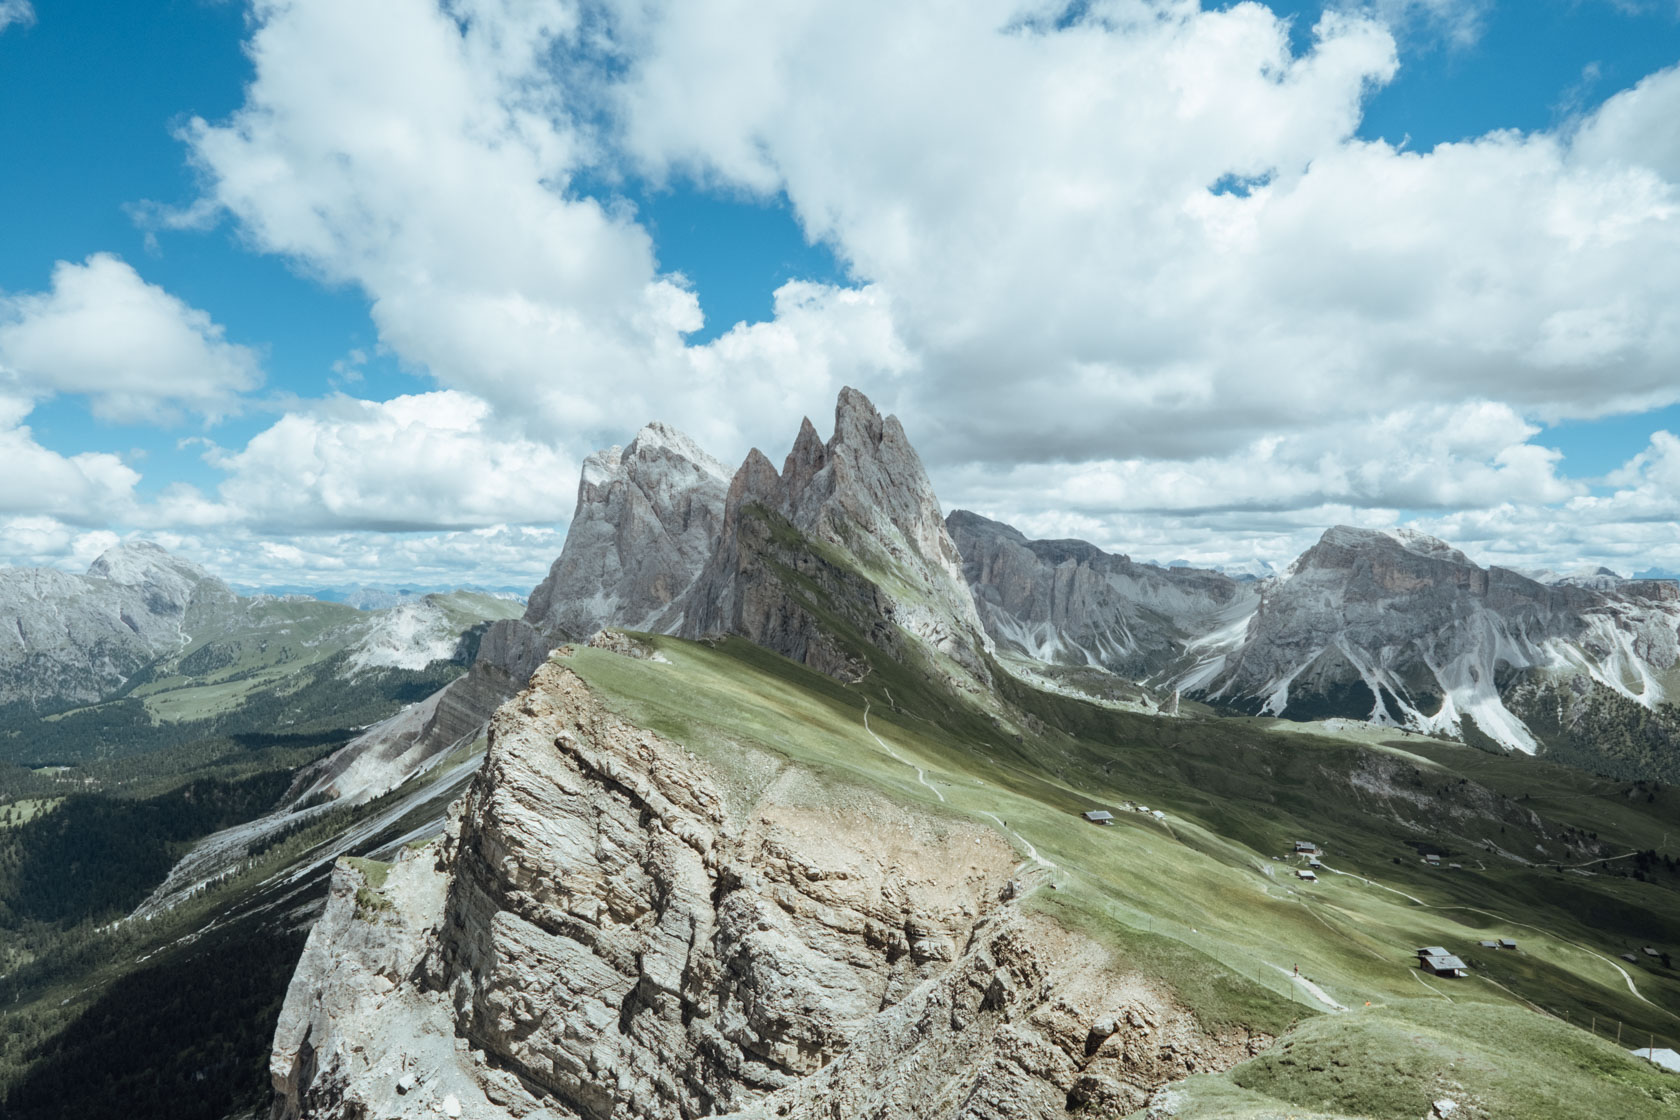
The most popular way to reach the Seceda ridgeline is from Ortisei , where you take two lifts: first a gondola to Furnes, then a steep cable car directly up to the summit at around 2,500 meters. This route is ideal if you’re short on time or energy – you’ll be standing on the iconic ridgeline just minutes after stepping off the lift. From there, you can walk along the ridge or simply relax at the top with an Aperol and a view.
The second option (which we did) starts from Santa Cristina , where you take the Col Raiser cable car to about 2,100 meters. From there, it’s a moderate 540-meter ascent to the Seceda summit on wide alpine trails. The route is quieter and more gradual than you might expect, with panoramic views and a few scenic rifugios along the way. It’s a great choice if you want to earn your view and escape some of the Ortisei crowds.
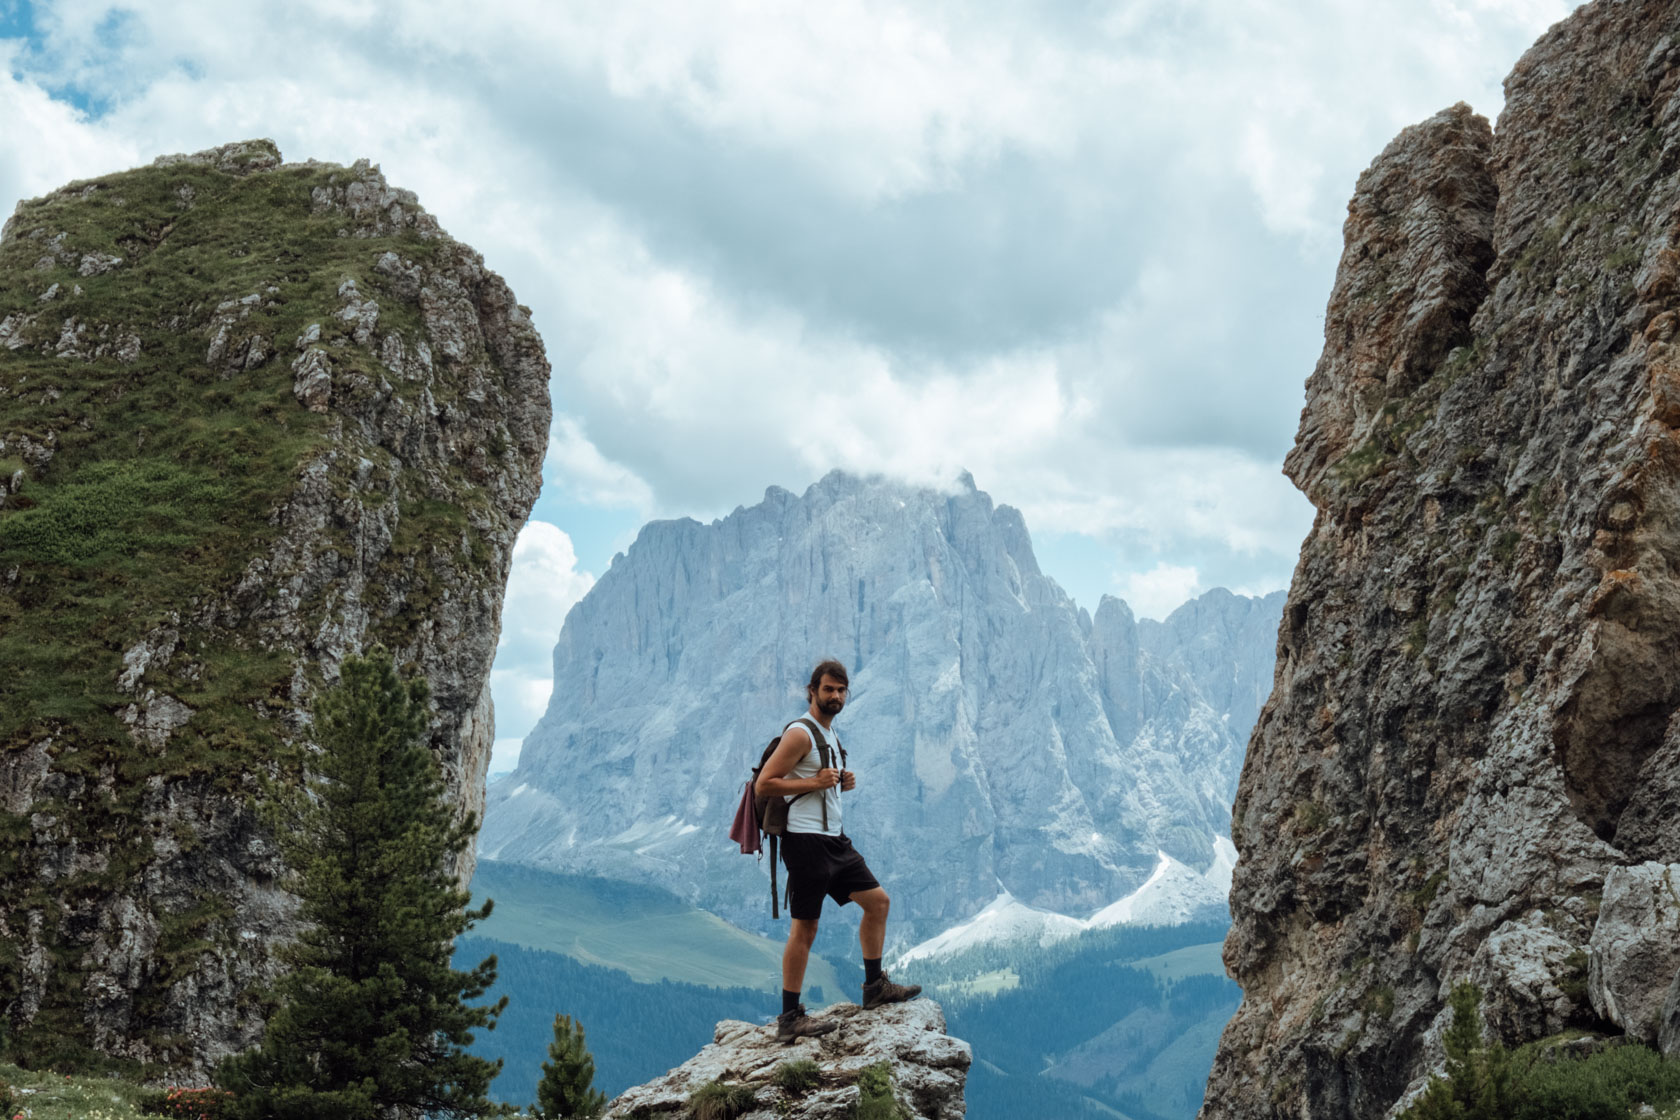
Soon after you start your descent back down, you’ll pass by this location where you can stand framed by rocks on either side and with the Dolomites in the background. The general area is called Pieralongia , known for the rocks jutting out of the ground.
Finally, you’ll slowly wind back down towards Col Raiser. Along the way, two alpine huts will be available (Rifugio Troier and Rifugio Firenze ). The latter had a very welcoming, sunny terrace that made the perfect pit stop towards the end of the trek before finally reaching the cable car to descend back to the bottom.
Day 5: Alpe di Siusi and Ortisei
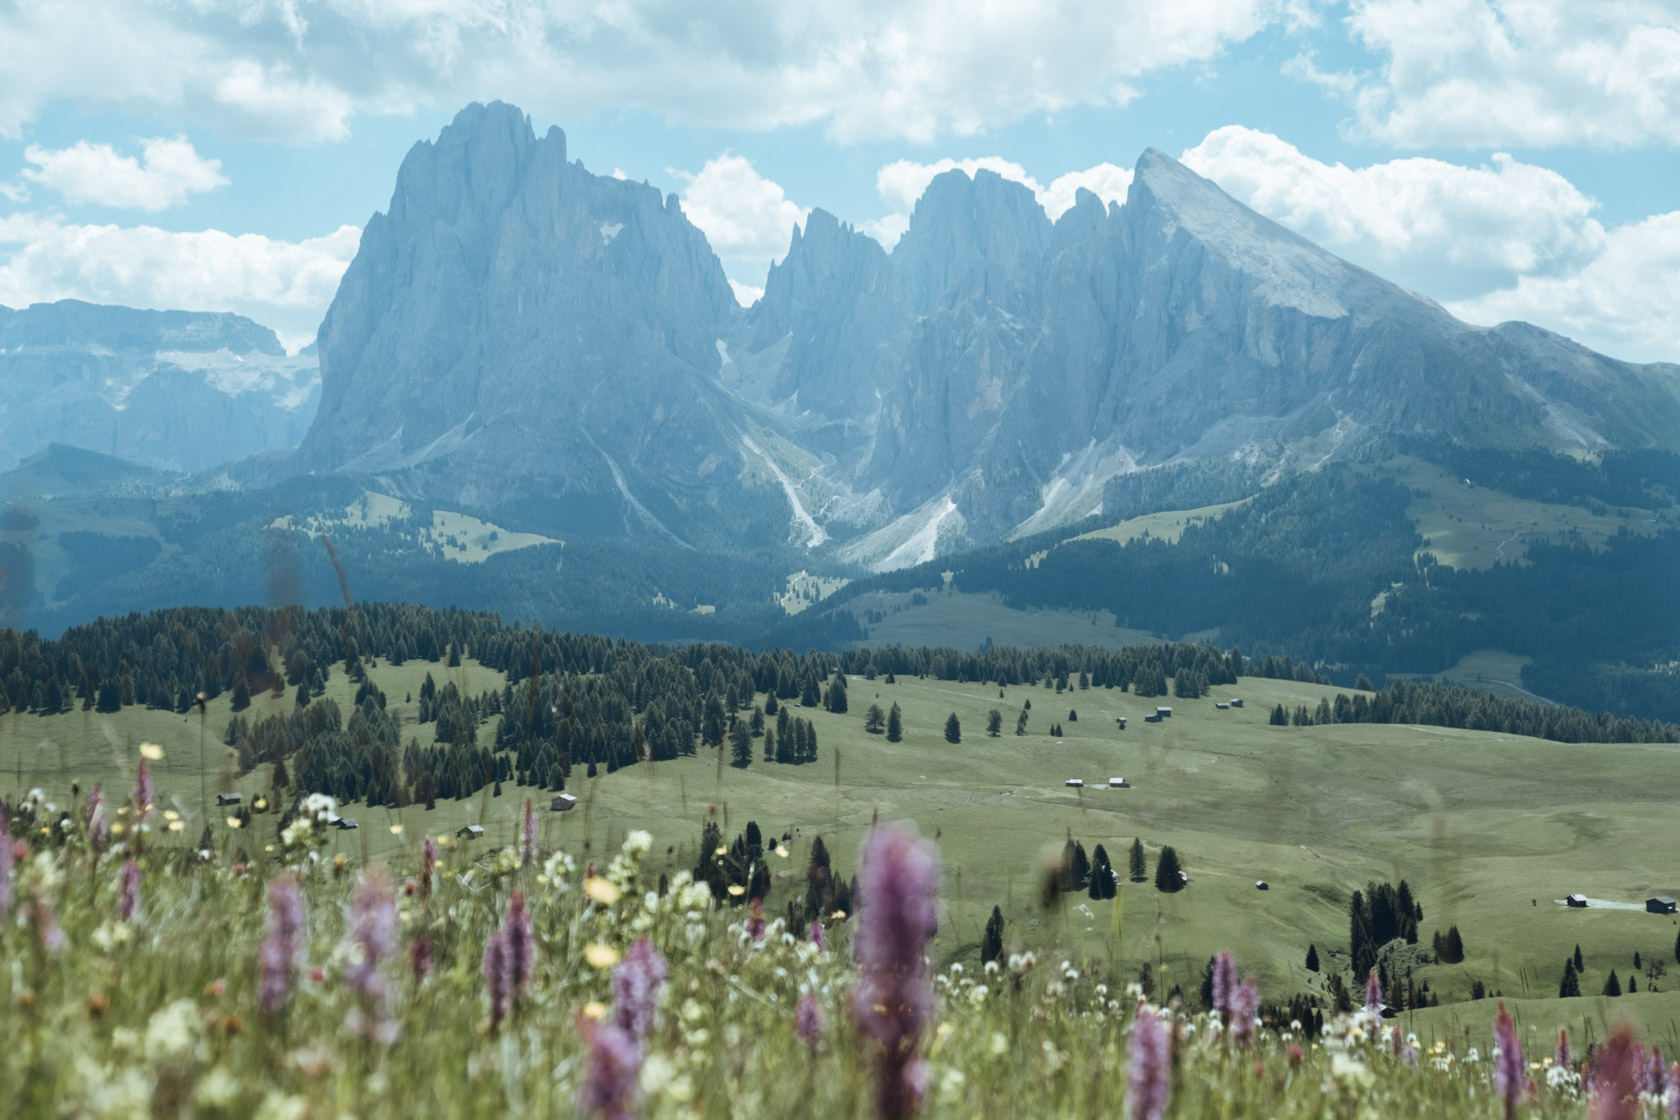
Alpe di Siusi (“Seiser Alm” in German) is yet another famous, scenic location in the Dolomites. At over 56 square kilometers, it’s the largest alpine pasture in Europe and part of a UNESCO World Heritage area. Over the summer, you’ll see abundant yellow, white, and purple wildflowers dotting the meadow. For that sight, the best time to come to the Dolomites for flowers is in July.
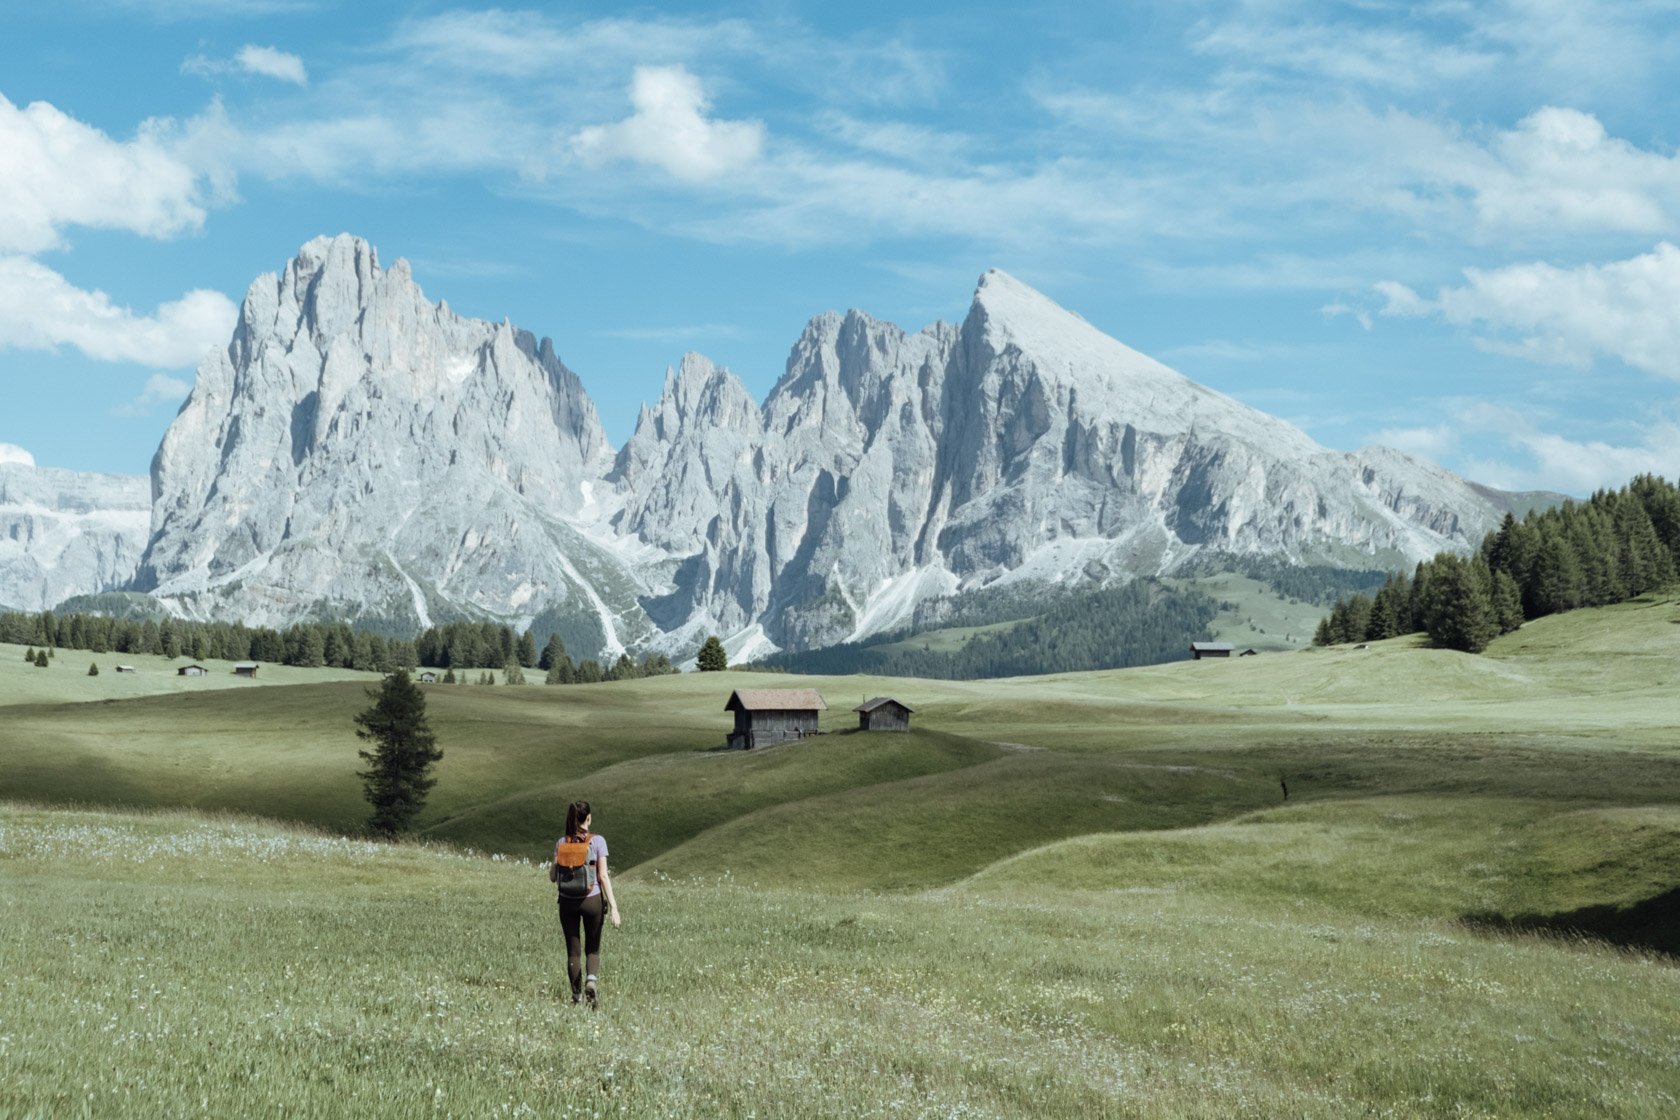
Importantly, Alpe di Siusi is car-free during the day unless you’re local or staying overnight in accommodation located in the meadow. Which means that to reach the top, you’re restricted to using the cable car. The cable car opens at 8:30am and has it’s last departure back down at either 5:30 or 6:00pm. To spend the full day there, you’ll want to arrive in the morning to make the most of it.
Here’s a summary of the hike we did throughout Alpe di Siusi:
- Route: Circular hike from the lift from Ortisei, across Alpe di Siusi to Compatsch and back
- Distance: 11.5 km
- Elevation gain: 404 m
- Total time: 5 hours 29 minutes
- Difficulty: Moderate (due to length and full sun exposure – bring water!)
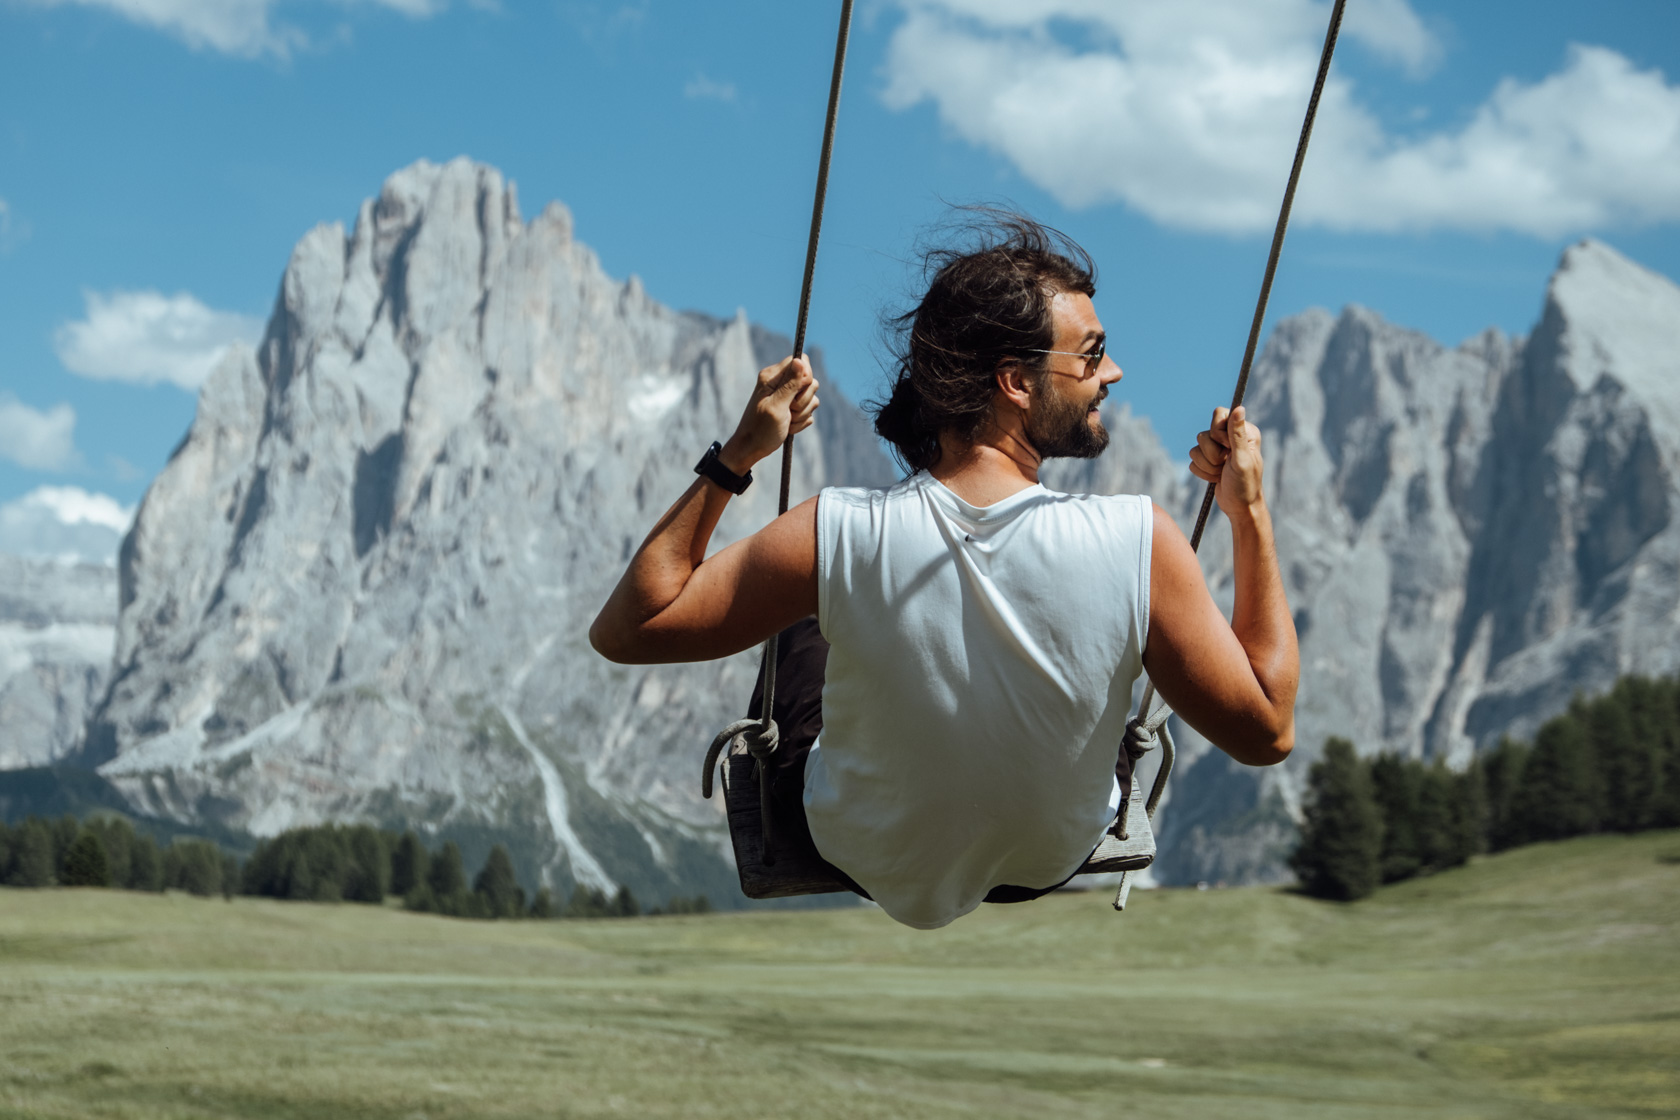
We started around 9am at the cable car and stopped at Huber Schwaige in Compatsch for lunch (fantastic Tyrolean food), and on the way back stopped at Baita Sanon for drinks and a photo opp on the swings.
There was no shade along much of the route, so be sure to bring sunscreen, water, and a hat. You’ll be rewarded with continuous views of Sassolungo, alpine huts, and a constellation of wildflowers.
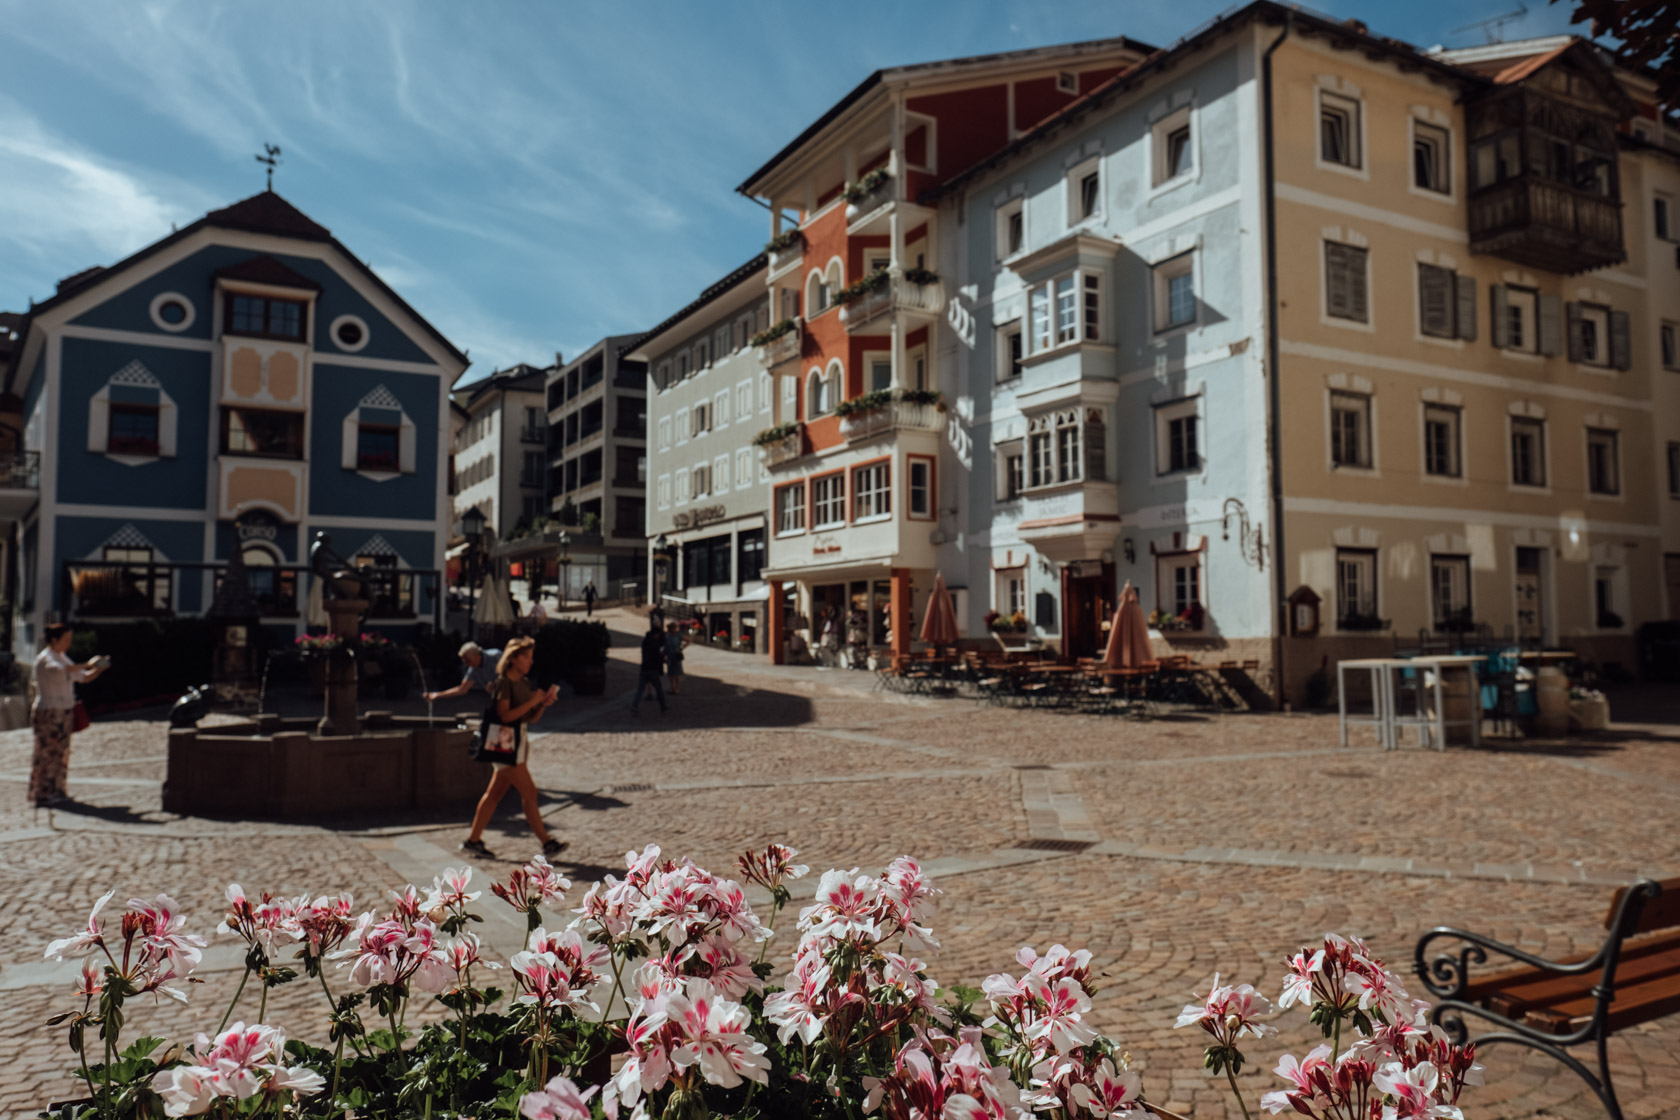
Wrap up the day by exploring Ortisei (St. Ulrich in German), one of the bigger towns in the Dolomites. If you’ve already parked for the cable car, you can continue without re-parking into the town by simply crossing the road. You’ll find a cute, car-free town center, half a dozen spots to grab a gelato, and plenty of opportunities to buy carved wood figures the town is known for. It’s also the center of Ladin culture, a third language spoken in the area in addition to Italian and German.
While busier than Santa Cristina, it’s a popular place to base yourself since Seceda and Alpe di Siusi can both be reached from town without a car.
Day 6: Sassolungo, Carezza Al Lago, and St. Valentin Church
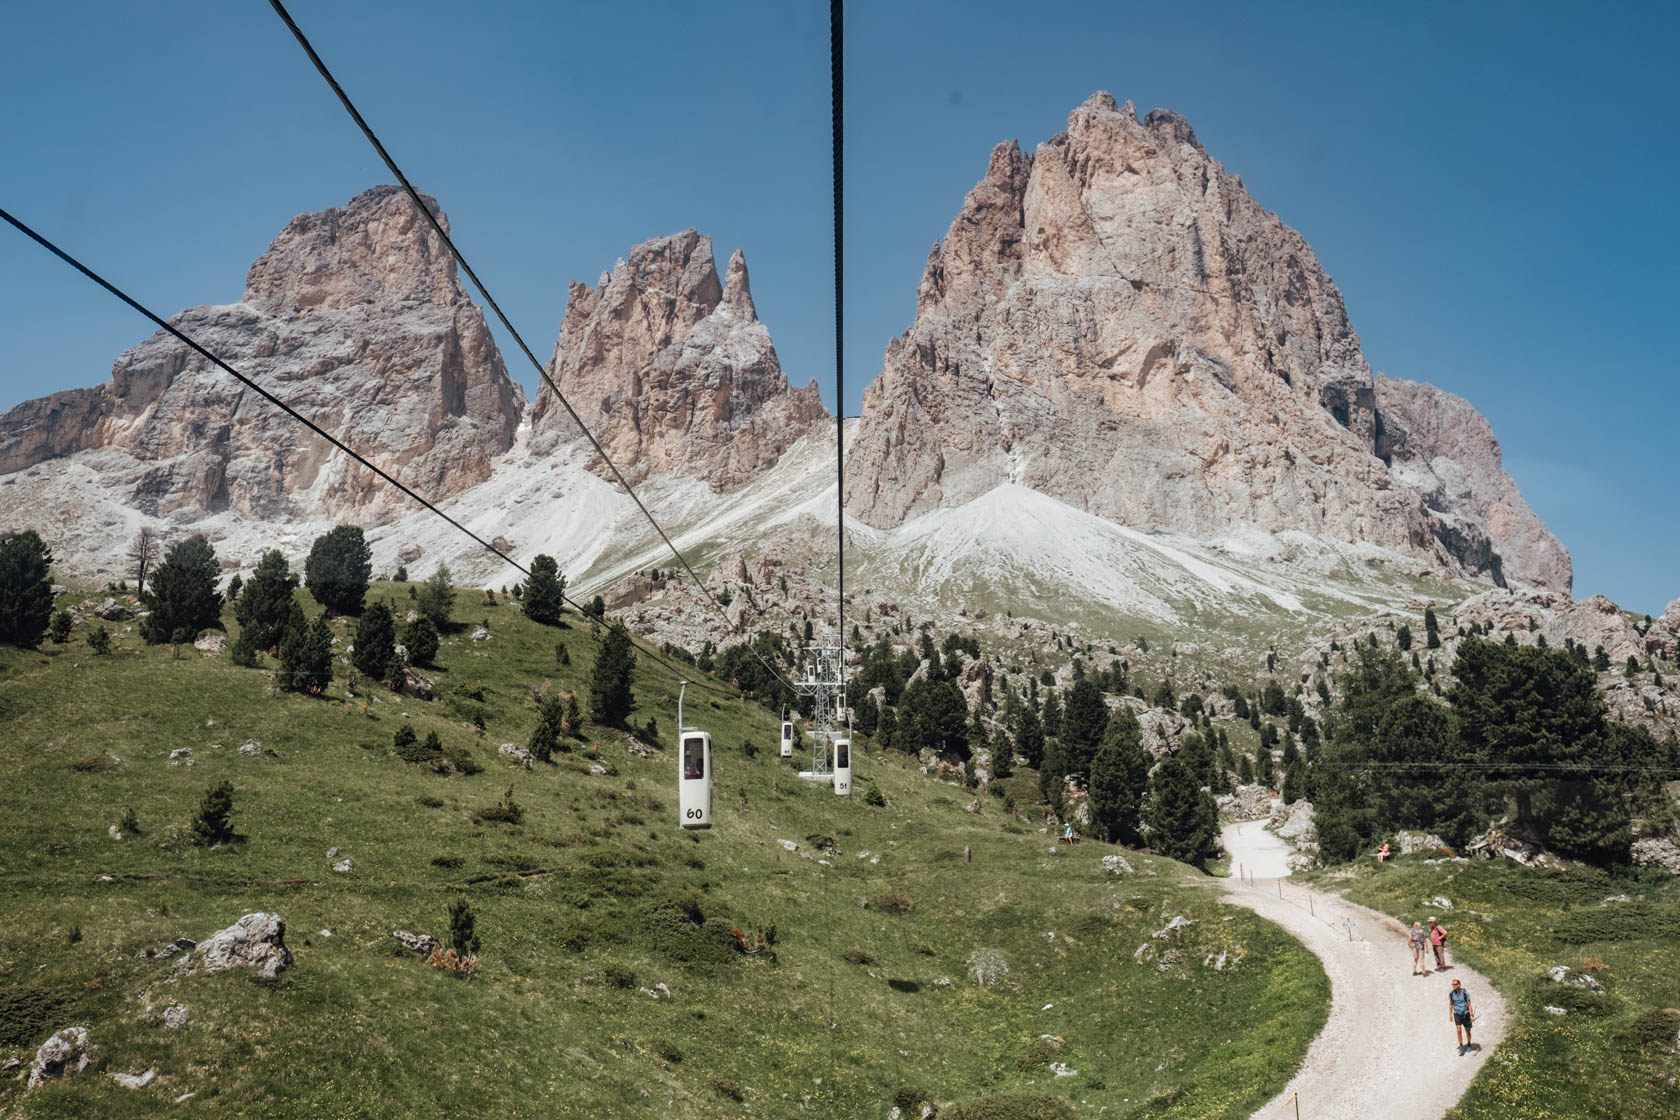
Sassolungo (Langkofel in German) is famous for its quirky, coffin-style cable cars which you can take up from Passo Sella. They’re absolutely tiny with just enough room for two people standing, and there are people there to help you get in and out safely. They’ll take you to the rifugio at the top, Rifugio Toni Demetz .
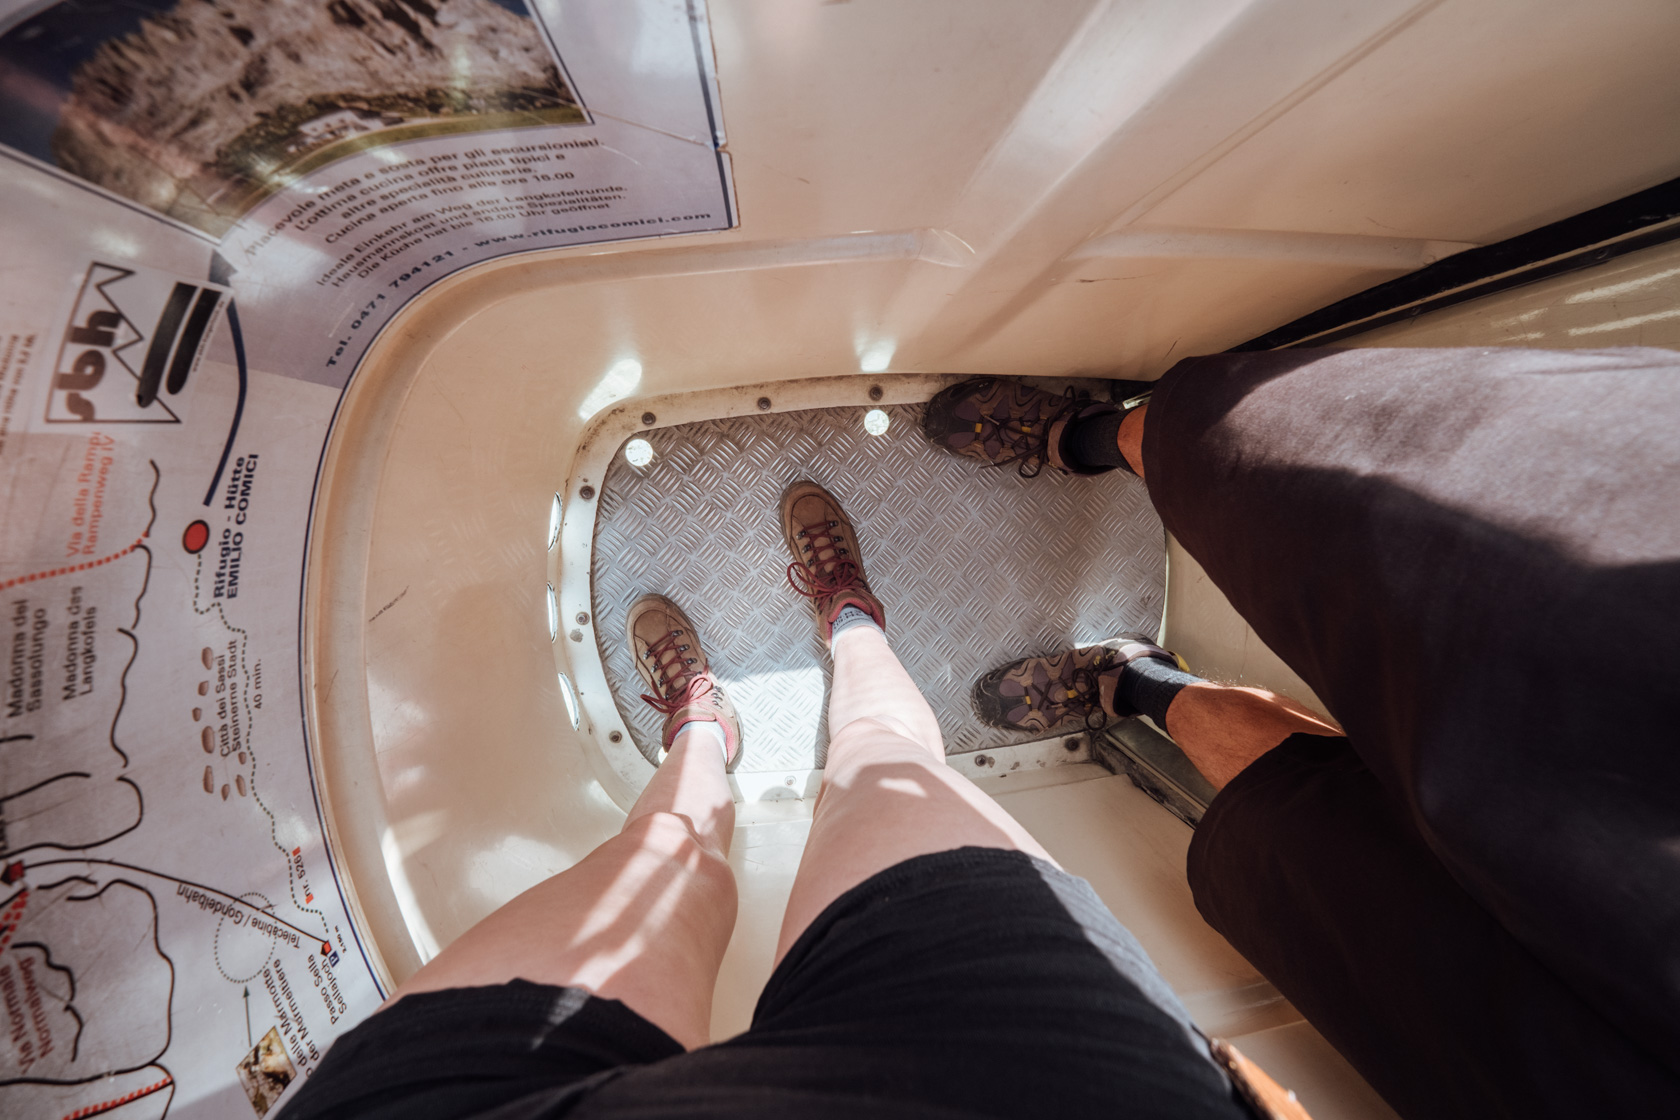
From there, you can grab breakfast or lunch. The window panes assist greatly in your napins, food, and yourself not blowing away in the wind.

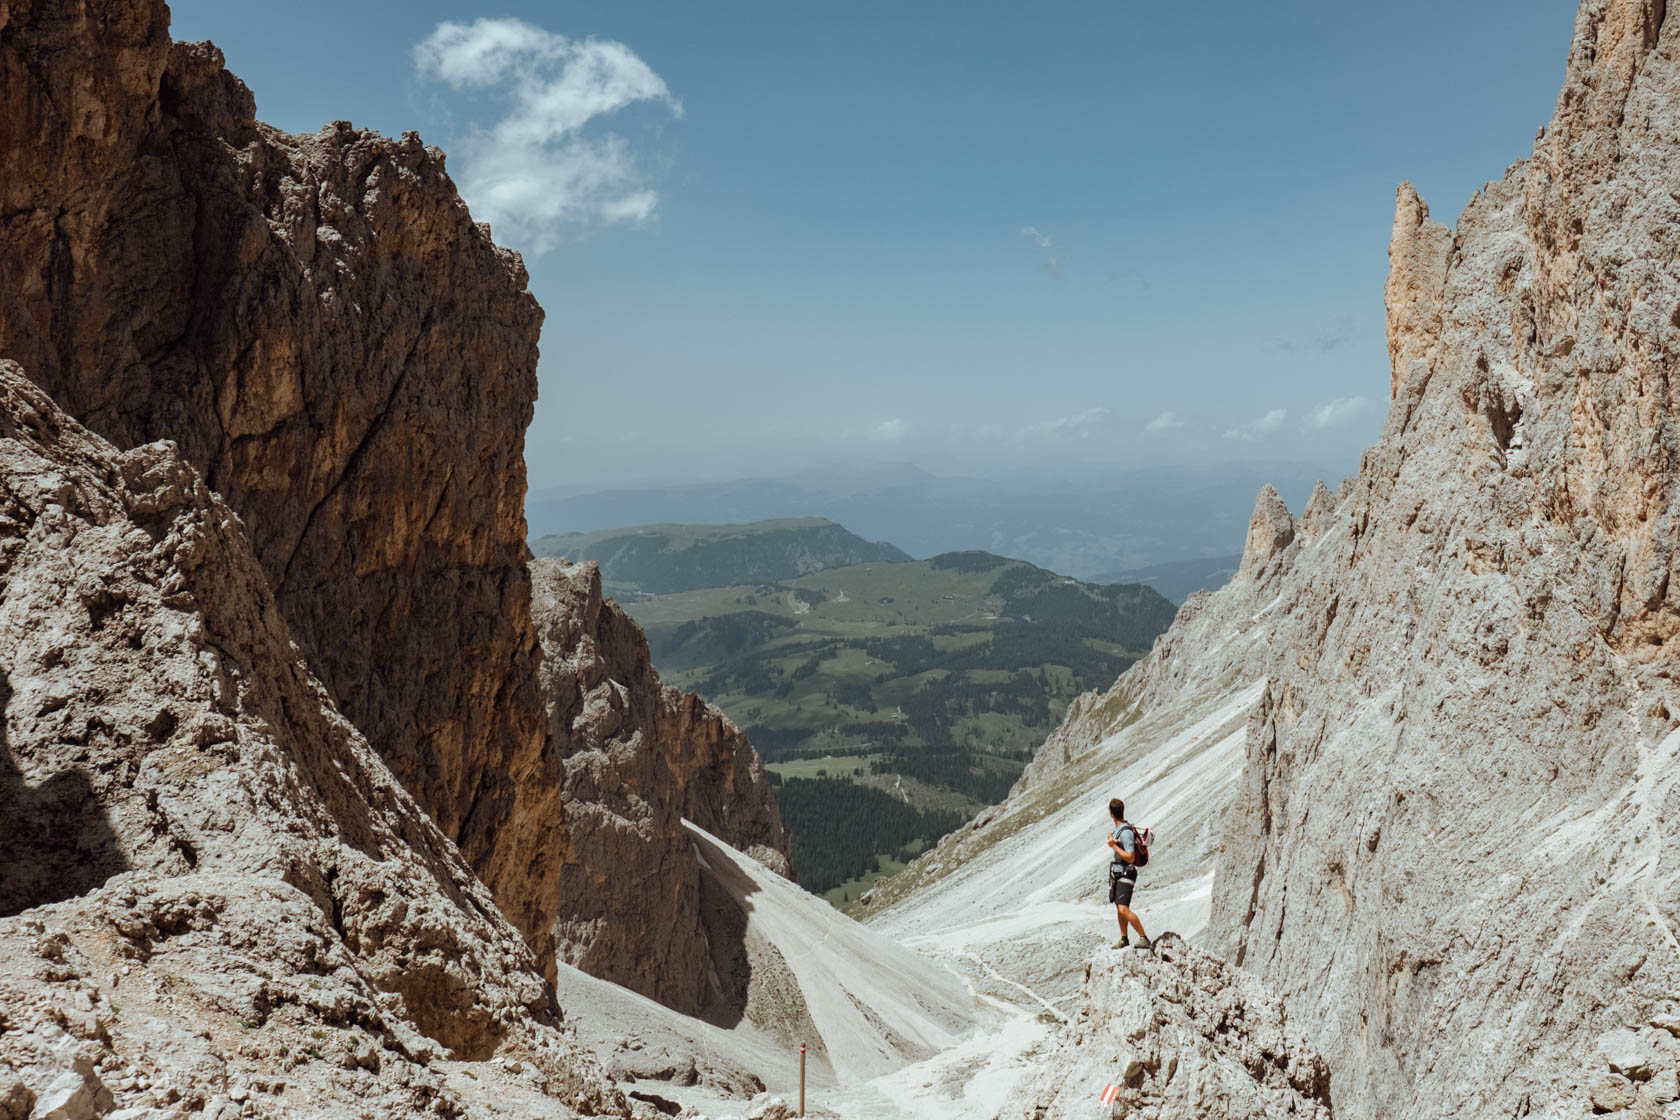
If you’re planning to take the Sassolungo cable car up and hike down, know that the trail starts off steep and rocky, and in early summer, you may still encounter snow or ice. It’s doable if you’re a confident hiker with proper footwear, but I wouldn’t recommend it in slick conditions or without hiking poles. There was still ice when we were there in late June.
Next, a small but very pretty lake in the Dolomites: Lago di Carezza . It’s smaller than you might guess from the photos, and can be circumabulated in about 15 minutes. The area is also heavily developed and includes a disproportionate number of restaurants. A leisurely stroll and a couple photos is all you need before continuing on your way.
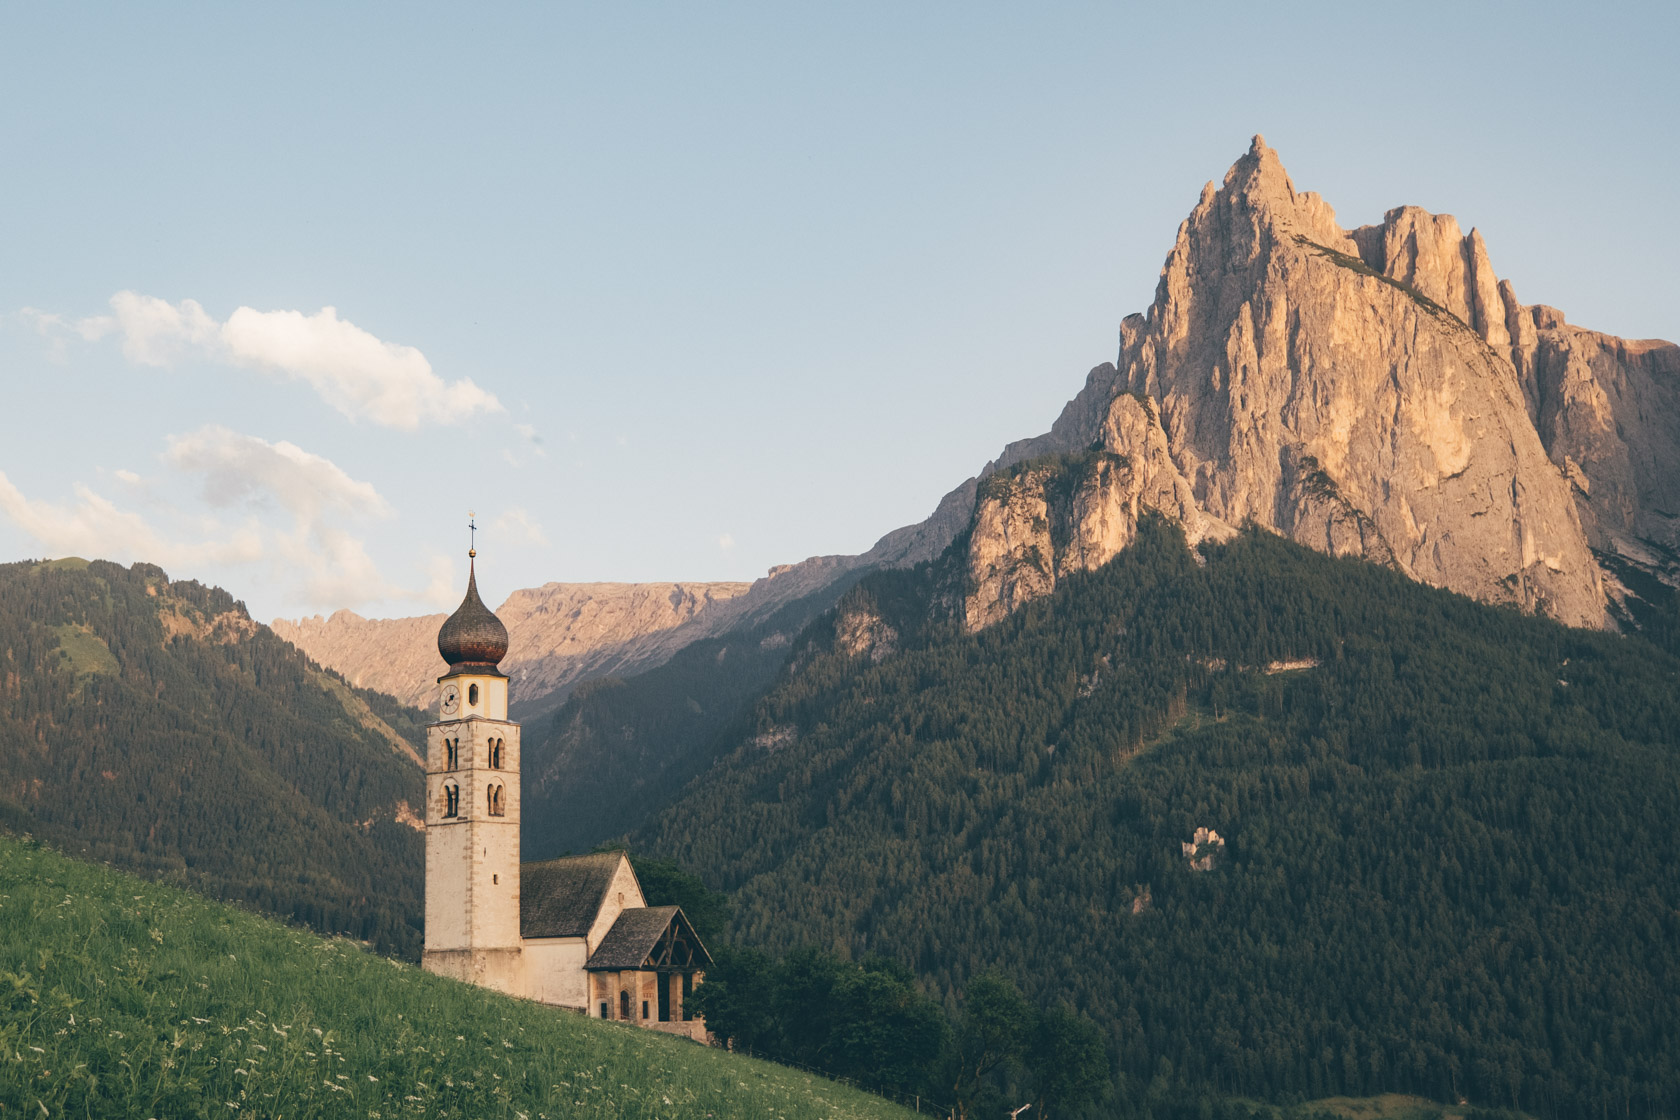
The last stop of the day was the Church of St. Valentin in Seis, a perfect little mountain chapel perched above a meadow with the Dolomites rising behind it. If you get it at golden hour or sunset, it’s magical. You can’t always go inside, but the view from the hill just below is what you’re here for — peaceful, pastoral, and totally picture-perfect.
Day 7: Adolf Munkel Trail
For our last hike of the trip, Adolf Munkel Trail is less strenuous than a lot of the other hikes. You get plenty of stunning mountain views without too much elevation gain, and there are some rifugios to stop at along the way. When we went, we got caught in a stop and had to do the last section in heavy rain. Not ideal, but a memory nonetheless!

- Distance: ~9–11 km depending on the loop (ours was 10km)
- Elevation gain: ~400–500 m (ours was 432m)
- Time: 3–4 hours (we took 5 hours due to the rain)
- Difficulty: Easy to moderate — well-marked paths, nothing technical
- Route type: Loop (the classic circuit goes via Rifugio Gschnagenhardt and Rifugio Odle, then loops back through forest)
Is a week the Dolomites enough?
Honestly, yes and no. We packed a lot in — and I wouldn’t trade any of the places we saw — but there were definitely moments when I wished we had a bit more time to slow down, linger at a rifugio, or take a second crack at a viewpoint in better weather. Looking back, I’m glad we split our stay between two areas (Cortina and Val Gardena), because it made the driving manageable and gave us more time on the trails than in the car.

If I could change anything, I’d set aside two days for the Tre Cime area so we could do additional hikes without feeling like there was no way for us to return without sacrificing another item on the list. And yet there’s still more to do, you’d better believe we’ll be back.