Banff National Park is practically a photography mecca – around every corner you’re likely to see stunning scenery in Banff begging to be captured on camera. Glorious sunrises, captivating sunsets, towering mountains and wildlife lurking just out of view. Banff was easily one of the most photogenic places I’ve ever been.
Photography in Banff almost feels hard to get wrong, but we know what they say: fortune favors the prepared (and those who packed all their lenses 😉).
With that in mind, I’ve broken down a couple of the most important things a photography lover needs to know before visiting Banff National Park. Things like what camera gear to pack, photography tips for Banff, how to capture the best Banff pictures, and the best photography locations in the park. Here’s an outline of the post:
- Essential camera gear for visiting Banff
- Tips for photographing Banff
- Best photography locations in Banff National Park (that are easy to reach)
- More resources
Are you planning to visit Banff soon? Check out my 3-day Banff itinerary for a detailed guide that’ll take you to all the locations in this guide over the course of three majestic days!

Essential camera gear for Banff National Park
If you’re a photography lover (which I assume you are, you’re here aren’t you?) then there are some pieces of gear you want to make sure you do NOT leave at home before you head to Banff. Most of these things are kind of common sense, but it’s easy to forget when you’ve got so many bits and bobs in your bag! Double check that you’re packing these 7 essential items for your Banff photography trip:
- ND filters – If you want to capture silky smooth waterfalls in Banff, don’t leave your ND filters at home! I use ND filters by B&W and they do a good job not having a weird tint that some ND filters have.
- Travel tripod – You can’t do long exposures without a tripod! Whether you’re capturing epic selfies or smooth waterfalls, a travel tripod is an essential piece in your arsenal. I’ve used this carbon fiber travel tripod for a few years now and it has proven to be really rugged and stable.
- Wide-angle lens – Banff is about landscapes! You’re going to want a nice wide angle lens to fit it all in. If you’re using the Fuji system, check out my favorite wide-angle lens, the Fujinon XF 16mm f1.4 WR .
- Zoom / telephoto lens – If you’re interested in capturing wildlife, you’re going to want a zoom or telephoto lens. I eeked by with a 56mm fixed length lens but really wish I’d brought a proper telephoto lens with me such as the Fujinon XF 100-400mm f4 WR OIS (AKA my dream lens).
- Lens-cleaning wipes and pens – This one’s easy: keep your lens clean or all that Canadian sunshine is going to show loads of dust on your photos! It’s really cheap to pick up a lens pen and lens cleaning wipes .
- Spare batteries – As far as I’m concerned, you can never have too many spare batteries, especially when traveling somewhere like Banff. I always travel with at least two spare batteries.
- High performance memory cards – When you’re shooting wildlife, you really want a fast write speed so you can turn on burst shooting and capture animals without the buffer on your camera filling up. These 64GB memory cards by SanDisk write 300 MB per second, which is so far the fastest I’ve seen on the market. I own about 4 of these.

This awesome photo made possible by ND Filters and a my trusty travel tripod !
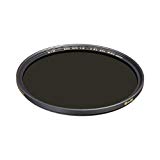 B&W Neutral Density (ND) filters
These ND filters all you to keep light out of your lens so you can take long exposure photos during the day. I use these for smooth waterfalls and moving clouds.
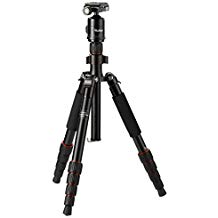 Rollei Compact Traveler No. 1 Tripod (Carbon)
My travel tripod of choice. I've used this in all kinds of scenarios, shooting northern lights or timed selfies. Easy to use and ultra light.
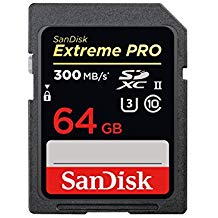 SanDisk 64GB UHS-II 300MB/s
My favorite high performance memory card, lets you take many photos in rapid succession and film 4K video. I own about four of these!
Banff photography tips
Some of these Banff photography tips are ones I learned the hard way 😉 But hopefully with this guide you’ll be able to avoid some of my mistakes and really make the most out of your photos in Banff.
Keep your lenses clean
I can’t tell you how many times someone has handed me their camera and I look at the lens to find smudges all over it. Not keeping your lenses clean is like looking through a dirty window! You might not notice it on your LCD screen but you’ll definitely notice it when you open the photos full-sized on your computer. Few things are as disappointing as thinking you nailed the shot, only to find there’s dust all over the lens.
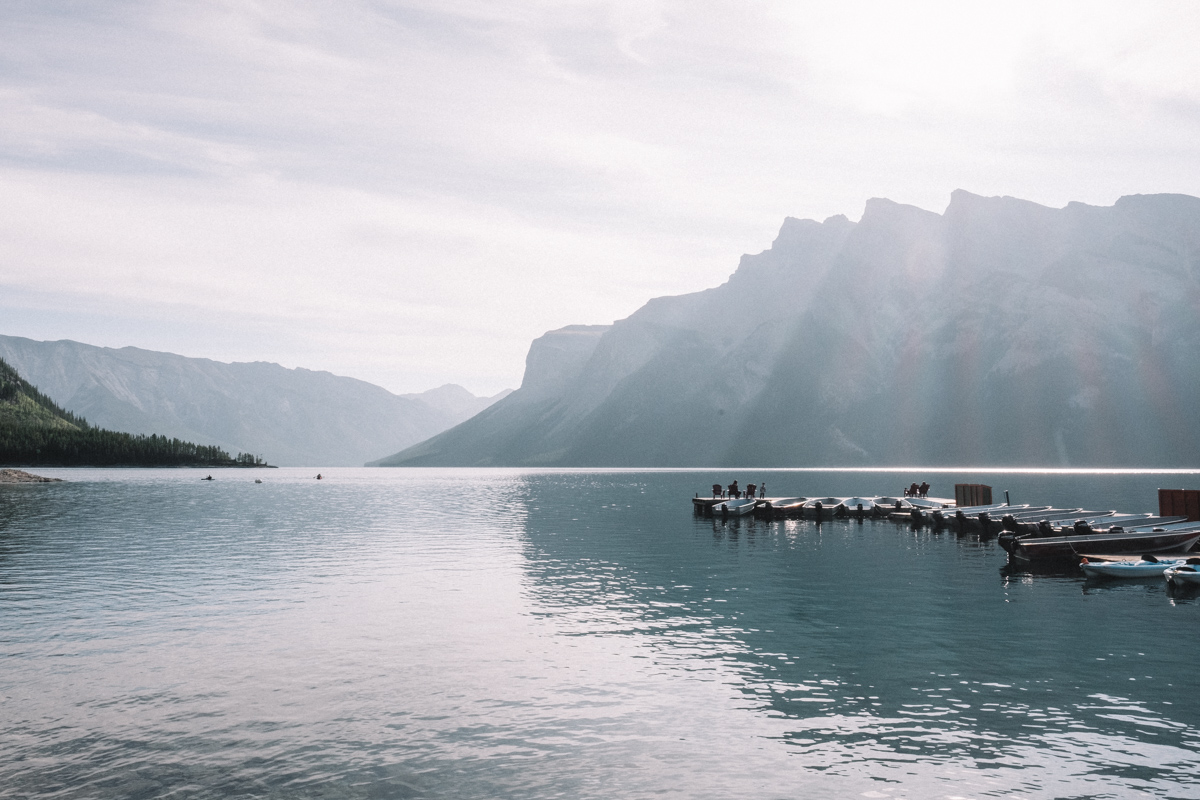
This happened to me at Lake Minnewanka. You can really see how the sunshine reflected dust over many of my photos. When you look at them, you’d think you have dust on your laptop screen–but no. It’s my photo. 😭

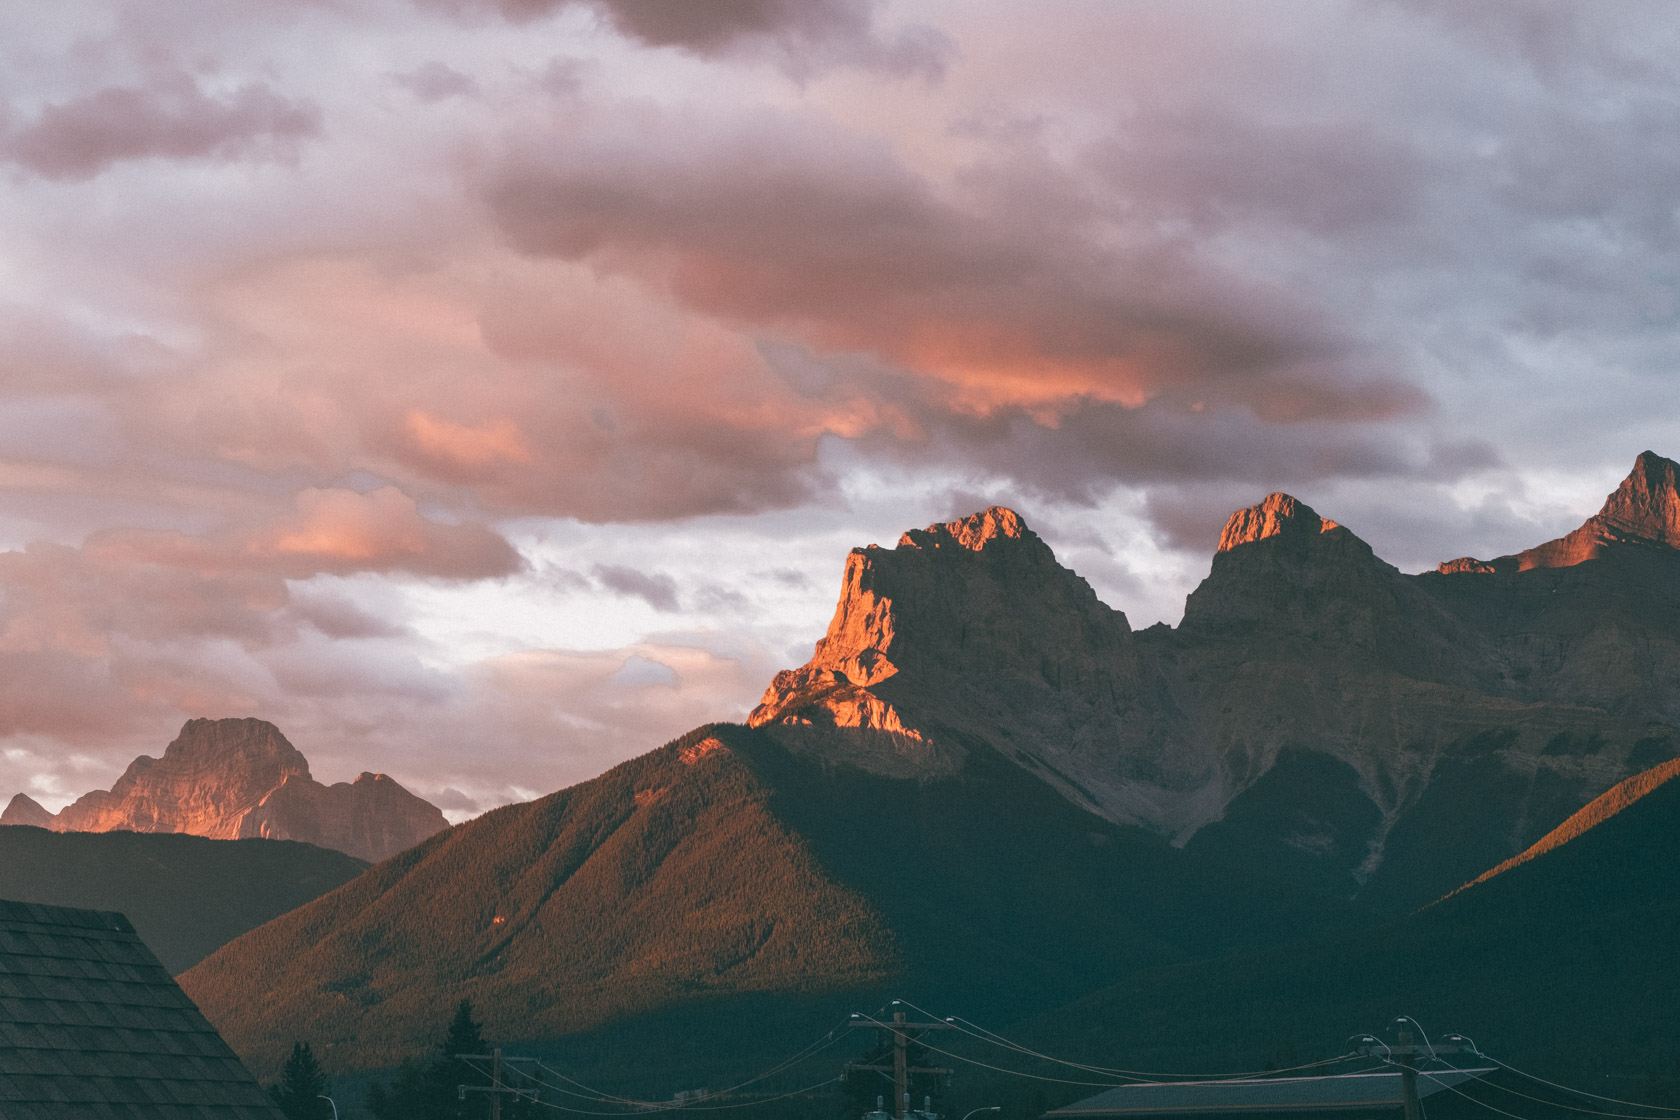
Capture the rocky mountains at sunrise
That’s how the most iconic pictures of Banff’s lakes are usually photographed – with sun-tipped mountains in the background. You can only really get this effect at sunrise, which means waking up veeeeery early in Summer when sunrise happens before 6 o’clock in the morning. Or, if you’re lucky like us, you’re staying somewhere with a mountain view and capturing a famous ridge involves merely rolling out of bed and snapping the shutter 😉
Watch for wildlife on the road
If you visit Banff, there’s a good chance you’ll get caught in a so-called “bear jam” at least once – a situation where several cars have slowed or stopped on the road, usually to take photos or observe wildlife. For instance, when a herd of sheep graze near the street, or in our case – when we saw a bear mosey along the highway before disappearing into the brush.
My tip would be that if you’re driving the Icefields Parkway , make sure you’ve got a zoom lens handy to shoot photos of wildlife you see! That is, so long as you’re not driving 😉

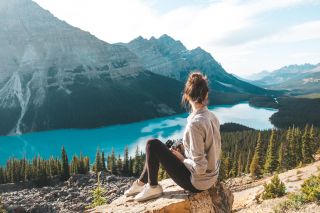
Sunset is often less busy than sunrise
Exactly what time of day is best for capturing photos often depends on the situation. In Banff, a lot of the crowd is up early for morning photos, making the morning some of the busiest times of the day. And when I say morning, I really mean waaaay before sunrise – especially at famous lakes like Lake Louise or Moraine Lake .
Sometimes, you can get even better photos with less crowds if you visit the exact same spot later in the afternoon. The important thing to keep in mind is whether the lake or location you want to photograph is going to be in some light sun when you want to take the photo.

For example, this photo of Peyto Lake was captured in the late afternoon just before Golden Hour. The crowds were completely managable and we still got plenty of light on the lake. However when we visited some other lakes, the lighting was much better in the morning hours when the sun wouldn’t be blocked by the mountains.
At the end of the day, it makes a lot of sense to take a look at Google’s Satellite view and check where the sun is rising and setting to make sure you’re visiting at the right time of day!
Turn multiple photos into a panorama
You can use what’s called an ultra-wide angle lens that go as wide as 8mm, but these often create what’s known as a fish-eye effect. Plus, such lenses are usually not very flexible and it can be a pain to carry around such specialized lenses.
What you can do instead is use a normal wide-angle lens such as a 16mm lens or a 24mm lens, but stitch together multiple photos into a panorama, using tools like Adobe Lightroom. All you have to do is make sure that at least 1/3 of the photo is overlapping the previous one.
For example, to create this photo below, I took 5 or 6 portrait-orientation shots and stitched them together. It’s a super simple process! You can learn more from this Lightroom tutorial which explains how to create panoramas.

This photo was created with the panorama tool in Lightroom from 5-6 photos
Include people in your photos for scale
One of the best things about Banff is the sheer scale of things: how big the mountains are and how small the people can seem in the midst of nature. One of the best ways to capture incredible photography in Banff is to include people for scale – that way you can really see how huge the landscapes are when compared to a tiny person!

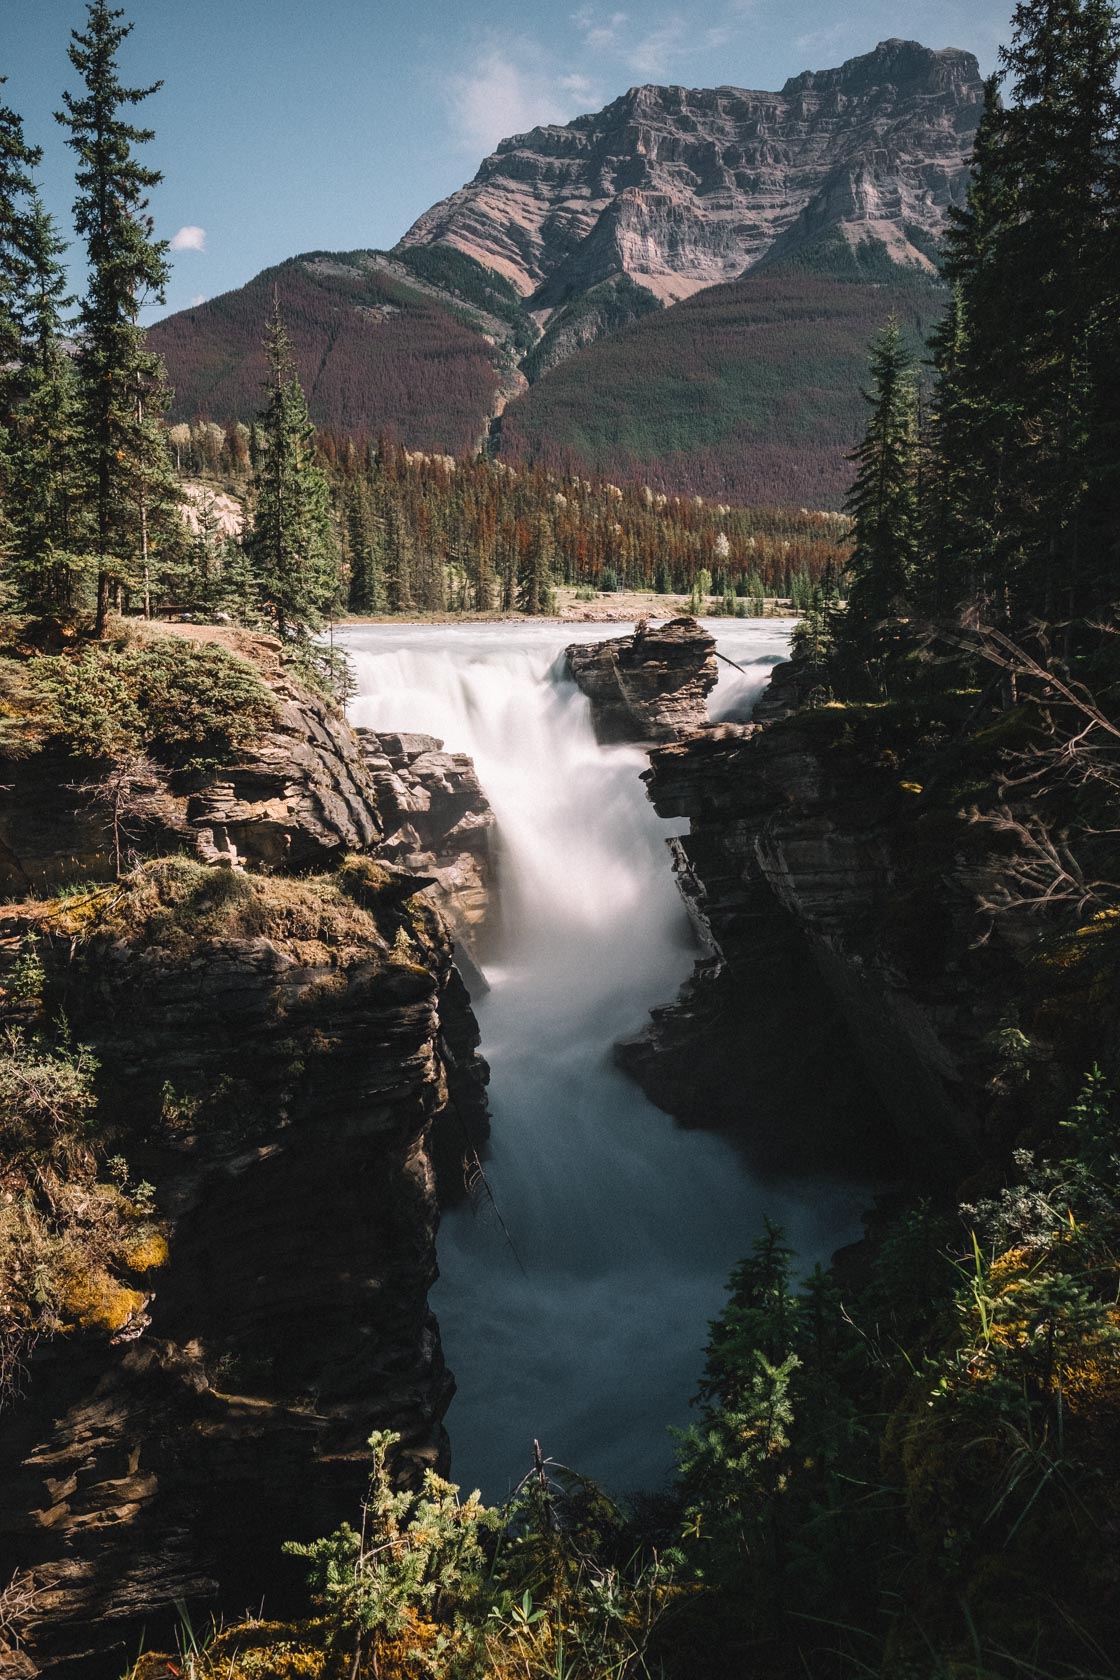
Take the time to capture smooth waterfalls
So often when I’m traveling, I get too lazy to set up the tripod and put on my ND filters to capture a long exposure. But in Banff I was really fortunate that I did. Some of my favorite photos of Banff resulted from long exposure of the park’s famous waterfalls and lakes!
If you’re not familiar with how taking long exposures works, you basically need to use something called an ND filter which cuts out a lot of the light that reaches the sensor of your camera. You can get two types of ND filters: those that screw directly onto your lens, and a plate that is attached with a round attachment. There are pros and cons to both kinds, but since I only have two lenses I use for long exposures during daytime, I just own two different ND filters (which is cheaper anyways).
What happens next is that you slow down the shutter speed, usually to 1 second or more. Most of the long exposures I take during the day are for about 1 second. So long as you keep the ISO low and the aperture pretty closed (meaning, a number higher than f5.6) you can capure some really unique photos. You need to make sure you mount your camera to a tripod so it stays stable, otherwise your long exposure photos will be blurry!
Check out an example in the next section of a long exposure taken with an ND filter and a tripod!
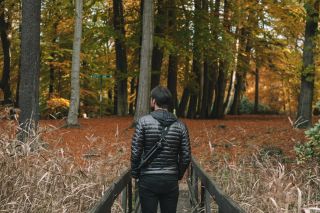
Don’t be afraid to go portrait
This is a simple tip but important in tight spaces – sometimes portrait mode is just a better orientation when you’re capturing something huge! If you don’t want a panorama-style shot, portrait mode can really help give you a good balance of foreground and background you need in order to capture the scene.
Check out this long exposure in portrait orientation:
10 best Banff photography locations
Alright, now that I’ve shared my top tips with you, here are some of my absolute favorite places to photograph in Banff. At the end I’ll also share some of my favorite resources for photography tips in and around Banff National Park.
1. Lake Louise
Lake Louise is kind of like the crown jewel of Banff – with crowds to match. But that doesn’t mean you should be scared of visiting, it’s completely worth it. If you walk just a short way away from the pier near the parking lot, you’ll have plenty of stretches of lake all to yourself – sometimes with even better views.
Get this photo: Walk further along the shoreline of the lake towards the loop path and look back towards the canoe cabin. This shot is a panorama of 3-4 photos stitched together.
2. Moraine Lake
Moraine Lake is like the less-famous-but-just-as-beautiful sister of Lake Louise. She’s also got a killer mountain backdrop, glacier blue water, and an extra card up her sleeve: a super accessible high vantage point for photos, called the Rockpile.
Get this photo: Climb up the Rockpile and go all the way to the highest point, which has a nice gap in between the trees to get a great shot of the lake. The Rockpile is a short ride to the bus stop!

3. Peyto Lake
Peyto Lake represent the third of the top 3 most famous lakes in Banff National Park. It is unique compared to the other two in the sense that when you take photos of Peyto Lake, you’re doing it from a high vantage point and a distance.
Peyto Lake is famous for looking like a dog looking away, which you can easily capture in your photos. Be sure to bring a wide-angle lens to capture both the tops of the mountains and the face of the “dog”.
Get this photo: Take the paved 2km walk to Bow Summit. It takes about 20 minutes and isn’t too strenuous, but also isn’t completely flat.

4. Icefields Parkway
Icefields Parkway is considered one of the most scenic drives in the world and once you’ve done it you’ll totally understand why – everywhere you look there are mountains frosted with glaciers, reflective glacier-fed lakes, and the chance at spotting a bear roaming along the road.
Get this photo: Take a photo out the rear view mirror as you drive away from Bow Lake !

5. Two Jack Lake
Two Jack Lake is easily accessible from the town of Banff, yet during our time there we saw very few people. Perhaps more people prefer to visit the largest lake in Banff, Lake Minnewanka. Nonetheless, Two Jack Lake is a beautiful albeit small lake with excellent reflections. From what I’ve seen it’s also a great place to visit in Winter where the reflection are so clear it’s like putting a mirror under the mountains.
Get this photo: Wake up early and make Two Jack Lake the first stop of your day!

6. Sunwapta Falls
Sunwapta Falls is at the end of the Icefields Parkway and is technically part of Jasper National Park. What makes it special is this island in the middle of the stream before the waterfall comes towering down. There’s an upper falls (pictured below) as well as a lower falls, which is less spectacular but still nice to check out while you’re in the area. Since there’s a bridge that connects the two banks of the stream, it’s easy to get some great photos of the falls – just be aware the bridge is often a bit wet and muddy so be prepared to get a little dirty!
Get this photo: Use a travel tripod and an ND filter to create a long exposure from the bridge at Sunwapta Falls.

7. Bow Lake
Bow Lake is another lake famous for its reflection, which I didn’t quite manage to capture as the water wasn’t still enough by the time we arrived in the morning. Nonetheless the lake is a gorgeous cyan color, being a glacier-fed lake.
Get this photo: Face towards the glacier and snap your photo, the earlier in the morning the better!

8. Castle Junction
Castle Mountain is one of the most easily recognizable mountains in and around Banff National Park. You’ll see it a few times while driving around the national park from the highway, but some of the best photos are available just off the highway if you take the time to look for them.
Get this photo: Go to Castle Junction and drive towards Bow Valley Parkway. Before you cross the bridge over the river, park the car and walk through the wildlife gate (it’s secured with a simple chain and no lock) on the left side of the street (be sure to close it behind you to keep wildlife off the highway). You’ll be able to see the spot this was taken from through the gate.

9. Lake Minnewanka
Lake Minnewanka is the largest lake in Banff National Park, and one of the best ways to explore it is by boat! You can take a boat tour around the lake for some epic photos of the landscapes, and a chance at seeing wolves or eagles.
Get this photo: Arrive at Lake Minnewanka early in the morning to catch rays of sun as they fall on the lake’s surface!
10. Athabasca Glacier
Athabasca Glacier is one of the glaciers connected to the Columbia Icefield, and one of the easiest to walk up to from the road. It’s quite massive, but has also shrunk dramatically in the last few decades.
Get this photo: Walk up to Athabasca Glacier. There’s a parking lot right in front and the walk takes about 10 minutes up a gravel path.

More resources
To close up I wanted to share just a couple of links to photo guides that I found helpful when planning my own Banff itinerary.
What photos would you want to take most during a trip to Banff National Park?
Share your thoughts in the comments! I’d love to hear the spot you’re most excited to capture on camera.
Photography gear mentioned in this post
Here are the pieces of photography gear I used to capture my Banff National Park photos. Feel free to ask me any questions you might have about this gear (or Banff in general) in the comments!
 Fujifilm X-T2
My go-to travel camera I bring on every trip. Both robust and lightweight with gorgeous image quality.
B&W Neutral Density (ND) filters
These ND filters all you to keep light out of your lens so you can take long exposure photos during the day. I use these for smooth waterfalls and moving clouds.
Rollei Compact Traveler No. 1 Tripod (Carbon)
My travel tripod of choice. I've used this in all kinds of scenarios, shooting northern lights or timed selfies. Easy to use and ultra light.
Like this post? Pin it for later!